If your vacuum isn’t picking up dirt, it could be due to common issues like a full bag or canister, clogged filters, or tangled brush rolls. Start by emptying the bag or canister, then clean or replace the filters every few months. Don’t forget to check the hose and attachments for obstructions. Inspect the belt for wear and look for any air leaks. Keep these tips in mind, and you’ll discover even more solutions.
Key Takeaways
- Check and empty the dust bin or bag regularly, as a full canister restricts airflow and reduces suction power.
- Clean or replace filters every 3-6 months to prevent clogged filters from impeding airflow.
- Inspect hoses and attachments for clogs; detach and clear any visible blockages to restore proper airflow.
- Ensure the brush roll is free from tangles and spins properly; clean it regularly for effective dirt pickup.
- Listen for unusual motor sounds and seek professional help if suction issues persist despite troubleshooting.

Anewise 3 Packs 86889 HEPA Media Filter Replacement for Kenmore EF-1, 86889, 20-86889, 40324, 53295 Canister and Upright Vacuum Cleaner, for Panasonic Part MC-V199H
COMPATIBILITY: These HEPA media filter replacement kit are compatible with Kenmore Canister and Upright Vacuum Cleaner #86889, 20-86889,…
As an affiliate, we earn on qualifying purchases.
As an affiliate, we earn on qualifying purchases.
Safety Precautions
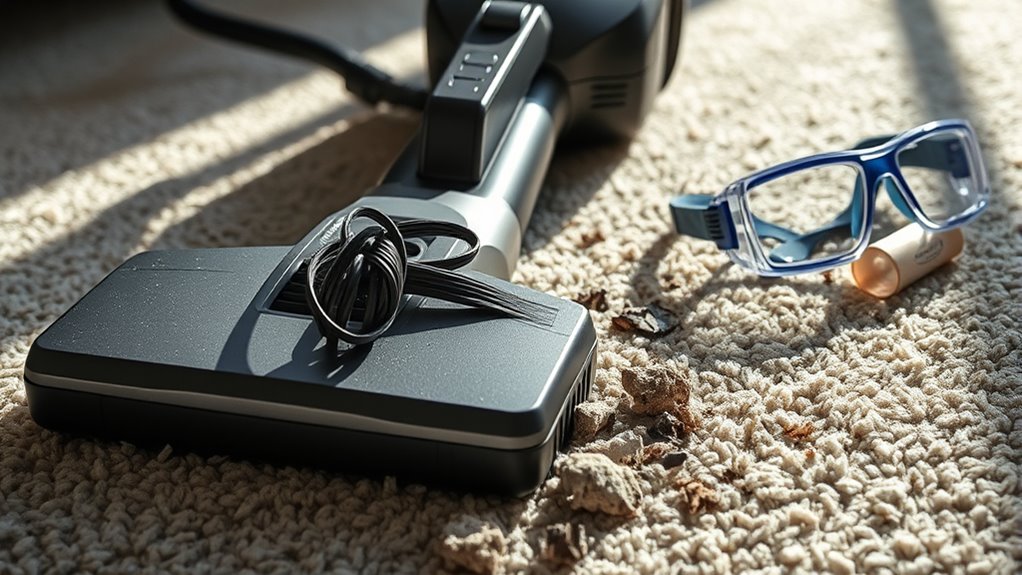
When you’re troubleshooting your vacuum, it’s vital to prioritize safety. Always unplug the vacuum before starting any maintenance to prevent electrical shocks.
As you work, wear protective gloves, especially when handling dirty components or sharp parts. This not only keeps you safe but also maintains hygiene. Additionally, using HEPA filters can further enhance the cleanliness of your environment by capturing tiny particles that may not be visible. Regularly cleaning your vacuum and its components is crucial for optimal performance and can prevent further issues. Furthermore, maintaining a clean environment can be complemented by investing in the best home security systems, which can enhance overall safety in your home. Air quality can be up to 5 times worse than outdoor air, making air purifiers a beneficial addition to your home.
Make sure you’re not near any water sources while working, as moisture can create electrical hazards.
Additionally, it’s important to inspect the power cord for visible damage; a frayed or worn cord can lead to serious malfunctions or even fires.
Finally, don’t forget to check the user manual for specific safety precautions and operational guidelines tailored to your vacuum model. Air purifiers can significantly improve indoor air quality, reducing allergens that may contribute to respiratory issues.
Following these steps will help you troubleshoot safely and effectively.
DR.PEN Flexible Grabber Claw Pick Up Reacher Tool (Drain Clog Remove Tool), With 4 Claws Bendable Hose Pickup Reaching Assist Tool for Litter Pick, Home and Kitchen Sink, Drains, Toilet (35.4 inch)
Extremely Slender. The diameter of tube ONLY 1.1cm. Our Grabber Tool is perfect for picking up small items…
As an affiliate, we earn on qualifying purchases.
As an affiliate, we earn on qualifying purchases.
Common Problems and Solutions
Troubleshooting common vacuum problems can save you time and money, especially if you know what to look for. A full bag or canister often restricts airflow, cutting suction power. Regularly empty or replace them to keep your vacuum performing efficiently. Additionally, investing in a home security system can provide peace of mind while you focus on keeping your home clean.
Next, check the filters; dirty filters can impede airflow and lead to suction loss. Cleaning or replacing them every 3-6 months is essential for efficiency. Regularly monitor filter indicators if available to ensure optimal performance. Many vacuums, especially those from BISSELL, are designed to maintain strong suction power even with frequent use, making them ideal for allergy sufferers who need reliable performance.
Clogged hoses can also block airflow, preventing effective dirt pickup. Inspect your hoses for obstructions and clear them if needed.
Additionally, tangled brush rollers can hinder cleaning, so make it a habit to maintain and clean those regularly. Addressing these issues can quickly restore your vacuum’s performance. To enhance your vacuum’s efficiency, consider investing in a model with HEPA filters that help trap allergens and improve air quality.

Pikk-it Vacuum Hair Brush Cleaner Tool – Removes Tangled Hair from Vacuums & Hairbrushes | Pet & Human Hair Removal Comb Rake | Improves Vacuum Cleaning Power (Single/Twin Pack) (1)
✅ WORKS ON ANY VACUUM: Pikk-it's unique design works with any vacuum, ensuring your device cleans more efficiently….
As an affiliate, we earn on qualifying purchases.
As an affiliate, we earn on qualifying purchases.
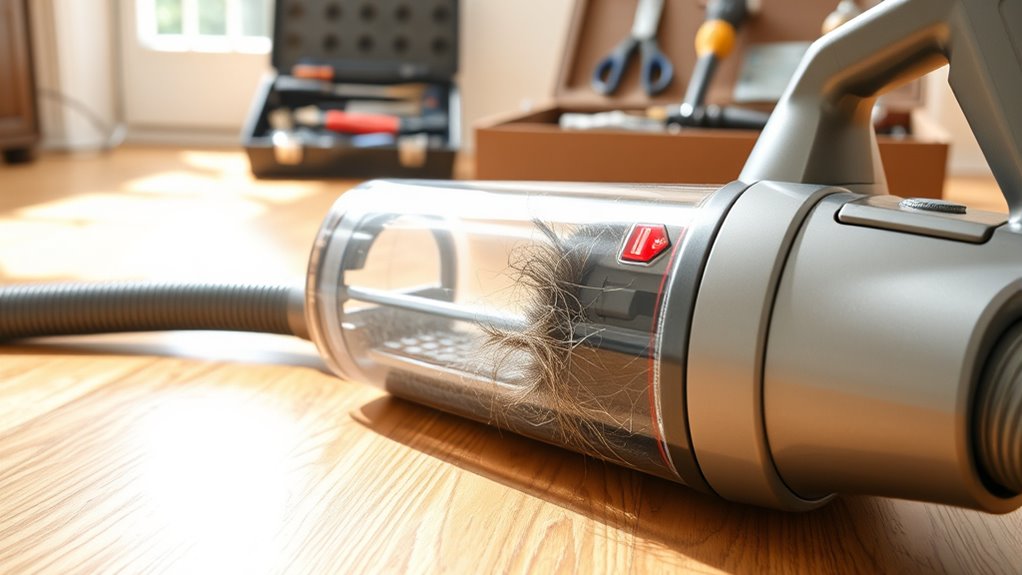
Inspect the Bag or Canister
When your vacuum isn’t picking up dirt as it should, it’s time to check the bag or canister.
A full bag or canister can block airflow and reduce suction, so make sure to empty or replace it regularly. Best vacuums for hardwood floors feature designs that enhance airflow and suction efficiency. Additionally, modern vacuums often incorporate energy efficiency standards that help optimize performance and reduce power consumption. Clearing out accumulated debris not only improves performance but also prevents clogs. Additionally, ensuring your vacuum is regularly maintained for optimal performance will help prolong its life and efficiency. Regular maintenance and inspections of your vacuum can also help identify potential issues before they impact performance. For example, emptying dust bins after each use is crucial for maintaining suction power.
Check for Fullness
Maintaining proper airflow in your vacuum is essential, and checking for fullness is an important step in this process. A full bag or canister can greatly restrict airflow, reducing your vacuum’s suction power.
For bagged models, replace the bag when it reaches the manufacturer’s recommended fullness mark, usually around two-thirds full. If you have a bagless vacuum, empty the canister after each use or when it hits the fill line to prevent suction loss from debris buildup. Additionally, regularly checking the filtration systems can help maintain optimal performance. A well-maintained vacuum also ensures high contrast ratios for effective dirt removal. Regularly assessing your vacuum’s performance can also prevent overspending on repairs or replacements. Moreover, ensuring that your vacuum is free from clogged filters is vital for sustaining suction power.
Even partially filled bags or canisters can experience compacted small particles that block airflow, so routine maintenance is critical for consistent suction. By monitoring fullness, you guarantee your vacuum operates efficiently and prolong its lifespan. Furthermore, a clogged filter can also hinder suction power, so it’s important to clean or replace filters as needed.
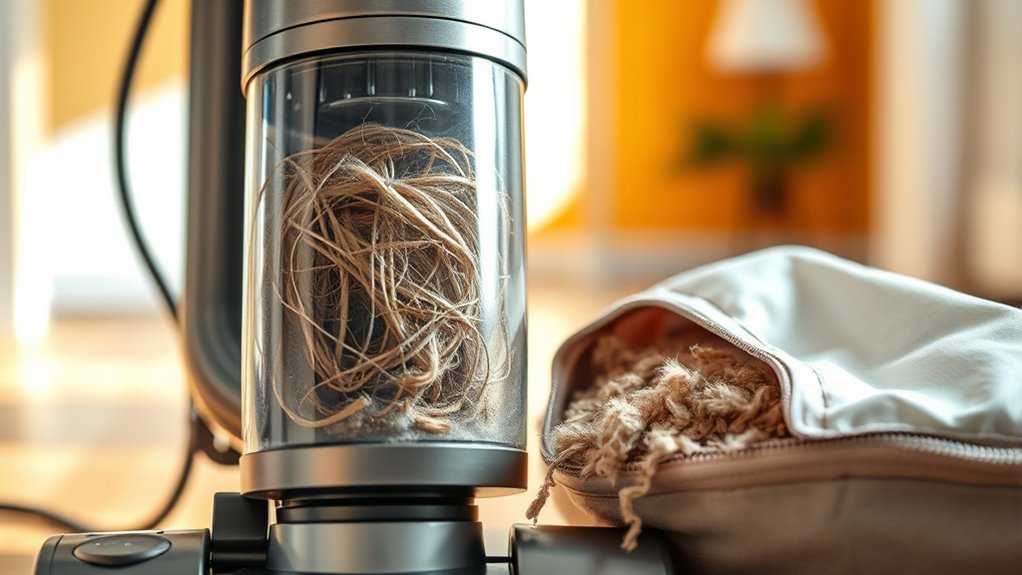
Empty and Clean
Emptying and cleaning your vacuum’s bag or canister is essential for peak performance. A full bag or canister can drastically reduce suction power, making your vacuum less effective.
To keep your vacuum running smoothly, follow these tips:
- Feel the satisfaction of a clean home, free from dust and dirt.
- Experience the joy of effortless cleaning with powerful suction.
- Avoid the frustration of blocked airflow and diminished performance.
- Enjoy the peace of mind that comes from maintaining your vacuum properly. Understanding the importance of regular maintenance can enhance your vacuum’s efficiency and longevity. Additionally, keeping your vacuum well-maintained can help you maximize investment returns over time.
Make certain to replace bagged models when they’re over three-quarters full and empty bagless models after each use.
Also, clean the canister and filters regularly, checking for blockages to guarantee maximum suction. Your vacuum will thank you! Regular maintenance, such as preventive care, can significantly extend the lifespan and efficiency of your vacuum.

2 + 4 Pack Filters for Shark Vacuum Navigator Lift Away Filter Replacement ZU503AMZ NV350 NV351 NV352 NV355 NV356E NV357 NV360 NV370 UV440 UV540, Parts XFF350 XHF350
Perfect Compatible with Shark Navigator Lift Away Models: NV350_26, NV350A_26, NV350E, NV350Q, NV350T, NV350W, NV350W_N, NV350WC, NV351, NV351C,…
As an affiliate, we earn on qualifying purchases.
As an affiliate, we earn on qualifying purchases.
Clean the Filters

Cleaning your vacuum’s filters is essential for maintaining strong suction and airflow.
You should know the different types of filters your vacuum uses and how often they need maintenance.
Filter Types Explained
Understanding the different types of vacuum filters is essential for keeping your machine running smoothly. There are various filter types, including pre-motor, post-motor, and HEPA filters, each designed to capture different sizes of particles and allergens.
Regularly cleaning or replacing your vacuum filters every 3-6 months is vital to avoid clogged filters that can hinder performance.
- Feel the relief of fresh, clean air.
- Enjoy the satisfaction of a well-maintained vacuum.
- Experience powerful suction and effective dirt pickup.
- Save money by prolonging your vacuum’s lifespan.
Always check the manufacturer’s instructions for specific cleaning methods and replacement schedules, ensuring your vacuum operates at its best.
Don’t let dirty filters hold you back!
Maintenance Frequency Guidelines
To keep your vacuum running efficiently, it’s important to maintain a regular filter cleaning schedule. Aim to clean or replace your vacuum filters every 3 to 6 months.
This maintenance is vital for peak airflow and suction performance. Regularly cleaning the filters prevents dirt buildup that can hamper suction and reduce your vacuum’s overall efficiency.
Remember that different filters—like pre-motor, post-motor, and HEPA—might require specific cleaning methods, so consult your manufacturer’s manual.
Always allow your filters to dry completely before reinstalling them to prevent damage to the vacuum’s motor and components.
Neglecting this maintenance can lead to decreased suction power and shorten your vacuum’s lifespan, so stay on top of it!
Clear the Hose and Attachments

While you mightn’t realize it, clogs in the hose and attachments can considerably hinder your vacuum’s performance. To get your vacuum running smoothly again, follow these steps:
- Detach the hose and inspect it for visible blockages.
- Use a broomstick to gently push out any obstructions.
- Check all attachments like brushes and nozzles for debris buildup.
Regularly clearing the hose and attachments keeps your vacuum in top shape.
Don’t let dirt and debris compromise your cleaning efforts! After clearing the hose and attachments, make certain to reconnect them securely.
This guarantees proper suction and functionality during use, making your vacuum work like new again.
Keep your home spotless by addressing these simple yet essential maintenance tasks!
Check the Brush Roll
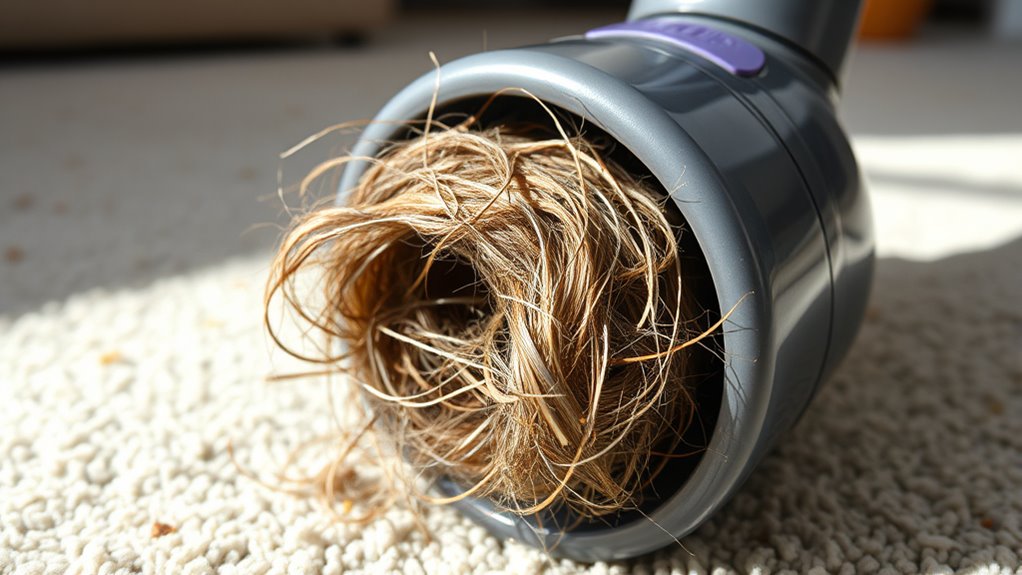
Checking the brush roll is an important step in maintaining your vacuum’s performance. Regularly inspect the brush roll for any tangles of hair, debris, or dirt that can hinder its rotation and affect your cleaning efficiency.
Make sure it’s spinning freely; a stuck or jammed brush roll can greatly reduce suction and dirt pickup. If you find any entangled materials, remove them carefully, using scissors if necessary.
Don’t forget to check the bearings around the brush roll for signs of wear or damage, as these can impede movement and suction capabilities. If you notice any issues, replace damaged brush rolls or bearings promptly.
A well-functioning brush roll is vital for effective dirt pickup in your home.
Inspect the Belt

After ensuring the brush roll is in good shape, it’s time to turn your attention to the vacuum belt. This essential component drives the brush roll, and a worn or broken belt can severely impact suction.
Regularly inspect the belt for signs of wear, like fraying or cracks, and replace it every 6-12 months for peak performance. A loose belt may slip, preventing the brush roll from agitating dirt effectively. If you hear unusual noises or notice decreased suction, it’s likely time to examine the belt.
- Fraying edges that signal trouble
- Cracks that spell disaster
- Stretching that weakens power
- Slipping that leaves dirt behind
Don’t let a faulty belt ruin your cleaning efforts!
Check for Air Leaks

When your vacuum isn’t performing well, air leaks might be the culprit.
Start by identifying potential cracks in the hose and checking for loose connections.
Inspect the hose integrity to guarantee your vacuum maintains its suction power for effective cleaning.
Identify Potential Cracks
Air leaks can greatly impact your vacuum’s performance, so it’s crucial to identify any potential cracks. Start by inspecting the vacuum hose and body for visible cracks or gaps. Use a flashlight to uncover hairline cracks that might be hard to see.
- Imagine the frustration of a vacuum that won’t pick up dirt.
- Picture the dust and debris lingering in your home.
- Think about the money wasted on repairs and replacements.
- Visualize the relief of a fully functioning vacuum.
Seal small cracks temporarily with duct tape, but don’t forget to plan for a replacement hose to guarantee long-term efficiency.
Regularly check connection points and gaskets, as these areas are common sites for air leaks.
Seal Loose Connections
Loose connections in your vacuum can be a hidden culprit behind poor suction and ineffective cleaning. Start by inspecting your vacuum for visible cracks or gaps, particularly in the hose and housing, as these lead to air leaks that diminish suction power.
Make certain that all connections, like the hose attachment and dustbin, are securely fitted—any looseness allows air to escape and reduces efficiency. If you spot small cracks, use duct tape as a temporary fix, but plan for a permanent replacement to enhance performance.
Don’t forget to check the gaskets around the dustbin and detachable parts; worn gaskets can also cause air leaks. Regular maintenance checks will help you seal loose connections and maintain peak suction.
Inspect Hose Integrity
Inspecting the integrity of your vacuum hose is essential for maintaining strong suction power. Start by checking the hose for visible cracks, tears, or holes that can lead to air leaks. To find these leaks, run your hand along the hose while the vacuum’s on; if you feel air escaping, you’ve got a problem.
- A damaged hose reduces efficiency.
- You might be missing dirt hiding in plain sight.
- You could end up wasting time and effort.
- It’s frustrating when your vacuum doesn’t perform as expected.
Secure all connections between the hose and vacuum body, as loose fittings also contribute to air leaks.
For small cracks, consider duct tape as a temporary fix, but larger damages may require a replacement.
Inspect the Motor

When troubleshooting your vacuum, checking the motor is essential, as a malfunction can lead to weak or no suction.
Start by listening for unusual sounds like grinding or humming, which may signal motor issues that need immediate attention. If your vacuum frequently shuts off, it could be overheating due to dust buildup or internal damage.
To get a clearer picture, use a multimeter to test the motor for electrical continuity, ensuring it’s receiving power. If you notice any signs of damage or malfunction, don’t hesitate to seek professional repair.
Motor repairs can be complex and often require specialized tools, so it’s best to leave it to the experts if you’re unsure.
When to Call a Professional
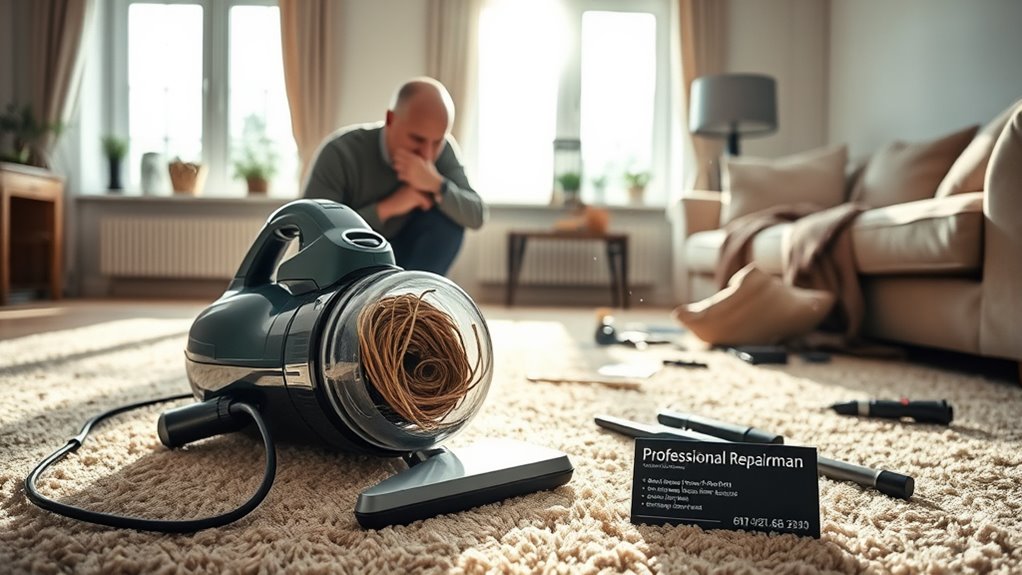
Sometimes, even after checking the motor and addressing common issues like clogs or dirty filters, your vacuum might still struggle to perform. If that’s the case, it’s time to evaluate a professional assessment.
- Persistent electrical issues, like unusual noises or burning smells
- Complex repairs, such as motor diagnostics
- A lingering lack of suction despite troubleshooting
- Feeling uncomfortable or lacking the tools for repairs
These signs often indicate a deeper mechanical problem that requires professional help.
Signs of deeper mechanical issues often signal the need for professional assistance to prevent further damage.
Attempting to fix these issues without expertise can lead to further damage or safety hazards. Regular professional servicing not only addresses existing problems but also extends your vacuum’s lifespan, keeping it in top shape for years to come.
Frequently Asked Questions
How to Fix a Vacuum Cleaner That Won’t Pick Up?
If your vacuum cleaner won’t pick up, start by checking for clogs in the hose or air ducts.
Next, inspect the brush roll for tangles and debris.
Clean or replace the filters regularly, as dirty filters can hinder performance.
Verify the vacuum belt is in good condition, and adjust the height setting for the flooring type.
These steps should help restore your vacuum’s suction power and improve its overall effectiveness.
How to Fix a Vacuum That Spits Out Dirt?
Did you know that nearly 30% of vacuum issues stem from blocked filters?
If your vacuum’s spitting out dirt, start by checking the filters; clean or replace them if they’re clogged.
Next, inspect the hose and attachments for any blockages.
Confirm the brush roll is free of tangles, and verify the vacuum belt is intact.
Finally, adjust the height setting for the surface you’re cleaning to improve dirt collection.
Why Isn’t My Vacuum Picking up Everything?
If your vacuum isn’t picking up everything, check for a few common issues.
First, inspect the hose for clogs that might block airflow.
Next, examine the filters; dirty or worn ones can reduce suction.
Don’t forget to empty the canister or replace the bag if it’s full.
Finally, look at the brush roll—tangled hair can hinder performance.
Regular maintenance of these components keeps your vacuum running efficiently and guarantees it picks up dirt effectively.
How Do I Unclog My Vacuum?
If your vacuum’s feeling a bit under the weather, it’s time for a little TLC.
Start by unplugging it and detaching the hose to check for hidden clogs. Gently use a broomstick to clear any blockages.
Next, inspect the brush roller for pesky tangles and trim them away.
Don’t forget to clean or replace the filters, and check the metal pole for obstructions.
If problems linger, consult your manual for further assistance.
Conclusion
Now that you know how to troubleshoot your vacuum, don’t let a little dirt defeat you! Remember, around 25% of vacuum problems stem from clogged filters or full bags. By maintaining your vacuum regularly, you can guarantee it works efficiently and lasts longer. If you try these fixes and your vacuum still isn’t performing, it might be time to call a professional. Keep your space clean and fresh with a little care for your trusty cleaning companion!