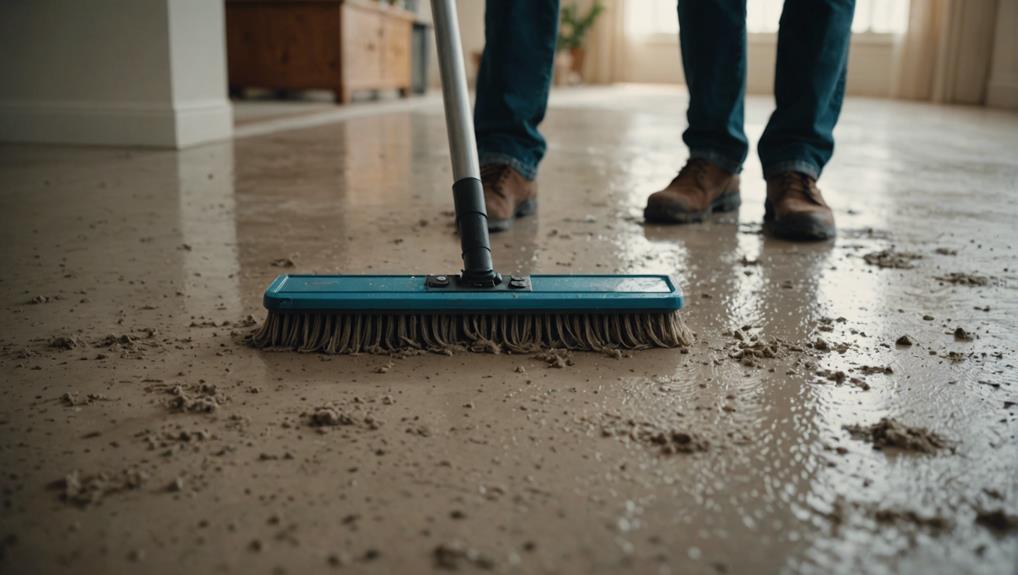
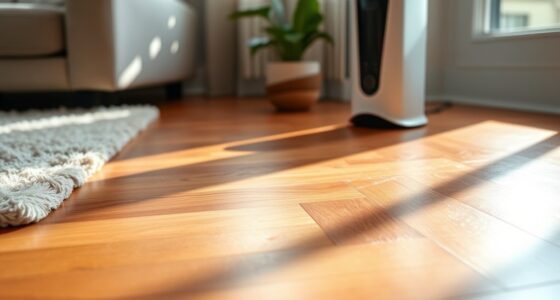
Connect with us

Floor and Carpet Cleaning Guides

A Perfect Guide to Purchasing Your Dream Vacuum for Hardwood

Find your ideal match with A Perfect Guide to Purchacr the best units, features, and prices for hardwood floor vacuums.

Published

on

A Perfect Guide to Purchasing Your Dream Vacuum for Hardwood Floors

Imagine you are walking barefoot on smooth, polished hardwood floors. The warm sunlight fills the room, bringing peace and comfort. But, keeping your floors clean and shiny is not always easy. You need the right vacuum to help.

Buying a vacuum for hardwood means finding the perfect match. No more using methods that don’t work or might harm your floors. With the best vacuum, keeping your floors beautiful and clean is easy.

This guide will help you understand what to look for in a hardwood floor vacuum. We’ll discuss important features like powerful suction, long battery life, and smart technology. Get ready to ditch the dust and pet hair and welcome gleaming floors.

Table of Contents

Key Takeaways:

  • Choosing the right vacuum is crucial for your hardwood floors’ beauty and cleanliness.
  • Look for features such as suction strength, long battery, anti-bacterial technology, and smart navigation in your vacuum.
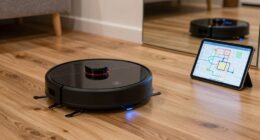
  • Robot vacuums like the Dreame F9 are smart and great at picking up pet hair. But hybrid vacuums may not work well on hardwood.
  • The Miele Classic C1 Pure Suction and Miele Complete C3 Calima PowerLine are great options with strong cleaning power and good warranty.
  • The Dyson V12 Detect Slim has cool features like a laser light for spotting dust. Yet, it has a smaller bin for dirt.

The Best Vacuum Options for Hardwood Floors

Having the right vacuum is key to cleaning hardwood floors well. With so many choices, picking the best one can seem hard. We’ve researched for you and found the top vacuums made for hardwood floors.

The Miele Classic C1 Pure Suction model tops our list. It has a strong 1,200-watt motor for good suction. This means it can pick up dirt and debris well. Plus, it’s quiet, operating between 57 and 69 decibels1.

Another top pick is the Miele Complete C3 Calima PowerLine. It’s great for hardwood floors and comes with a three-year warranty1. Its self-sealing bag feature stops dust and allergens from getting out. This makes your home’s air cleaner1.

Advertisement

If you like cordless vacuums, consider the Dyson V12 Detect Slim. Its 12-ounce dustbin means less emptying for you1. It’s light and has many attachments. This makes it useful for more than just floors2.

Choosing the right vacuum for hardwood floors means looking at suction, durability, and if it cleans gently but well. The vacuums we mentioned are great for these reasons. They leave hardwood floors clean and looking good, no matter which one you pick.

Top Vacuum Options for Hardwood Floors

Vacuum Model Features
Miele Classic C1 Pure Suction – 1,200-watt motor – Operates between 57 and 69 decibels1
Miele Complete C3 Calima PowerLine – Self-sealing bag – Three-year warranty for its Complete series1
Dyson V12 Detect Slim – 12-ounce dustbin1 – Various attachments for versatile cleaning2

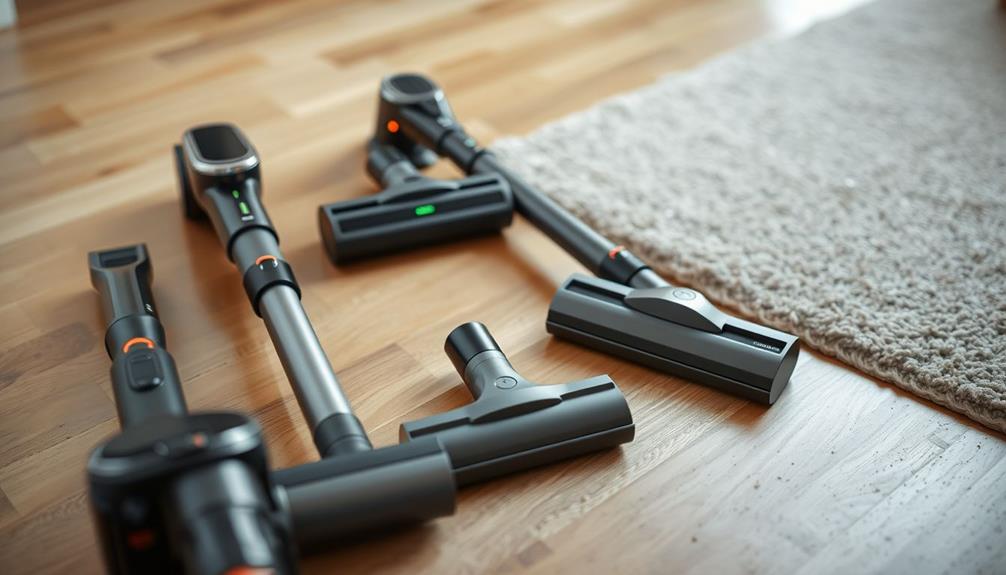
Choosing the Right Type of Vacuum for Hardwood Floors

Cleaning hardwood floors requires the right vacuum. There are different types, each with its own pros and cons. This helps you find the best match for your needs.

Here are the three main types of vacuums to look into:

Advertisement

1. Upright Vacuums

Upright vacuums are a favorite among homeowners. Their upright design makes them easy to use and store. They have strong suction and brush rolls. This makes them great for picking up dirt from hardwood floors.

Studies show upright vacuums like the Miele Classic C1 Pure Suction have a powerful 1,200-watt motor. This means strong suction for clean floors. Plus, Miele vacuums are quieter than other brands. They range from 57 to 69 decibels, while brands like Shark and Hoover can be louder, hitting 76-79 decibels.1

2. Canister Vacuums

Canister vacuums have a separate cleaning head and body connected by a hose. This design lets you easily clean under furniture and in tight spots. They come with different attachments, so they’re great for hardwood and other surfaces.

Miele’s Classic C1 series vacuums have top-notch filters. Their AirClean exhaust filter catches nearly all tiny particles. And their HEPA filter grabs even the smallest ones, ensuring the air stays clean while you vacuum1.

3. Stick Vacuums

Stick vacuums are light and easy to handle. They’re perfect for quick clean-ups. Their design lets you move easily around furniture and corners. Many are cordless, so you don’t have to worry about plugs when cleaning your floors.

Each vacuum type has its own advantages. The best choice depends on your home’s size, your floors’ layout, and how much they’re used.

With this info, you’re ready to pick the best vacuum for your hardwood cleaning needs.

Type of Vacuum

Important Features to Consider for Hardwood Floor Vacuums

When picking a vacuum for your hardwood floors, it’s important to look at some key features. These include how strong it sucks, the type of brush roll, the filter system, how long the cord is, and the extra tools it comes with. Let’s dive into why these features matter for keeping your floors clean and in good shape.

Suction Power

Suction power matters a lot when choosing a vacuum for hardwood floors. If the vacuum is strong, it can pick up all kinds of dirt and dust well. This makes your floors really clean and stops dirt from scratching or harming the wood. The Dyson V12 Detect Slim is a good example because it’s strong on both floors and rugs1.

Advertisement

Brush Roll Type

The kind of brush roll a vacuum has is also key for hardwood floors. You should look for vacuums with brushes made specially for delicate floors. The Dyson V12 Detect Slim, for instance, has a Laser Slim Fluffy head that’s great for bare floors and doesn’t damage them1.

Filtration System

A good filter system is key for clean air when you vacuum hardwood floors. Vacuums with HEPA filters are great because they catch tiny bad stuff like allergens and dust. This keeps the air clean. HEPA filters help make sure tiny particles don’t get back into the room3.

Cord Length

The length of your vacuum’s cord can change how easy it is to use, especially in big spaces. A longer cord means you don’t have to change plugs often. But, a cordless vacuum, like the Dyson V12 Detect Slim, lets you move freely without any cord troubles1.

Attachments

Attachments add more ways to use your vacuum, especially for cleaning hardwood floors. Look for tools like soft brushes made for wood floors. These tools help you clean without scratching or harming the floor. They make it easy to reach spots and corners that are hard to get to1.

By looking at these important features when you choose a vacuum for your hardwood floors, you can clean well, keep your vacuum working great, and keep your floors looking beautiful for a long time.

Advertisement

Addressing Common Concerns: Scratching and Cleaning Efficiency

Vacuuming hardwood floors often raises two key worries: the chance of scratches and how well it cleans. It’s important to pick a vacuum that’s kind to hardwood floors. This way, you can clean your floors well without leaving any marks.

Cleaning your floors correctly prevents scratching. Plus, it ensures your vacuum works as efficiently as possible.

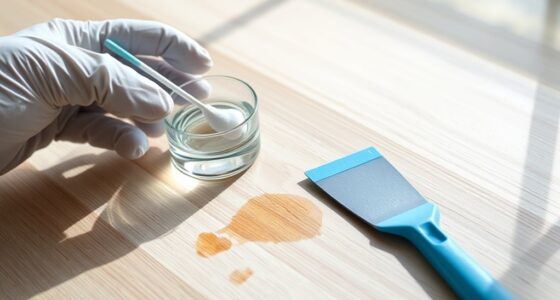
Gentle Cleaning for Scratch-Free Floors

Hardwood floors look great but are easy to scratch. To protect them, choose a vacuum with soft bristles or microfiber pads. This type of cleaning tool4 gently gets rid of dirt without harming your floors.

To keep your hardwood floors in top shape, take extra steps besides picking a soft vacuum. Use furniture pads, avoid high heels or long pet nails on the floor, and put down rugs in busy areas. These actions shield your floors from scratches4.

Cleaning Efficiency for Optimal Results

Cleaning your floors well is just as important as avoiding scratches. You want a vacuum that gets rid of all the mess, including pet hair. This leaves your hardwood looking perfect. Achieving great cleaning results involves several factors:

Advertisement
  1. Strong Suction Power: Choose a vacuum that can pull up dirt well. Good suction gets all the grime out of your floors.
  2. Appropriate Attachments: Use a vacuum with tools made for hardwood. A soft brush attachment or a floor brush works best.
  3. Effective Filtration System: The right vacuum captures even the tiniest particles5. Look for one that keeps dust and allergens inside. This helps keep the air and your floors clean5.

When you pick a vacuum that’s gentle and cleans well, your hardwood floors will stay beautiful. With the right care, they’ll look great and be free of scratches and dirt.hardwood floor vacuum

Factors to Consider for Pet Owners

If you have pets, choosing the right vacuum for your floors is key. As a pet owner, you have to think about extra things. This helps keep your place clean and deals with pet hair and allergens.

Pet hair removal from floors is a big deal for pet owners. The Dreame F9 robot vacuum, with strong suction of 2500 pa, is made for this job. It gets rid of pet hair well, helping lower allergens6.

Besides pet hair, messes from pets can be tough to clean up. Extras like pet brushes and crevice tools help a lot. They get into hard spots and clean up pet messes on hardwood floors. The Dreame F9 has these tools6.

Odors and allergens from pets worry many. The Dreame F9 robot vacuum is built to fight bacteria. It keeps your floors clean and reduces allergens. This makes your home healthier for you and your pets6.

Statistics at a Glance:

From data7, 40% of UK households have a pet, mostly dogs and cats. This is big to keep in mind when picking a vacuum for your floors.

If you own a pet, vacuuming your floors at least twice a week is suggested. Regular vacuuming cuts down on pet hair. This keeps your home tidy7.

Advertisement

The kind of wood flooring you have affects cleaning. Engineered wood, often in bathrooms, needs careful cleaning to avoid harm. You need the right tools7.

Choosing the right finish for your floors is also key. Unfinished flooring lets you pick a pet-friendly finish. This fights against scratches and dents. Light colored floors can hide pet damage well, keeping them looking good7.

“For pet owners, getting a vacuum that tackles pet hair on floors is vital. The Dreame F9 robot vacuum has mighty suction, special tools for messes, and fights bacteria. It keeps your place free from allergens.” – Reference6

Keeping these points in mind and using a pet-friendly vacuum like the Dreame F9, you can keep your floors clean. This makes a happier space for you and your pets.

Statistical Data Source
40% of UK households own a pet Link 3
24% of households own dogs Link 3
17% of households own cats Link 3
hardwood floor vacuum

Budget-Friendly Options for Hardwood Floor Vacuums

Looking for a vacuum that’s easy on your wallet but great for hardwood floors? There are many good choices that won’t cost you a lot. Customers and experts both like these for being affordable and high-quality.

Miele Classic C1 Pure Suction

Think about the Miele Classic C1 Pure Suction. It’s not too pricey and works well on hardwood. It has a strong 1,200-watt motor to clean up dirt and dust. It’s also quieter than many, making less noise.

It uses an AirClean filter that traps almost all small particles. This means the air in your home stays clean1.

Advertisement

Miele Complete C3 Calima PowerLine

The Miele Complete C3 Calima is another wallet-friendly pick. It’s great for hardwood and has handy tools like a crevice tool and dust brush. All these tools are easy to find on the canister1.

It also has self-sealing bags. This keeps dust and allergies from getting back into the air1.

Dyson V12 Detect Slim

Prefer no cords? The Dyson V12 Detect Slim might be for you. It cleans hardwood floors well and lasts up to 45 minutes per charge. But, its dustbin is small. You might need to empty it a few times if cleaning a whole house or if you have pets.

Choosing the right vacuum means thinking about what you need. Consider things like how it cleans on hardwood, ease of use, and warranty. Finding the right one within your budget means clean floors without spending too much.budget-friendly circuit for hardwood floor vacuums

Vacuum Model Suction Power Noise Level (Decibels) Filtration System
Miele Classic C1 Pure Suction 1,200 watts 57-69 decibels1 AirClean exhaust filter1
Miele Complete C3 Calima PowerLine N/A N/A N/A
Dyson V12 Detect Slim N/A N/A N/A

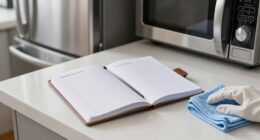
Maintenance and Care Tips for Hardwood Floor Vacuums

To keep your hardwood floor vacuum working its best, good care is vital. Following some simple tips will ensure your vacuum lasts longer.

Cleaning the Dust Container and Filters

Regular cleaning of the vacuum’s dust container is key for its power and to avoid clogs. Check the manual on how to do this right. Also, clean or change the filters as the manual suggests. This helps stop dust and allergies from building up inside your vacuum6.

Advertisement

Checking and Cleaning the Brush Roll

The brush roll might get clogged with hair and debris. It’s important to check and clean it regularly. You may need to take the brush roll out to clean it properly, based on your vacuum’s model. Look at the manual for how to keep the brush roll in good shape6.

Inspecting and Cleaning the Nozzles and Attachments

Make sure the nozzles and attachments are free from blockages. A soft cloth or a brush can be used to clean them. This step ensures they work well and the vacuum has proper airflow6.

Checking and Replacing Belts and Brushes

Belts and brushes can wear out or get damaged. Check them often for any signs of problems. Changing worn-out belts and brushes helps your vacuum work better. Read the manual to learn about checking and replacing them6.

Storing Your Hardwood Floor Vacuum

Storing your vacuum correctly is essential to prevent dust and damage. Make sure it’s off and unplugged before storing. Keep it in a clean, dry place away from direct sun and extreme temperatures. A vacuum bag or cover can add extra protection6.

Regular Maintenance Schedule

A regular maintenance schedule is important for your vacuum’s performance. This means cleaning the dust container, filters, checking the brush roll, attachments, and storing it right. By keeping a maintenance routine, your vacuum will clean efficiently and last longer6.

Advertisement

Recommended Maintenance Schedule for Hardwood Floor Vacuums

Maintenance Task Frequency
Empty and clean the dust container After each use
Clean or replace filters Every 1-3 months
Clean brush roll Monthly
Inspect and clean nozzles and attachments Monthly
Check and replace belts and brushes As needed
Store vacuum properly After each use

Always check the user manual for your specific vacuum’s maintenance needs. Following a regular care routine will help extend its life and keep it cleaning well.Hardwood Floor Vacuum Maintenance

Image: Hardwood Floor Vacuum Maintenance

Customer Reviews and Recommendations

Looking for the right vacuum for hardwood floors can be made easier by listening to others. Here are some positive things people have said about their vacuums:

“I bought the Miele Classic C1 Pure Suction and it’s been great for my hardwood floors. It doesn’t cost too much, it’s light, and sucks up dirt really well. Plus, its filter catches almost all tiny particles, making my home’s air cleaner. I really suggest getting one!”1

Someone else was happy with the Tineco FLOOR ONE S5:

“After using a German vacuum for years, I tried the Tineco FLOOR ONE S5. I’m so glad I did. It’s perfect for both dry and wet messes, and it knows when to work harder in dirtier spots. It gets everything, from cat litter to pine needles. Just clean it well after using it to stop smells!”8

Another person loved the Shark – Navigator Lift-Away Upright Vacuum:

“The Shark – Navigator Lift-Away Upright Vacuum has been amazing for my hardwood floors. It keeps allergens from spreading in my house. Plus, it’s super powerful and does a great job, just as the reviews said!”9

Last, someone else talked about how good the Dyson – Ball Animal 3 Extra Upright Vacuum is:

Advertisement

“With pets at home, I needed a strong vacuum. The Dyson – Ball Animal 3 Extra Upright Vacuum has been perfect. Its strong suction and many tools make cleaning pet hair easy. My floors look great. It even has extra tools for tight spots. I highly recommend it to pet owners!”9

These reviews give us a good idea about how these vacuums work on hardwood floors. Think about these opinions as you choose the best vacuum for your home.

Conclusion

When you’re buying a vacuum for your hardwood floors, it’s key to look at the features and cleaning power. Think about what fits your home best. With the advice in this guide, you’ll know how to pick the perfect vacuum for your floors.

Hardwood floors are more and more popular, with the industry earning $3 billion in 201710. Their long-lasting beauty makes them a favorite for many homeowners.

Choosing the right wood and finish, like solid wood for rooms not on the ground and engineered wood for damp areas10, helps your floors last longer. Keeping them clean by sweeping, vacuuming, and using the right products is essential10.

There are many good vacuums out there for hardwood floors. The BONA Hardwood Floor Cleaner, trusted for a decade, is a great pick11. The Dyson V6 Absolute stands out for being affordable and easy to carry11. Then, there’s the Swiffer Sweep + Vac, a cordless option that makes cleaning simple11.

Advertisement

FAQ

What factors should I consider when purchasing a vacuum for hardwood floors?

When buying a vacuum for hardwood floors, think about the suction power. Also, consider the type of brush roll. Don’t forget the length of the cord and what attachments it comes with.

Are there different types of vacuums available for cleaning hardwood floors?

Yes, you can find various vacuums for hardwood floors. These include upright, canister, and stick vacuums.

How can I ensure that the vacuum I choose is gentle on hardwood surfaces?

Choose a vacuum made especially for hardwood floors. This ensures it’s gentle on your surfaces.

How do I find a vacuum that effectively removes pet hair?

Look for vacuums with pet hair removal features. Check if they have specialized pet mess attachments. Also, see if they help reduce pet odors and allergens.

Are there budget-friendly options available for vacuuming hardwood floors?

Yes, you can find budget-friendly vacuums for hardwood floors. They still perform well.Advertisement

How do I properly maintain and care for my hardwood floor vacuum?

Maintain your vacuum by cleaning filters regularly. Always empty the dust bin. Also, check for blockages or things that might be stuck.

Can customer reviews and recommendations help me choose a vacuum for hardwood floors?

Yes, customer reviews and recommendations are very helpful. They give you insight when picking a hardwood floor vacuum.

Which Type of Vacuum is Best for Hardwood Floors?

When it comes to the canister vs upright vacuum choice for hardwood floors, it ultimately depends on personal preference. Canister vacuums are typically more maneuverable and have a variety of attachments for different surfaces, while upright vacuums can be more convenient for quick clean-ups. Both can be effective on hardwood floors.

Source Links

  1. https://www.nytimes.com/wirecutter/reviews/best-vacuum-for-hardwood-floors/
  2. https://nymag.com/strategist/article/best-vacuums.html
  3. https://www.theclintoncourier.net/2023/07/25/what-to-look-for-when-buying-a-vacuum-cleaner-key-considerations/
  4. https://mrsander.co.uk/blog/whats-the-best-way-to-keep-your-wooden-floors-clean/
  5. https://cleanmyspace.com/the-complete-guide-to-using-a-dyson-v11/
  6. https://global.dreametech.com/blogs/blog/how-to-choose-a-robot-vacuum-for-hardwood-floor
  7. https://www.sanding.co.uk/news/blog-floor-maintenance/hardwood-flooring-and-dogs.html
  8. https://www.apartmenttherapy.com/tineco-wet-dry-vacuum-review-37041500
  9. https://www.bestbuy.com/site/shop/best-vacuum-for-hardwood-floors-and-carpet
  10. https://www.firstclasswoodfloors.com/blog-1/the-ultimate-guide-before-buying-hardwood-floors-questions-to-ask
  11. https://carolineondesign.com/how-to-clean-engineered-wood-floors/
Continue Reading
Advertisement

Floor and Carpet Cleaning Guides

Effective Ways to Remove Stubborn Limestone Stains!

Get rid of stubborn limestone stains with these expert tips for a refreshed and clean look, leaving your surfaces gleaming like new!

Published

on

removing limestone stains effectively

To remove stubborn limestone stains effectively, start by selecting the right cleaning tools like a soft brush or an oscillating tool with sandpaper, depending on the surface. Apply a limestone-safe cleaner, letting it sit before gentle scrubbing and rinsing. For deep stains, use a poultice, allowing it to dry and repeating if needed. Buff and polish the surface with a specialized solution to restore shine. Seal the limestone with a penetrating sealer for long-lasting protection. Each step plays an essential role in eliminating tough stains from limestone surfaces, ensuring a clean and refreshed look.

Key Takeaways

  • Utilize a limestone-safe cleaner and let it sit before scrubbing.
  • Consider using a poultice for deep stains and allow time to dry.
  • Buff and polish the surface to restore shine and smooth imperfections.
  • Seal the limestone with a penetrating sealer every 2-3 years for protection.
  • Avoid abrasive tools on polished limestone and air dry rough surfaces after cleaning.

Selecting the Right Cleaning Tools

When tackling stubborn limestone stains, choosing the right cleaning tools is essential for effective removal. For cleaning rough limestone surfaces, opt for a soft bristle brush or toothbrush. These gentler tools help prevent scratching and maintain the integrity of the limestone.

Avoid using abrasive tools on polished limestone, as they can cause damage and unsightly scratches on the surface. If you're dealing with tough stains on limestone, consider using an oscillating tool with sandpaper for more targeted cleaning power.

After cleaning, allow rough limestone to air dry naturally. This process helps preserve the limestone and prevents any potential damage that could occur from artificial drying methods. For polished limestone surfaces, it's best to hand-dry them to avoid watermarks and maintain their shiny appearance.

Applying a Limestone-Safe Cleaner

cleaning limestone with care

To effectively remove stubborn limestone stains, start by applying a pH-neutral, organic cleaner specifically formulated for limestone surfaces. Here are three steps to effectively apply a limestone-safe cleaner:

  1. Apply the Cleaner:

Generously apply the limestone-safe cleaning product to the stained area. Make sure the cleaner covers the entire stain and let it sit for 5-10 minutes to effectively break down the stubborn marks.

  1. Scrub Gently:

After the cleaner has had time to work on the stain, delicately scrub the area with a soft brush or sponge. Avoid using harsh abrasives that could scratch the limestone surface while still working to lift the stain out of the stone.

  1. Rinse and Dry:

Thoroughly rinse the area with warm water to remove any remaining cleaner and residue. Once clean, dry the limestone surface completely to prevent water marks or streaks from forming.

Using a Poultice for Deep Stains

removing deep stains effectively

For persistent deep stains on limestone surfaces, utilizing a commercial poultice can effectively draw out the embedded discoloration and restore the stone's appearance. These poultices are specifically designed to remove stains from porous materials like limestone.

To begin, apply the poultice over the stain, making sure it covers the affected area completely. Allow the poultice to dry for 24-48 hours, enabling it to absorb the deep-set stain from the limestone.

Once dry, gently scrape off the poultice from the surface. The poultice works by pulling the stain out of the limestone, helping to eliminate the discoloration.

Advertisement

In cases of stubborn stains, multiple applications of the poultice might be necessary to ensure thorough removal without causing damage to the limestone.

Buffing and Polishing the Surface

refining car s exterior finish

Consider buffing and polishing the surface of your limestone to restore its shine and smooth out imperfections.

Here are some steps to help you achieve this:

  1. Gentle Cleaning: Start by cleaning the limestone floors with a mild soap and water solution. Use a bristle brush to scrub away any dirt or debris gently. Avoid harsh chemicals that can damage the stone.
  2. Polishing Technique: Once the surface is clean and dry, apply a specialized limestone polishing solution. Use a soft cloth or polishing pad to buff the surface in circular motions. This process helps to enhance the natural beauty of the stone.
  3. Professional Assistance: For more extensive restoration or if you're unsure about polishing your limestone floors yourself, consider hiring professional cleaning services. They've the expertise and equipment to effectively polish and maintain your limestone surfaces.

Sealing the Limestone for Protection

sealing limestone for preservation

Start by applying a penetrating sealer to your limestone surfaces to create a protective barrier against stains, moisture, and wear. Sealing limestone is vital to prevent liquids from seeping in and causing lasting damage.

The penetrating sealer acts as a shield, enhancing the durability of your limestone surfaces. Regular resealing, typically recommended every 2-3 years, is essential to maintain this protective layer. Ensuring your limestone is adequately sealed not only safeguards it from potential stains but also increases its longevity.

By investing the time and effort into properly sealing your limestone, you're actively contributing to the preservation of its beauty and structural integrity. Remember, the protective barrier created by the penetrating sealer is a cost-effective way to shield your limestone surfaces from the elements and daily wear and tear.

Prioritize sealing your limestone for long-lasting protection and enhanced aesthetic appeal.

Advertisement

Frequently Asked Questions

How Do You Remove Stubborn Stains From Limestone?

To remove stubborn stains from limestone, you can use a commercial poultice or baking soda. Apply it thickly over the stain and let it dry for 24-48 hours. Scrape it off gently with a plastic spatula to avoid damage.

How to Make Limestone White Again?

To make limestone white again, first, avoid acidic cleaners. Use a poultice or baking soda on stains, apply, let dry, scrape off, and rinse. Seal with a penetrating sealer for protection. Following these steps will restore your limestone's brightness.

What Cleans Limestone Best?

To clean limestone effectively, use pH-neutral, organic cleaners to avoid surface damage. For oil-based stains, opt for professional cleaners with high pH levels. Pressure washers work well for outdoor surfaces. Sealing post-cleaning prevents future stains.

Will Hydrogen Peroxide Clean Limestone?

Hydrogen peroxide can effectively clean limestone. Mix it with flour to make a paste, apply on stains, let sit for hours, then scrub gently. Test on a small area first to avoid discoloration.

Are Limestone Stains and Algae Removal Techniques Similar?

When it comes to removing algae from pool surfaces, the techniques are somewhat similar to removing limestone stains. Both involve using cleaning solutions, scrubbing, and perhaps even pressure washing to effectively remove algae from the pool and eliminate limestone stains. Proper and regular maintenance is key to preventing both issues.

Advertisement

Conclusion

To sum up, removing stubborn limestone stains is possible with the right tools and techniques. By selecting the appropriate cleaning tools, applying a limestone-safe cleaner, using a poultice for deep stains, buffing and polishing the surface, and sealing the limestone for protection, you can effectively restore the beauty of your stone surfaces.

So, why wait? Give these methods a try and say goodbye to those pesky stains for good!

Continue Reading

Floor and Carpet Cleaning Guides

Say Goodbye to Dog Urine Stains on Limestone Floor Tiles!

Lift the veil on removing dog urine stains from limestone floors with effective strategies and tools, ensuring a clean and pristine surface!

Published

on

remove dog urine stains

Tired of dog urine stains on your limestone floor tiles? Start by understanding the material's porous nature and the effects of urine. Gather tools like flour, hydrogen peroxide, plastic wrap, and painter's tape. Remove debris with brooms and dry mops before applying a pH-neutral cleaner. Let it sit to dissolve urine crystals. Use Diatomaceous Earth poultice for stubborn stains. Consider enzymatic cleaners for odor removal. Prevent future stains by sealing floors and training pets. Ready to bid farewell to those pesky stains? These steps provide a solid foundation for spotless limestone floors.

Key Takeaways

  • Understand limestone properties for effective stain removal.
  • Create poultice with flour or Diatomaceous Earth for stains.
  • Remove debris and clean surface before stain treatment.
  • Apply pH-neutral cleaner, scrub, and rinse stained areas.
  • Use enzymatic cleaners for odor neutralization and prevention.

Understanding Limestone Floor Properties

To effectively manage dog urine stains on limestone floor tiles, understanding the inherent properties of limestone is vital. Limestone flooring is known for being porous, which makes it prone to staining, especially from substances like dog urine.

The pH imbalance in limestone can react with the acidic components in urine, leading to discoloration and etching on the surface. If left untreated, dog urine stains on limestone floors can result in foul odors, weaken the stone structure, and promote the growth of bacteria and mold.

To tackle these issues, it's essential to comprehend the characteristics of limestone floors for effective stain removal. Prompt cleaning and sealing of the floors can help prevent and mitigate the effects of dog urine stains.

Preparing Tools and Materials

gathering supplies for construction

Make sure you have all the necessary tools and materials ready before beginning the process of removing dog urine stains from your limestone floor tiles. Gather supplies such as white flour or Diatomaceous Earth, Hydrogen Peroxide, plastic wrap, and low contact painter's tape.

Additionally, make certain you have a mild detergent, water, enzymatic cleaner, and paper towels on hand for the cleaning process. To create an effective stain removal poultice, prepare a mixture using the white flour or Diatomaceous Earth combined with Hydrogen Peroxide.

Have plastic wrap and low contact painter's tape ready to cover and secure the poultice on the stained area for best results. Remember to keep enzymatic cleaner and plastic wrap available for neutralizing urine odors that may linger on your limestone floors.

Advertisement

Removing Debris Before Cleaning

clearing clutter for cleanliness

Prior to starting the cleaning process on your limestone floor tiles, make sure to use brooms or dry mops to eliminate any debris present on the surface. Clearing away loose dirt, dust, or pet hair is essential for effective stain removal.

Debris such as dirt and grime can mix with urine stains, underscoring the importance of thorough cleaning before tackling stains. By removing debris beforehand, the cleaning solution can penetrate the stain more effectively, leading to better results.

Prioritizing debris removal creates a clean surface for the subsequent cleaning process, enhancing the overall stain removal outcome. Be sure that the brooms or dry mops are used gently to avoid scratching the limestone surface.

Taking the time to remove debris sets the stage for successful cleaning and eradication of stubborn urine stains, leaving your limestone floor tiles looking fresh and spotless.

Applying Ph-Neutral Cleaner

cleaning with ph neutral solution

Begin by selecting a pH-neutral cleaner to effectively treat dog urine stains on your limestone floor tiles. Here are four essential steps to help you successfully remove stains using a pH-neutral cleaner:

  1. Dilute the Cleaner: Follow the manufacturer's instructions to dilute the pH-neutral cleaner with water as directed. This guarantees the solution isn't too harsh on your limestone tiles.
  2. Apply the Cleaner: Use a mop or a sponge to apply the pH-neutral cleaner onto the affected areas where the dog urine stains are present. Make sure there's complete coverage over the stains.
  3. Scrub Gently: With a soft-bristled brush or a cloth, gently scrub the stained areas to help the cleaner penetrate and lift the urine stains from the limestone floor tiles.
  4. Rinse Thoroughly: After allowing the cleaner to sit for the recommended time, rinse the area thoroughly with clean water to remove any residue and traces of the cleaner. Repeat if necessary until the stains are completely gone.

Allowing Cleaner to Sit

providing designated seating space

Allow the pH-neutral cleaner to sit on the dog urine stain for the recommended time to effectively break down and lift the stain from your limestone floor tiles. Giving the cleaner time to penetrate the stain enhances its effectiveness in lifting the urine residue. The sitting time allows the cleaner to work on dissolving the urine crystals embedded in the limestone. Patience is key as the cleaner sitting on the stain guarantees thorough removal without damaging the limestone. Properly following the recommended sitting time for the cleaner maximizes its stain-lifting potential on the limestone floor tiles.

Benefits of Allowing Cleaner to Sit on Limestone Floor Tiles
Enhances stain-lifting effectivenessAllows cleaner to penetrate the stainDissolves urine crystals in the limestone
Guarantees thorough removal without damageMaximizes stain-lifting potential

Gently Scrubbing Stained Area

effectively removing stubborn stains

To effectively remove dog urine stains from your limestone floor tiles, gently scrub the stained area using a soft cloth or brush to avoid damaging the surface.

Here are some tips to help you get rid of those stubborn stains:

  1. Choose the Right Tools: Opt for a soft cloth or brush to gently scrub the stained area, ensuring you don't harm the limestone tiles.
  2. Use the Correct Cleaner: Make a solution of pH-neutral stone cleaner and water to effectively tackle the urine stain without causing any damage.
  3. Avoid Harsh Chemicals: Stay away from abrasive tools or strong chemicals when scrubbing to prevent any scratching or etching on the delicate limestone surface.
  4. Apply Gentle Pressure: Work in small sections, applying gentle pressure while scrubbing to lift the urine stains effectively without causing any harm to the tiles.

Rinsing With Warm Water

gentle cleansing technique used

Start by rinsing your limestone floor tiles with warm water to effectively remove residual cleaning solution and dirt. Warm water is a vital ally in the battle against stains on limestone surfaces. Its gentle yet effective nature can help lift lingering grime and urine stains from the tile's surface.

Thoroughly rinsing the floor is essential to prevent any residue buildup that could attract more dirt over time. By using warm water, you not only guarantee a spotless finish but also help maintain the cleanliness and beauty of your limestone tiles. This simple step can make a significant difference in the appearance of your floor, leaving it looking fresh and renewed.

Advertisement

Thoroughly Drying the Floor

excellent choice capturing the essence of the text

After rinsing your limestone floor tiles with warm water, the next essential step is to thoroughly dry the floor to prevent water spots and potential damage. Follow these steps to make certain your limestone floor stays clean and free of stains:

  1. Use a dry, clean cloth or towel to remove excess water from the surface of the floor.
  2. Thoroughly dry the entire floor area, making sure to reach all corners and edges.
  3. Guarantee all moisture is removed to prevent stains from reappearing and to maintain the natural beauty of the limestone.
  4. Regularly check the floor for any remaining dampness, as even small amounts of water can lead to water spots or discoloration over time.

Adequate drying time is vital in the maintenance of your limestone floor, so take your time and ensure the floor is completely dry before moving on to the next step in the cleaning process.

Considerations for Persistent Stains

cleaning stubborn set in stains

Addressing persistent dog urine stains on limestone floors requires taking proactive steps to utilize stain removal methods such as poultices to draw out deep-set contaminants effectively.

Additionally, implementing preventive measures like enzymatic cleaners can help neutralize lingering odors by targeting bacteria feeding on the urine.

It's crucial to be proactive in preventing etch damage, as professional honing and polishing may be necessary to restore the pristine look of polished limestone surfaces.

Stain Removal Methods

Consider utilizing a poultice containing ingredients like flour or Diatomaceous Earth to effectively remove persistent dog urine stains from limestone floor tiles. This method helps draw out the stains from the porous limestone surface, aiding in their removal.

Make sure to secure the poultice with plastic and low contact painters tape, allowing it to dry for 24 to 48 hours for best stain removal results.

Additionally, enzymatic carpet cleaners can be beneficial in neutralizing urine odors on limestone floors by targeting the bacteria responsible for the unpleasant smell. To maximize the effectiveness of the enzymatic cleaner, cover the affected area with plastic after application to allow for deep penetration and thorough odor elimination.

Advertisement

Preventive Measures

Implementing regular sealing of your limestone floors is an essential step in preventing the deep penetration of dog urine stains and maintaining the integrity of the surface.

Sealing creates a protective barrier that can help prevent future stains from seeping into the porous limestone.

Additionally, consider training your pets to avoid urinating on the floors and promptly cleaning up any accidents to prevent the spread of the stain.

Using pet-friendly cleaning products and techniques can effectively remove existing stains and discourage re-marking.

Seeking advice from stone restoration experts can provide valuable insights on preventive measures and treatment options for persistent dog urine stains on limestone floors.

Advertisement

Frequently Asked Questions

How to Get Dog Urine Out of Limestone?

To get dog urine out of limestone, act fast by blotting excess liquid, clean with water and mild detergent, apply poultice for deep stains, rinse with water, and consider sealing the surface. Prevent future stains by sealing after cleaning.

How Do You Get Stains Out of Limestone Tiles?

You scrub, you buff, you banish those stains. With water and detergent, you work your magic. Poultice in hand, you draw out the deep-seated marks. Rinse, seal, and voilà! Stains vanish, leaving pristine limestone tiles gleaming.

How Do You Remove Old Dog Urine Stains From Floor Tiles?

To remove old dog urine stains from floor tiles, create a poultice with white flour or Diatomaceous Earth and Hydrogen Peroxide. Apply it to the stained area, let it dry for 24-48 hours to draw out stains. Use enzymatic cleaners to eliminate odors.

How to Remove Urine Stains From Stone Tiles?

To remove urine stains from stone tiles, act promptly to blot up fresh stains. Create a poultice with white flour or Diatomaceous Earth and Hydrogen Peroxide to draw out stubborn stains. Cover with plastic and let dry for 24-48 hours for effective removal. Use enzymatic cleaners for odors.

Can the Methods for Removing Limestone Stains also Work for Dog Urine Stains?

When dealing with dog urine stains, traditional cleaning methods may not be the most effective. However, some ways to remove limestone stains can also work on dog urine stains. Using a mixture of water and vinegar or a commercial pet stain remover can help lift and neutralize the odor and stain.

Advertisement

Conclusion

Say goodbye to dog urine stains on limestone floor tiles by following these simple steps.

Did you know that limestone is a porous stone, making it more susceptible to staining from liquids like dog urine?

By using a pH-neutral cleaner and gently scrubbing the stained area, you can effectively remove the unsightly marks and restore the beauty of your limestone floors.

So, don't let those stains linger any longer – take action today and enjoy clean, pristine floors once again!

Advertisement
Continue Reading

Floor and Carpet Cleaning Guides

Melted Plastic on Carpet? Learn the Quick Fix!

Intrigued by melted plastic on your carpet? Discover a quick fix involving gentle heating and careful scraping for a successful solution.

Published

on

quick fix for melted plastic

Managing melted plastic on your carpet? First, guarantee proper ventilation by opening windows and using fans. Next, gently heat the plastic with a warm iron, covered with cloth. Scrape off softened plastic residue using a plastic scraper. For stubborn bits, apply Goo Gone and repeat. Remember to be patient! Pro tip: adjust iron settings gradually. Consider using protective barriers like silicone mats. Prevent future mishaps by educating household members. Thoroughly clean the area post-removal, and monitor for damage. Stay cautious with hot items near carpets. Discover more effective tips by exploring further.

Key Takeaways

  • Use warm iron to soften plastic for easier removal.
  • Scrape off residue gently with a plastic tool.
  • Clean residue with a solvent like Goo Gone.
  • Prevent future incidents with protective barriers.
  • Thoroughly clean the area post-removal for a clean finish.

Precautions Before Removing Melted Plastic

Before you start removing melted plastic from your carpet, make sure to take necessary precautions to guarantee a safe and effective cleaning process. Ventilation is important in this process to make sure that any fumes released during the cleaning don't linger in the air. Open windows and doors to allow fresh air to circulate through the room. If possible, use fans to help push the fumes outside. This step is vital for your safety and to prevent any odors from lingering in your home.

Proper ventilation not only protects your health but also aids in the removal of the melted plastic. The airflow created by good ventilation can help disperse any lingering fumes and prevent them from settling back onto the carpet. By taking this simple precaution, you're ensuring a more efficient and thorough cleaning process.

Use of Warm Iron to Heat Plastic

heating plastic with iron

To effectively remove melted plastic from your carpet runner, follow these steps:

Start by using a warm iron to heat the affected area.

Gently scrape off the softened plastic residue with a dull knife or scraper.

Heat Plastic With Iron

How can you effectively utilize a warm iron to heat and remove melted plastic from a carpet?

Advertisement

When faced with melted plastic on your carpet, employing a warm iron can be a practical solution. Here's how you can use this method successfully:

  1. Set the iron to a low temperature: Make sure the iron is on a low setting to gently heat the melted plastic without causing damage to the carpet fibers.
  2. Cover the plastic with a cloth or paper towel: Place a protective barrier over the melted plastic to prevent direct contact with the iron, reducing the risk of further damage to the carpet.
  3. Apply the warm iron over the covered plastic: Gently move the iron over the paper towel-covered plastic to soften it. This process will make it easier to lift and remove the melted plastic from the carpet. Remember not to use high heat settings to avoid harming the carpet further.

Scrape off Melted Plastic

Scraping off melted plastic from your carpet using a warm iron can effectively remove as much residue as possible before employing further cleaning methods. Begin by gently scraping the melted plastic with a plastic scraper or a dull knife to lift off as many pieces as you can.

Then, set a warm household iron to a low heat setting and place a protective barrier like paper towels over the plastic residue. Press the iron onto the paper towels covering the plastic for short intervals, allowing the heat to soften the plastic without overheating the carpet fibers.

Be cautious as you work, gradually increasing the heat setting of the iron if needed, to avoid scorching or damaging the carpet beneath. The softened plastic should start to adhere to the paper towels, making it easier to scrape off with the plastic scraper.

Repeat the heating and scraping process until the melted plastic is entirely removed, leaving your carpet clean and plastic-free.

Clean Residue With Solvent

You can effectively clean residue from melted plastic on your carpet by utilizing the warmth of a household iron.

Advertisement

Follow these steps to remove the plastic remnants with ease:

  1. Heat the Residue: Place a piece of parchment paper over the melted plastic and run a warm iron over it. The heat will soften the plastic, making it easier to remove.
  2. Apply Goo Gone: Use a solvent like Goo Gone to break down the plastic residue further. Apply the solvent to the affected area and let it sit for a few minutes to work its magic.
  3. Scrape off the Residue: Gently scrape off the softened plastic with a dull knife or a plastic scraper. Be careful not to damage the carpet fibers while removing the residue.

Gentle Scraping With Plastic Tool

gentle facial exfoliation method

To start removing melted plastic from your carpet, grab a plastic scraper or credit card for gentle scraping. Remember to avoid sharp tools that could harm the carpet fibers and begin scraping from the outer edges towards the center.

Apply light pressure and take your time to carefully lift off the melted plastic without causing more damage.

Plastic Scraper Method

Consider utilizing a plastic spatula for gently removing melted plastic from the carpet runner. Remember to avoid using sharp tools that could potentially damage the carpet fibers during the scraping process.

Slowly and carefully scrape off the melted plastic to prevent further spreading or embedding in the carpet. It's crucial to work in small sections and gradually lift the melted plastic from the carpet to guarantee thorough removal.

Be patient and continue scraping until all visible plastic has been successfully removed, taking care not to pull or tug on the carpet fibers to prevent any unnecessary damage. By following these steps and using a plastic scraper method, you can effectively tackle the issue of melted plastic on your carpet without causing additional harm.

Advertisement

Careful Removal Technique

For a gentle and effective approach to removing melted plastic from your carpet, utilize a plastic tool such as a credit card or plastic scraper. When scraping off melted plastic, it's important to opt for plastic tools to prevent further damage to the carpet fibers.

Sharp or metal tools should be avoided as they can cause more harm. Plastic scrapers like credit cards work well in softly lifting the melted plastic without causing additional damage. Remember to work slowly and carefully when scraping to prevent spreading the melted plastic further into the carpet fibers.

Before starting the removal process, test the plastic tool on a small hidden area of the carpet to make sure it doesn't cause any harm. By following these careful scraping techniques with a plastic tool, you can effectively remove melted plastic from your carpet without causing more damage.

Cleaning With Carpet Cleaner

freshening up carpets easily

Using a carpet cleaner specifically formulated for removing melted plastic stains is the recommended method for cleaning the affected area.

Follow these steps for effective removal:

  1. Choose the Right Product: Select a carpet cleaner designed to tackle melted plastic stains. Make sure it's suitable for your carpet type.
  2. Read and Follow Instructions: Before application, carefully read the instructions provided on the carpet cleaner packaging. Following the guidelines will yield the best results.
  3. Test Before Application: Prior to applying the cleaner to the entire affected area, test it on a small, inconspicuous part of the carpet. This step helps confirm that the cleaner is compatible and won't cause damage.

Using Dish Soap and Warm Water

effective cleaning method choice

Mix dish soap with warm water to create a soapy solution for cleaning melted plastic off a carpet runner quickly and effectively. Gently scrub the affected area with the soapy mixture to help loosen the melted plastic residue. Be sure to use a clean cloth to blot and lift the melted plastic from the carpet runner. Repeat the process as necessary until all traces of the melted plastic have been removed from the carpet.

After cleaning, rinse the area with clean water to remove any soap residue, then allow it to dry completely.

Advertisement

Using dish soap and warm water is an efficient method for tackling melted plastic on your carpet runner. The combination of dish soap's cleaning power and warm water's ability to break down the plastic can effectively remove the stubborn mess. Remember to be patient and thorough in your cleaning process to guarantee the best results.

Restoring Carpet Runner Fibers

reviving carpet runner fibers

To restore carpet runner fibers after removing melted plastic, consider utilizing a household iron along with paper towels. Here are three important steps to help you effectively restore the affected area:

  1. Adjust Iron Settings: Set the household iron to a wool setting without steam to prevent damaging the carpet fibers. Gradually increase the heat to soften the melted plastic for easier removal without causing further harm.
  2. Careful Removal: Use a dull knife for better control when scraping off the melted plastic. This will help prevent any accidental tearing or damage to the carpet fibers during the removal process.
  3. Thorough Cleaning: After successfully removing the melted plastic, make sure you clean the treated area thoroughly. This step is essential to guarantee that no residue remains, maintaining the carpet's cleanliness and appearance.

Tips for Preventing Future Incidents

prevent future incidents effectively

Consider utilizing protective barriers like silicone mats or trivets under hot objects to prevent future incidents of melted plastic on carpet runners. Placing hot items directly on carpets increases the risk of plastic melting, so using these barriers acts as a shield for your carpet.

It's important to educate household members on handling hot items carefully around carpeted areas to prevent accidents. Regularly inspecting and maintaining appliances and tools that could cause melted plastic incidents is vital.

Implementing a designated area for hot items can further reduce the risk of plastic melting on your carpet. By taking these preventive measures, you can greatly lower the chances of encountering melted plastic on your carpet runners.

Final Steps for Clean Carpet Finish

carpet cleaning completion checklist

For a clean carpet finish post-melted plastic removal, thorough cleaning and monitoring are vital steps to guarantee no residue or damage remains.

Here are three essential final steps to achieve a pristine carpet:

  1. Thorough Cleaning: After removing the melted plastic, clean the carpet meticulously to make sure no remaining plastic bits or residue are left behind. Use a carpet cleaner or a mixture of mild detergent and water to scrub the affected area gently. Rinse with clean water and blot dry with a clean cloth to remove any cleaning solution residue.
  2. Monitor for Damage: Regularly inspect the cleaned area for any signs of damage or discoloration. If you notice any issues such as melted fibers or changes in color, consider seeking professional help to address the damage promptly.
  3. Preventive Measures: To avoid future incidents of melted plastic on the carpet, be cautious with hot items near carpets and consider using protective mats in high-risk areas to prevent accidents. Regular maintenance and quick action can help keep your carpet looking its best.

Frequently Asked Questions

How Do You Get Melted Plastic Out of Carpet?

To get melted plastic out of carpet, use a household iron with paper towels as a barrier. Remember to set it to a wool setting without steam and start with low heat. Use a dull knife for control, then clean the carpet thoroughly after.

What Dissolves Melted Plastic?

To dissolve melted plastic on carpet, you can use acetone, WD-40, baking soda paste, or Goo Gone. These solvents effectively break down the plastic without causing further damage to your carpet fibers. Choose wisely!

Advertisement

Will Goo Gone Remove Melted Plastic?

You might find that applying Goo Gone to the melted plastic effectively removes it from carpets. Let it sit, then scrape away the residue. Guarantee a thorough cleaning afterward to eliminate any remnants.

How to Get Melted Rubber off of Carpet?

To remove melted rubber from carpet, gently scrape with a dull knife. Apply WD-40 or acetone to dissolve the residue. Blot with a cloth to absorb. Avoid heat or force. If stubborn, seek professional help.

What is the Quick Fix for Melted Plastic on Carpet and Wax?

To remove melted plastic from carpet, place a bag of ice over the affected area to harden the plastic. Once hardened, carefully scrape off the plastic with a butter knife. Use a hairdryer to melt any remaining plastic and blot with a paper towel. Apply carpet cleaner to remove any residue.

Conclusion

To sum up, removing melted plastic from carpet can be a simple process with the right tools and techniques. By using a warm iron, gentle scraping, and cleaning with carpet cleaner, you can restore your carpet to its original state.

Remember to take precautions and follow the steps carefully to prevent any damage to your carpet. With a little patience and effort, you can have a clean and plastic-free carpet once again.

Advertisement
Continue Reading
Advertisement

Affiliate disclaimer

As an affiliate, we may earn a commission from qualifying purchases. We get commissions for purchases made through links on this website from Amazon and other third parties.

Advertisement
Advertisement

Trending