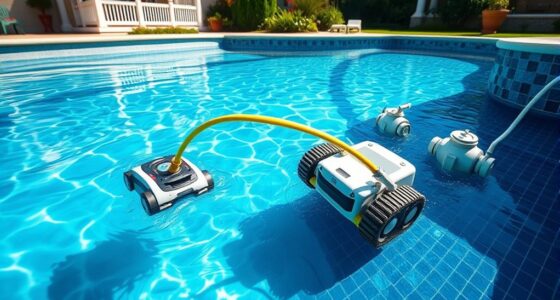
To replace worn parts on your robotic pool cleaner, start by inspecting for signs of wear like rust, scratches, or decreased suction. Gather the necessary replacements such as filters, brushes, or drive belts, and tools like screwdrivers and pliers. Carefully remove the damaged components, following manufacturer instructions, and install the new ones properly, ensuring secure connections. After reassembling, test your cleaner to confirm it functions smoothly—continue on to learn exact steps and tips for a hassle-free upgrade.
Key Takeaways
- Identify worn parts such as brushes, filters, impellers, and drive belts through visual inspection and performance issues.
- Gather compatible replacement parts and tools, reviewing manufacturer guidelines and maintenance schedules.
- Disconnect power and carefully remove worn components using appropriate hand tools, following manufacturer instructions.
- Install new parts securely, ensuring proper fit and connection, then perform software calibration if necessary.
- Test the robotic cleaner’s movement and water flow post-repair to confirm optimal operation and performance.
Top picks for "replac worn part"
Open Amazon search results for this keyword.
As an affiliate, we earn on qualifying purchases.
Identifying Signs of Wear and Tear
To keep your robotic pool cleaner functioning efficiently, you need to recognize the signs of wear and tear early on. One common indicator is rust buildup, which can appear on metal parts and reduce performance. If you notice corrosion or flaky spots, it’s time to inspect the affected components closely. Battery degradation is another key sign; if your cleaner doesn’t hold a charge as long as it used to or shuts off prematurely, the battery may be failing. Additionally, watch for decreased suction, unusual noises, or erratic movement. These issues often signal that parts are wearing out or need attention. By staying alert to rust buildup and battery health, you can address problems promptly, extending your robotic pool cleaner’s lifespan and maintaining optimal cleaning performance. Monitoring wear and tear signs and understanding the importance of regular maintenance can also help you evaluate whether your appliance’s performance is being affected by internal issues, ensuring your home appliance setup remains optimal. Regularly checking for wear and tear signs, such as cracks or broken components, can prevent minor problems from escalating into major repairs.
Gathering Necessary Replacement Parts and Tools

Before you start replacing parts, you need to gather the essential replacement components and the right tools. Make sure you identify the specific parts your cleaner needs and select tools that won’t damage the equipment. Having everything ready guarantees a smooth and efficient repair process. Additionally, understanding the electric motor power of your robotic pool cleaner can help you choose compatible replacement parts and optimize its performance. Proper workspace organization is also crucial to facilitate a productive repair process and minimize errors.
Essential Replacement Parts
Gathering the right replacement parts and tools is essential to guarantee your robotic pool cleaner functions properly after wear and tear. Knowing which parts to prepare ensures minimal downtime and maintains your device’s efficiency. Common essential parts include brushes, filters, impellers, and drive belts. Before purchasing, review your maintenance schedules to determine when replacements are needed, preventing costly repairs. Also, check warranty considerations, as using non-approved parts might void your coverage. Having these key components on hand allows you to perform timely replacements, keeping your cleaner operating smoothly. Remember, using genuine parts helps preserve the integrity of your device and maintains its performance over time. Additionally, understanding the family background of your device can help in selecting compatible parts and ensuring longevity. Being aware of the filtration system type and design can also guide you in choosing the most suitable replacement filters for optimal cleaning performance. Properly stocked parts and awareness of warranty rules ensure your pool cleaner stays reliable season after season, and staying informed about common wear points can help you anticipate future maintenance needs. Regular inspection of wear and tear areas can extend the lifespan of your cleaner and improve its efficiency. Incorporating maintenance best practices into your routine can further enhance the durability of your robotic pool cleaner.
Proper Tool Selection
Selecting the right tools is essential for efficiently replacing worn parts on your robotic pool cleaner. You’ll need basic hand tools like screwdrivers, pliers, and possibly a wrench, depending on your model. Proper tools help prevent damage to delicate components during battery maintenance or when installing new parts. Make sure you have a clean workspace to keep screws and small parts organized. Additionally, if your cleaner requires software updates, ensure your device is compatible with the update process, which may involve a USB drive or specific software. Having the correct tools on hand makes it easier to access internal components, replace worn parts, and perform firmware updates smoothly. Proper tool selection minimizes frustration and helps guarantee your robotic pool cleaner functions at its best. Using appropriate tools can also help preserve the integrity of sensitive electronic parts during maintenance. Furthermore, understanding the specific GMC tuning techniques can assist in diagnosing and addressing potential issues with related vehicle components.
Additionally, choosing the right tools can also facilitate preventing damage to your device, ensuring longevity and reliable operation over time.
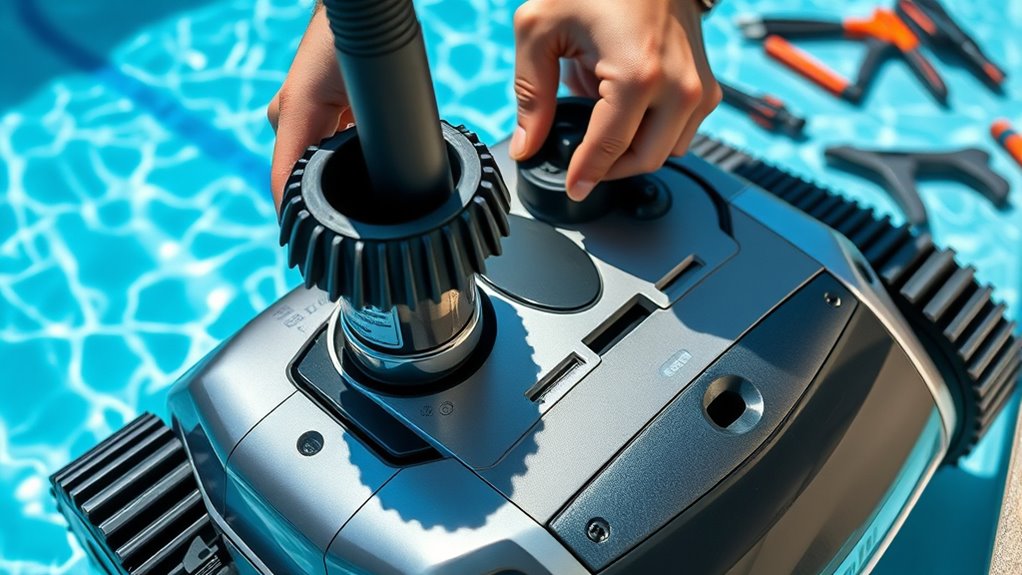
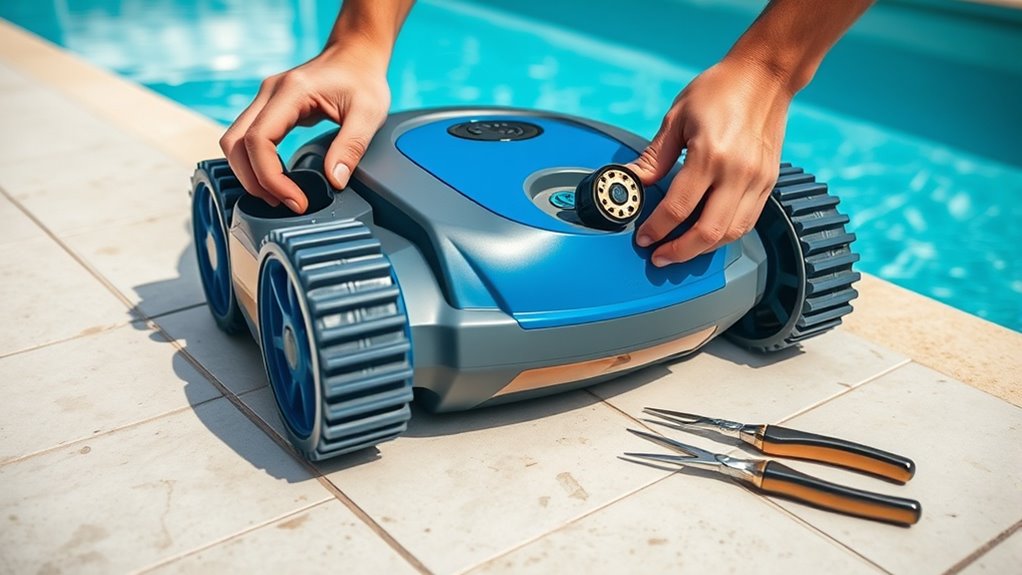
Removing and Replacing Brush Attachments

To replace the brush attachments on your robotic pool cleaner, start by turning off the device and unplugging it from the power source to guarantee safety. Carefully remove the worn brushes by pressing the release tabs or unscrewing the attachments, depending on your model. Once removed, align the new brushes and secure them firmly. Proper maintenance tips include checking for debris and wear regularly to extend your cleaner’s lifespan. Regularly inspecting your device helps prevent common issues and ensures optimal performance. Additionally, considering Kia Tuning techniques can inspire innovative ways to upgrade your pool cleaner’s efficiency and durability. Monitoring the fetal development during the replacement process can help ensure the device functions correctly without interference. Being aware of eye patch benefits can also be useful for understanding how to care for delicate components that may be part of your maintenance routine. Incorporating vibrational energy awareness can further optimize your maintenance approach, ensuring your device remains in peak condition.
Swapping Out Worn Filters Effectively
To keep your pool cleaner running efficiently, you need to identify worn filters that can no longer trap debris effectively. Carefully remove the old filters using proper techniques to avoid damage or spills. Once out, install the new filters securely, ensuring they fit properly for maximum performance. Regularly inspecting and replacing filters also helps maintain the cleaner’s cleaning efficiency and prolongs its lifespan.
Identifying Worn Filters
How can you tell when your pool cleaner’s filters are worn out? Over time, filters lose their effectiveness, which can be noticed by decreased cleaning performance or visible dirt buildup. Check the filter material for signs of tears, holes, or significant clogging that won’t clear with rinsing. The filter lifespan varies depending on usage and water conditions, but if your cleaner struggles to pick up debris or needs frequent cleaning, it’s a sign to inspect the filters. Worn filters often look frayed or damaged, indicating they’ve reached the end of their effective life. Replacing filters before they become too worn ensures your robotic cleaner continues to operate efficiently. Regular inspection helps you catch wear early, maintaining excellent cleaning power. Incorporating filter maintenance strategies can help you determine the optimal replacement schedule based on your specific cleaning patterns and water quality.
Proper Removal Techniques
When it’s time to replace worn filters, using proper removal techniques helps prevent damage and guarantees your robotic pool cleaner stays in top shape. Carefully disconnect the filter housing, avoiding force that could harm internal components. While removing filters, check your battery maintenance; ensure the device is unplugged or powered down to avoid electrical issues. Handling filters gently prevents cracks or tears. During this process, it’s also a good opportunity to verify that your software updates are current, as some models require updates to optimize filter performance. Keep track of the filter’s placement to ensure proper reinstallation later. Proper removal not only extends the lifespan of your filters but also maintains the overall functionality of your robotic pool cleaner.
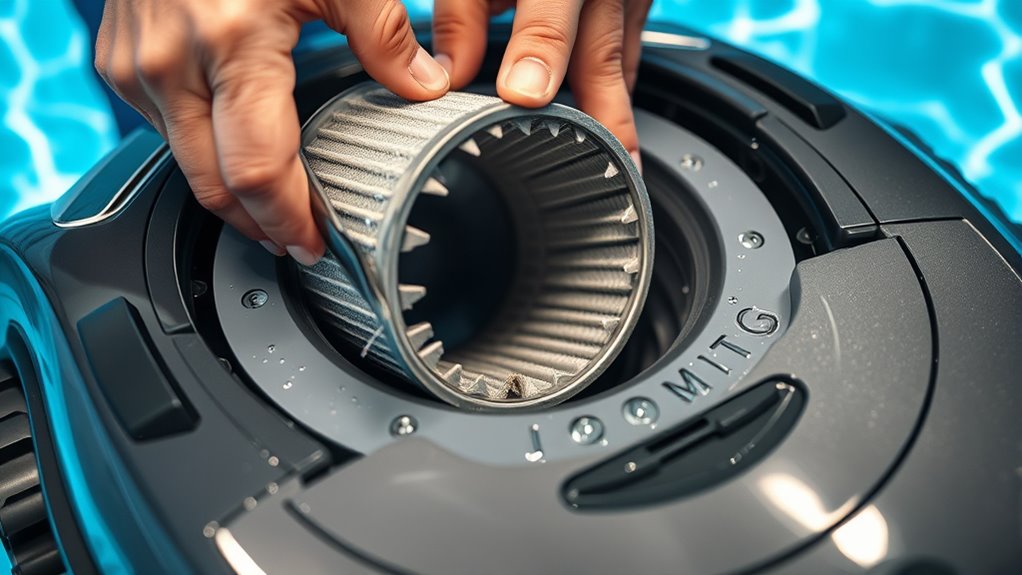
Installing New Filters
Replacing your filters properly guarantees your robotic pool cleaner continues to operate efficiently. To guarantee ideal water filtration, carefully remove the worn filters following the manufacturer’s instructions. Gently take out the old filters, avoiding damage to the filter housing. Before installing new filters, inspect them for any defects or debris. Insert the new filters firmly into their designated slots, ensuring they sit securely. Proper filter maintenance is essential, as clogged or worn filters hinder water flow and reduce cleaning effectiveness. Regularly replacing filters keeps water filtration at its best, prolonging the lifespan of your cleaner. Once installed, run the pool cleaner briefly to verify correct installation and ideal water flow. Effective filter replacement maintains your pool’s cleanliness and the efficiency of your robotic cleaner.
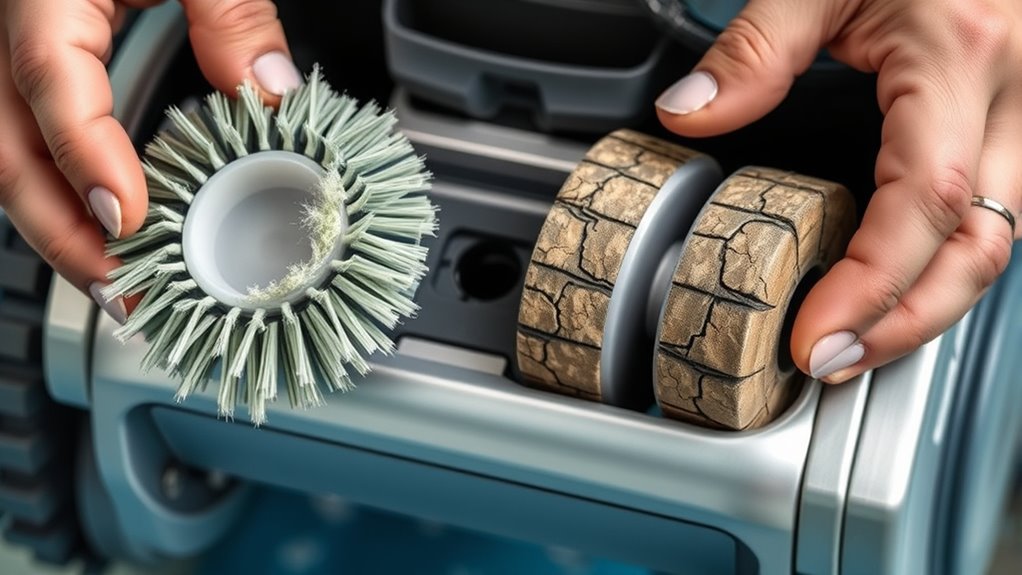
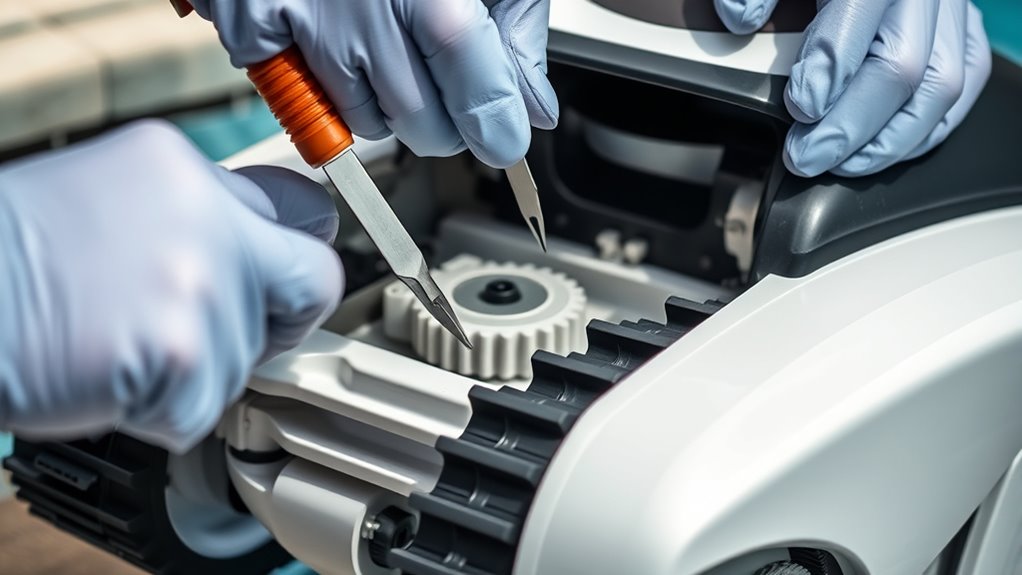
Replacing Damaged Propellers and Drive Belts
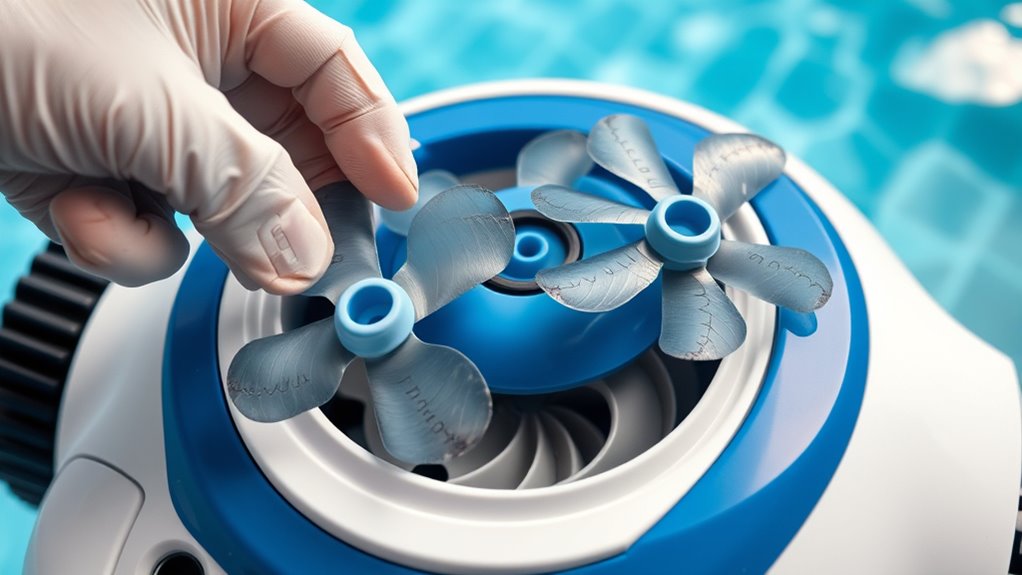
Damaged propellers and drive belts can considerably impair your robotic pool cleaner’s performance, so replacing them promptly is essential. When replacing these parts, ensure your robotic arm maintenance is up to date to avoid further issues. Remove the old propellers and belts carefully, following the manufacturer’s instructions. Check for any debris or damage that may have caused the wear. Once replaced, perform the necessary software calibration procedures to guarantee superior operation. Proper calibration helps your cleaner navigate efficiently and maintain proper cleaning cycles. Remember to inspect the surrounding areas for wear or damage during maintenance. Using quality replacement parts will extend your cleaner’s lifespan and keep it running smoothly. Regularly maintaining these components prevents costly repairs and maintains peak cleaning performance.
Inspecting and Replacing the Power Cord and Connectors
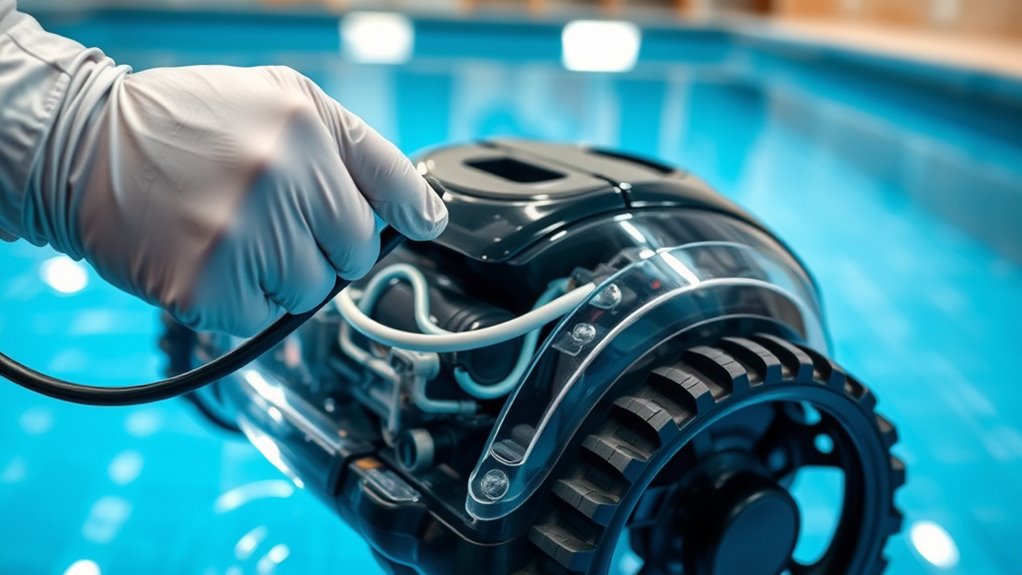
Regularly inspecting the power cord and connectors guarantees your robotic pool cleaner operates safely and efficiently. Look for signs of wear, fraying, or corrosion that could compromise electrical safety. When replacing parts, keep these considerations in mind:
- Check for Damage: Examine the cord and connectors for cuts, cracks, or loose fittings.
- Ensure Compatibility: Use replacement cords and connectors specifically designed for your model to avoid compatibility issues.
- Prioritize Safety: Always disconnect the power before inspection or replacement to prevent electrical hazards.
Reassembling Your Robotic Cleaner Safely
After inspecting and replacing the power cord and connectors, carefully reassemble your robotic pool cleaner to guarantee it operates safely. Proper reassembly is essential for effective pool maintenance and to prevent malfunctions. Follow the manufacturer’s instructions closely, ensuring all parts fit securely and align correctly. Double-check that wiring connections are tight and insulated to avoid electrical hazards. Use safety precautions like unplugging the unit during reassembly and working in a dry area. Handle all components gently to prevent damage. Confirm that all screws and clips are fastened properly. Taking your time during reassembly helps ensure the cleaner functions safely and efficiently, reducing the risk of leaks or electrical issues. Remember, safety always comes first in pool maintenance projects.
Testing the Unit Post-Replacement for Optimal Performance
Once you’ve completed reassembly, it’s crucial to test your robotic pool cleaner to make certain it’s functioning correctly. Start by powering it on and observing its movement to guarantee smooth operation. Check that the brushes and wheels are turning properly, and listen for unusual noises. Next, verify that the water flow is adequate and the suction is strong, indicating effective cleaning. Don’t forget to review the battery maintenance: charge the unit fully and confirm it holds the charge. Finally, run a software update if applicable, ensuring your cleaner has the latest features and fixes.
- Confirm the cleaner navigates the pool efficiently
- Make sure the battery charges correctly and maintains power
- Update the software for peak performance
Frequently Asked Questions
How Often Should I Schedule Maintenance for My Robotic Pool Cleaner?
You should schedule your pool cleaning regularly to keep it in top shape. Typically, a weekly pool cleaning schedule works well, especially during peak swimming season. Incorporate robotic maintenance tips like checking brushes, filters, and sensors monthly to prevent issues. Regular maintenance ensures your robotic cleaner functions efficiently, extends its lifespan, and keeps your pool sparkling. Adjust the schedule based on pool usage and environmental factors for ideal results.
Can I Replace Parts Myself or Should I Hire a Professional?
Deciding between DIY repairs or professional servicing depends on your confidence and skill. If you’re comfortable troubleshooting, replacing worn parts yourself can save time and money. However, for complex issues or safety concerns, hiring a professional guarantees proper repairs and avoids damage. Ultimately, weigh your experience, the task’s difficulty, and the importance of a thorough fix to choose the best option for your robotic pool cleaner.
Are There Compatibility Issues With Generic Replacement Parts?
When considering generic parts, you might wonder about compatibility concerns. You can often find compatible generic parts that work well, but it’s essential to verify the model and specifications carefully. Some generic parts may not fit perfectly or could affect the cleaner’s performance. To avoid issues, compare the part numbers and reviews, and when in doubt, consult the manufacturer or a professional to ensure compatibility.
What Safety Precautions Should I Take During Repairs?
When doing repairs, you should prioritize electrical safety and tool safety. Always disconnect the power supply before working on your robotic pool cleaner to prevent electrical shocks. Wear protective gloves and goggles to avoid injuries from sharp parts or debris. Use the correct tools carefully, following the manufacturer’s instructions. Keep your work area dry and well-lit, and avoid rushing to guarantee your safety throughout the repair process.
How Long Does a Typical Replacement Process Usually Take?
When you’re replacing parts, the repair duration varies based on your experience and the complexity of the task. Typically, it takes about 30 minutes to an hour to swap out replacement parts, but simpler repairs might take less time. Make sure you have all necessary tools ready, follow instructions carefully, and take your time to prevent mistakes. This way, you can efficiently complete the replacement process without unnecessary delays.
Conclusion
Think of your robotic pool cleaner as a trusted partner in maintaining your pool’s sparkle. By replacing worn parts, you’re rejuvenating its spirit and ensuring it continues to serve you well. When you give it new life, you’re not just fixing a machine—you’re restoring its purpose and your peace of mind. Keep it well-maintained, and it’ll keep your pool shining, symbolizing the care and attention that keeps everything in your life flowing smoothly.