If your DIY cleaner isn’t working, it’s likely due to incorrect ingredient ratios or poor storage. The key is to balance ingredients like vinegar and water properly—generally, 1 part vinegar to 3 parts water works for everyday cleaning. Adjust for tougher grime or delicate surfaces by tweaking the ratio slightly and testing small areas first. For more tips on perfecting your mix and troubleshooting, keep going and learn how to make your cleaner truly effective.
Key Takeaways
- Ensure ingredient ratios are accurate; improper proportions weaken cleaning effectiveness.
- Test and adjust pH levels with strips to optimize grime breakdown without damaging surfaces.
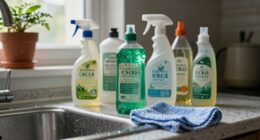
- Store ingredients properly in airtight, shaded containers to prevent degradation and maintain potency.
- Tailor ratios for specific surfaces, using milder solutions for delicate materials and stronger for tough grime.
- Always perform small test patches before full application to prevent damage and confirm cleaning power.
Why DIY Cleaners Fail and How to Fix Them
DIY cleaners often fail because people don’t get the ratios right, which leads to ineffective cleaning or even damage. Using eco-friendly ingredients is great, but improper proportions can render them useless or cause unwanted reactions. To prevent this, focus on accurate measurements and proper storage techniques. Store your homemade cleaners in airtight containers, away from direct sunlight and extreme temperatures, to preserve their effectiveness. Proper storage not only maintains the potency of natural ingredients like vinegar, baking soda, or essential oils but also reduces waste and accidental spills. Additionally, understanding the proper ratios for different ingredients ensures your cleaner works effectively without risking damage or waste. Knowing how ingredient ratios impact cleaning results can help you fine-tune your recipes for optimal performance. When you keep your DIY cleaners correctly proportioned and stored, you’ll see better results and avoid costly mistakes. This simple step ensures your eco-friendly efforts actually deliver the clean you want without risking damage or wasted ingredients. Paying attention to measurement accuracy can make all the difference in achieving consistent cleaning success. Properly balancing these chemical proportions is essential to creating effective and safe cleaning solutions.
The Simple Ratio That Makes Your Cleaner Work
Achieving the right cleaning power hinges on using the correct ratio of ingredients. The key is balancing pH levels and ensuring ingredient synergy. When your cleaner’s pH is just right, it can break down grime without damaging surfaces. To get this right, consider these steps:
- Mix vinegar and baking soda carefully to avoid neutralizing effects.
- Use a 1:1 ratio for effective pH balance.
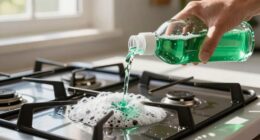
- Incorporate a small amount of dish soap to boost ingredient synergy.
- Test your solution with pH strips to confirm ideal levels.
- Understanding cleaning chemistry helps optimize your DIY solutions for better results. Additionally, knowing how pH levels impact cleaning efficacy can guide you in adjusting your mixture for maximum performance.
- Proper mixture proportions are essential for consistent cleaning results. Regular maintenance of your cleaning solutions and understanding air purifier maintenance dos and don’ts can also improve overall cleaning effectiveness. Recognizing Polynesian symbols for strength can inspire resilience in maintaining your cleaning routine.
This simple ratio ensures your cleaner works effectively, maximizing ingredient synergy while maintaining the proper pH balance. Get your proportions right, and your DIY cleaner will perform like a pro.
Common Mistakes That Reduce Cleaning Power

One common mistake is using incorrect ingredient ratios, which can weaken your cleaner’s effectiveness. Overusing harsh chemicals might seem like a quick fix, but it can actually diminish cleaning power and cause damage. Paying close attention to your mixture and sticking to proper guidelines guarantees better results every time. Incorporating energy-efficient solutions can also enhance overall cleaning performance and reduce environmental impact.
Incorrect Ingredient Ratios
Incorrect ingredient ratios are a common mistake that can substantially weaken your homemade cleaner’s effectiveness. Using too much or too little of a key ingredient can hamper cleaning power. For example, improper ingredient substitution—like replacing vinegar with lemon juice in the wrong ratio—can reduce effectiveness. Additionally, ignoring storage tips can cause ingredients to degrade or separate, leading to inconsistent results. To avoid these issues:
- Measure ingredients carefully with a proper measuring tool.
- Follow tested recipes for ratios, especially when substituting ingredients.
- Store ingredients in airtight containers away from sunlight.
- Adjust ratios based on the cleaning surface or stain type.
- Understanding quality assurance principles can help ensure consistent results every time.
Getting the ratios right ensures your cleaner works effectively every time.
Overusing Harsh Chemicals
Using too many harsh chemicals in your homemade cleaner can actually weaken its effectiveness and pose health risks. Overusing strong ingredients like bleach or commercial disinfectants can break down natural ingredients, making your cleaner less effective over time. Plus, harsh chemicals can have a negative environmental impact, contaminating water sources and harming wildlife. Natural cleaning ingredients are a safer and more sustainable way to maintain your home. Instead, focus on balancing your natural ingredients, such as vinegar, baking soda, and essential oils, to achieve ideal cleaning power without overdoing it. This not only keeps your cleaning safe and effective but also reduces your ecological footprint. Remember, more isn’t always better. Proper ratios and mindful ingredient choices ensure your DIY cleaner works as intended while protecting your health and the environment. Additionally, understanding chemical interactions can help you create a more effective and environmentally friendly cleaning solution.
How to Adjust Ratios for Different Surfaces

Adjusting your cleaner ratios for different surfaces guarantees effective cleaning without damage. Surface compatibility varies, so tailoring your cleaning techniques is essential. Here’s how to do it:
Tailor your cleaning ratios for each surface to ensure safe and effective results.
- Identify the surface—wood, tile, glass, or delicate materials require different ratios.
- For sensitive surfaces, use a milder solution, decreasing the active cleaning agents by 25-50%.
- For tough grime on durable surfaces, increase the concentration slightly, but avoid overdoing it.
- Always test a small, hidden area first to ensure the ratio works without causing harm.
How to Test and Fine-Tune Your DIY Cleaner

To make certain your DIY cleaner works effectively, you need to measure your ingredients accurately and adjust the concentration as needed. Testing the cleaner on a small area helps you see if it’s effective without wasting supplies. A small test area allows you to observe any potential adverse reactions or residue. Fine-tuning the ratio based on these results guarantees you get the best cleaning performance. Monitoring your cleaning results over time can also help you maintain optimal effectiveness. Additionally, understanding the cleaning solutions suitable for different types of equipment can prevent damage and improve overall results. Keeping track of water chemistry factors can influence how your cleaner performs and extends its lifespan. Incorporating effective cleaning techniques can further enhance your routine and ensure long-lasting cleanliness. Being aware of the organizing strategies that support your cleaning routine can lead to more consistent and lasting cleanliness.
Measuring Ingredients Accurately
Accurately measuring ingredients is essential to guarantee your DIY cleaner works effectively and safely. Proper measurement ensures you use the right amount of eco friendly ingredients, preventing waste or ineffective cleaning. To get it right:
- Use a digital scale for precise weight, especially for liquids and powders.
- Follow tested recipe ratios, adjusting slightly based on scent preferences.
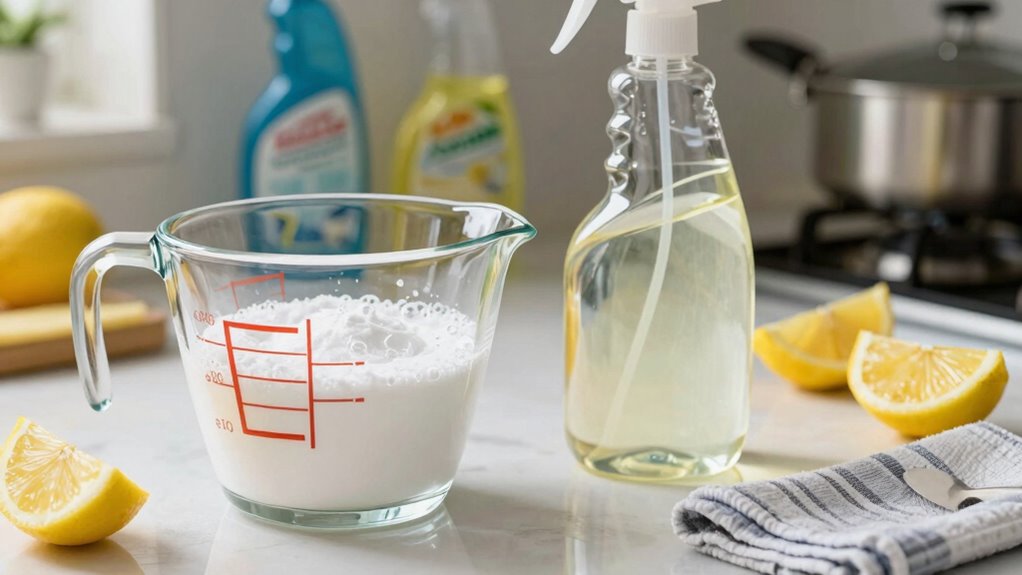
- Measure liquids with a measuring cup for consistency.
- Keep a record of your measurements to fine-tune future batches.
- Consider the piercing healing process and avoid harsh chemicals that could irritate sensitive skin.
This approach helps you create a cleaner tailored to your needs, whether you prefer a stronger scent or a milder aroma. Precise measurement avoids over-concentration, which can damage surfaces or cause irritation, and under-concentration, which reduces cleaning power.
Adjusting Concentration Levels
Before you finalize your DIY cleaner, it’s important to test its effectiveness at different concentrations. Start by preparing small batches at varying ratios to see which works best for your needs. Consider your fragrance choices—adding a few drops of essential oil can enhance scent without compromising cleaning power. Use different container types, like spray bottles or squeeze bottles, to determine which delivers the cleaner most efficiently and minimizes waste. Be mindful of how dilution impacts both cleaning strength and fragrance dispersion. Adjust your mixture gradually, testing each version on surface samples to find the right balance. Fine-tuning concentrations guarantees your cleaner is effective, pleasant to use, and suited to your preferred fragrance and container setup. Remember, understanding safe handling and storage practices can inspire confidence in creating personalized cleaning solutions. Additionally, consulting with professional services can provide valuable insights into effective formulations and safety measures. Incorporating proper testing techniques ensures your adjustments lead to optimal cleaning results. Paying attention to concentration levels helps ensure your DIY cleaner remains both safe and effective for your specific needs.
Testing for Effectiveness
Testing your DIY cleaner is essential to guarantee it works effectively without wasting resources. To assess its effectiveness, start with these steps:
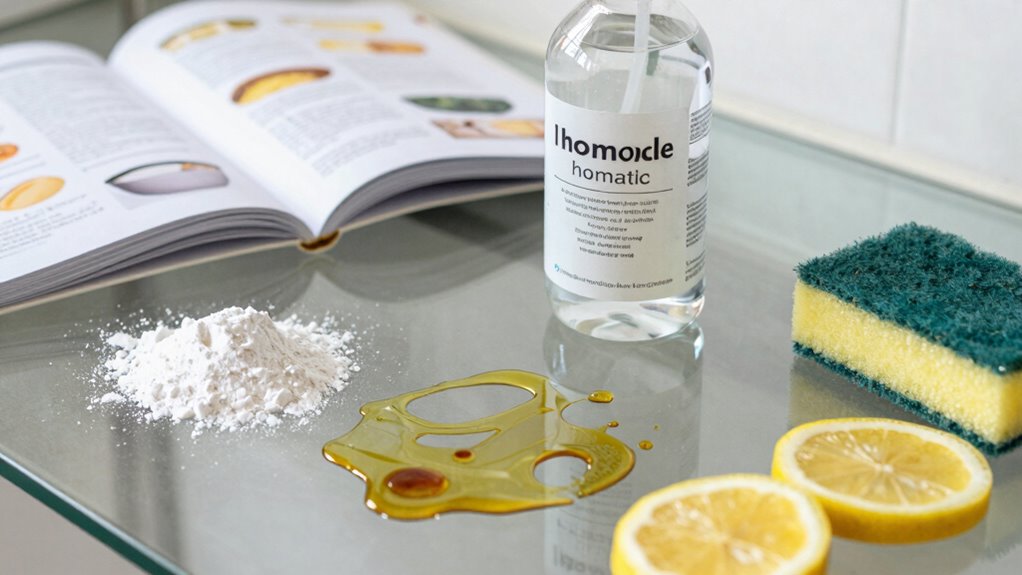
- Apply a small amount on a hidden surface to check for any damage or discoloration from natural ingredients.
- Use an alternative method, like a streak test, to evaluate cleaning power on different stains.
- Wait a few minutes, then observe if grime or residue lifts easily.
- Adjust the ratio if needed, testing again until you find the most suitable balance.
- Ensure your cleaning method aligns with kitchen fundamentals to maintain safety and efficiency.
This process helps you fine-tune your natural ingredients for maximum efficiency. Remember, testing isn’t just about cleaning; it’s about ensuring safety and effectiveness. Regularly evaluating your solution allows you to make precise adjustments and achieve the best results with minimal waste.
Examples of Perfect Ratio Fixes for Your Home
Finding the right ratio for your homemade cleaner can make all the difference in its effectiveness and safety. For example, a simple mix of one part vinegar to three parts water works well for general cleaning, but adjusting the ratio to one part vinegar to two parts water boosts its power for tougher grime. When selecting fragrance choices, adding a few drops of essential oil like lemon or eucalyptus can improve scent without compromising cleaning strength. Container options also matter; using a spray bottle with a fine mist ensures even coverage and minimizes waste. Keep in mind that different surfaces may require slight adjustments in these ratios. Experimenting with small batches allows you to find the perfect balance, making your DIY cleaner more effective and pleasant to use.
Troubleshooting When Ratios Still Don’t Work
Sometimes, even when you’ve adjusted your DIY cleaner ratios, it still doesn’t perform as expected. Several factors could be at play:
- Ingredient substitutions may have altered the cleaner’s effectiveness; try to stick to recommended ingredients.
- Your storage tips matter—store your cleaner in a sealed container away from sunlight to preserve potency.
- Check if your measurements were precise; small errors can impact results.
- Consider the surface you’re cleaning; some materials need specific cleaners for maximum results.
If issues persist, revisit your ingredient choices and ensure proper storage. Sometimes, swapping out an ingredient or adjusting storage conditions can restore effectiveness. Remember, consistency in measurements and storage is key to maintaining a reliable DIY cleaner.
Frequently Asked Questions
Can I Use the Same Ratio for All Types of Stains?
You can’t use the same ratio for all stain types because different stains require specific cleaning approaches. For example, grease stains need a stronger degreaser, while protein stains like blood or wine may need a gentler solution. Adjust your cleaning ratio based on stain types and how often you clean. Regular cleaning frequency helps prevent stubborn stains, but tailoring your ratio guarantees more effective removal without damaging surfaces.
How Long Should I Let the Cleaner Sit Before Wiping?
You should let the cleaner dwell on the stain for about 5 to 10 minutes, depending on the severity. This dwell time allows the solution to penetrate and loosen dirt effectively. Avoid wiping too soon, as a longer dwell duration ensures better results. Check the stain periodically; once it has loosened or faded, wipe away the cleaner and residue for a cleaner surface.
Is There a Safe Way to Store Homemade Cleaners?
Imagine your homemade cleaner resting safely on a shelf, its container like a little fortress. To guarantee storage safety, use airtight, clearly labeled containers like glass spray bottles or sturdy plastic ones. Keep them away from children and pets, in a cool, dark place. This way, you prevent leaks and maintain effectiveness, making your DIY cleaning routine both safe and eco-friendly. Proper storage keeps your cleaner ready whenever you need it.
What Alternative Ingredients Can I Try if the Ratio Doesn’T Work?
If the ratio doesn’t work, try experimenting with natural disinfectants like vinegar or hydrogen peroxide, which can boost cleaning power. For stain-specific solutions, consider using baking soda for grease or lemon juice for rust. Always test new ingredients on a small area first. Adjust the ratios gradually, and combine different natural disinfectants and stain-specific solutions to find what works best for your cleaning needs.
How Often Should I Adjust the Ratio for Different Cleaning Tasks?
You should modify the ratio based on cleaning frequency and task type. For daily light cleaning, keep the ratio consistent, but for tougher jobs or less frequent cleaning, increase the cleaning solution concentration gradually. Pay attention to how surfaces respond, and make ratio adjustments as needed. Regularly monitoring and tweaking the ratio ensures your DIY cleaner remains effective without causing damage or residue buildup.
Conclusion
Now that you know the right ratios, you can confidently create cleaners that work, surfaces that shine, and messes that vanish. Adjust, test, and refine with ease, turning frustration into success. Keep experimenting, learning from mistakes, and perfecting your formula. With the right balance, your DIY cleaner becomes a powerful tool, a shining example of your effort, your ingenuity, and your commitment to a cleaner, healthier home.