Connect with us

Floor and Carpet Cleaning Guides

The Ultimate Guide to Cleaning Your Carpet the Right Way!

Wish to master the art of carpet cleaning?

Published

on

carpet cleaning done right

To clean your carpet the right way, regular maintenance is important. Vacuum high-traffic areas twice weekly to prevent dirt buildup. Use walk-off mats to minimize tracked dirt. Promptly attend to spills to prevent stains from setting. Rotate furniture periodically to avoid wear patterns. Utilize natural solutions like vinegar and baking soda for stain removal. Professional cleaning every 12-18 months guarantees deep cleaning. Steam cleaning with high temperatures kills bacteria efficiently. Incorporate deep cleaning for maintenance. Remember, following these steps guarantees a clean and long-lasting carpet. More insights await as you explore further.

Key Takeaways

  • Regular vacuuming and spot cleaning prevent dirt buildup and stains.
  • Use natural cleaning solutions like vinegar and baking soda for eco-friendly cleaning.
  • Rotate furniture and use walk-off mats to reduce wear and dirt accumulation.
  • Schedule professional steam cleaning every 12-18 months for deep sanitization.
  • Promptly treat spills to prevent them from setting and causing permanent stains.

Importance of Regular Carpet Cleaning

Regular carpet cleaning is vital for maintaining a healthy indoor environment and extending the lifespan of your carpet. Clean carpets not only look better but also contribute to better indoor air quality by removing dirt, allergens, and debris that can accumulate over time.

Routine cleaning is essential to prevent embedded debris from causing wear and tear on your carpet, ultimately helping to prolong its life. By deep cleaning your carpets regularly, you can guarantee that your living space remains free from harmful particles that could impact your health.

Professional carpet cleaning every 12-18 months is recommended to tackle deep-seated dirt and bacteria that normal cleaning may not address. Remember, carpets can harbor up to 4,000 times more bacteria than a toilet seat, underscoring the importance of maintaining a regular cleaning schedule to create a clean and healthy home environment.

Effective Stain Removal Techniques

stain removal strategies overview

To effectively remove stains from your carpet, act quickly by blotting instead of rubbing the affected area.

Using appropriate stain removal products tailored to the type of stain can help clean your carpet efficiently.

Remember to test any cleaning solution on a hidden spot to prevent color fading or damage before applying it to the stain.

Advertisement

Spot-Treating Tough Stains

For effectively removing tough stains on your carpet, consider utilizing specific stain removal techniques tailored to different types of spills and marks. When dealing with stubborn stains like red wine or coffee, remember to act quickly by gently blotting the area with a clean cloth instead of rubbing it in.

Here are some effective spot-treating methods for common tough stains:

  • Grease or Oil Stains: Use a mixture of water and mild dish soap to tackle these types of stains effectively.
  • Pet Urine Stains: Apply a solution of white vinegar and water to neutralize odors and deter pets from revisiting the area.
  • Ink Stains: Treat ink stains with rubbing alcohol or a commercial ink remover to prevent permanent damage to your carpet fibers.
  • Blood Stains: Utilize a combination of hydrogen peroxide and dish soap for thorough cleaning and stain removal of blood marks on your carpet.

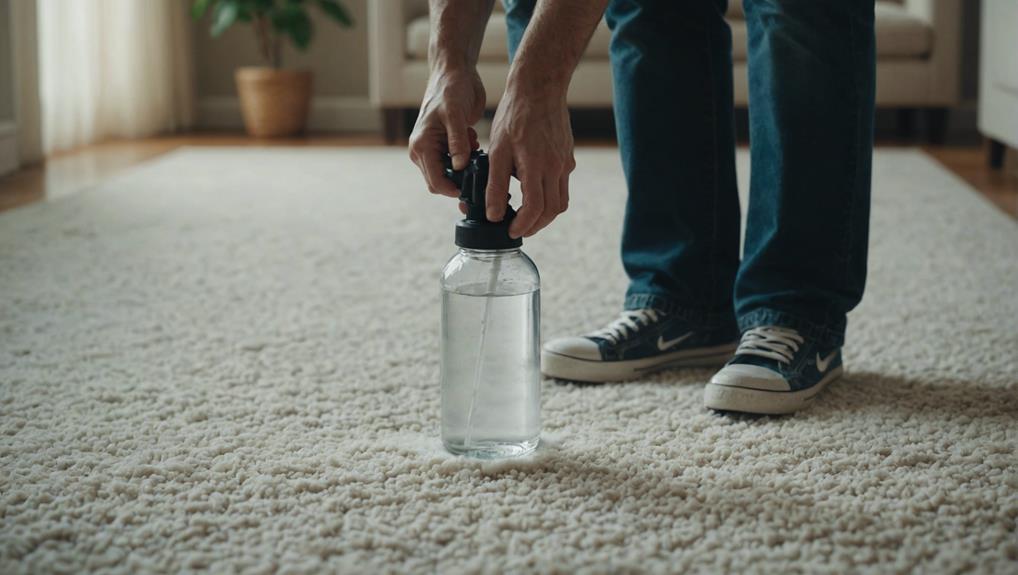
Using Natural Cleaning Solutions

When tackling tough stains on your carpet, incorporating natural cleaning solutions can provide effective stain removal techniques. Vinegar and baking soda are excellent options for breaking down stains and odors on your carpet.

Vinegar is particularly useful in guaranteeing odors and removing tough stains, leaving your carpet fresh and clean. On the other hand, baking soda is great for absorbing odors and can help neutralize stains effectively.

These natural cleaning solutions aren't only safe and environmentally friendly but also affordable options for maintaining a clean carpet. By using natural cleaning solutions, you not only assure effective stain removal but also contribute to creating a healthier indoor environment for you and your family.

Make the switch to natural cleaning solutions like vinegar and baking soda to keep your carpet clean and fresh without the use of harsh chemicals.

Advertisement

Steam Cleaning Benefits

Steam cleaning offers numerous benefits as an effective stain removal technique for your carpet. It's a deep cleaning method that can effectively remove tough stains like pet urine, grease, and coffee spills.

The high-temperature steam used in this process not only helps to remove stains but also kills bacteria, dust mites, and allergens present in your carpet fibers. Additionally, steam cleaning is an eco-friendly method that's chemical-free, making it safe for both pets and children.

This thorough clean penetrates deep into the carpet pile, lifting dirt and debris that may be trapped within. By regularly steam cleaning your carpet, you can't only prolong its life but also improve indoor air quality by removing pollutants that may be affecting your home environment.

Benefits of Using Vinegar for Cleaning

cleaning with vinegar benefits

Using vinegar for carpet cleaning offers numerous benefits. Its natural and eco-friendly properties make it a safe and effective solution for removing odors and disinfecting carpets.

The acidity of vinegar aids in breaking down stains and dirt, helping restore your carpet's appearance while being affordable and easy to find.

Vinegar's Cleaning Power

Harnessing the natural cleaning power of vinegar can transform the way you tackle carpet stains and odors. Here's why vinegar is a game-changer for carpet cleaning:

Advertisement
  • Vinegar is a natural and versatile solution for removing stains and odors from carpets.
  • The acidity in vinegar effectively breaks down dirt and grime, making it a potent cleaner for carpets.
  • Mixing vinegar with water creates an eco-friendly and non-toxic cleaning solution that's both gentle and efficient.
  • Vinegar not only helps disinfect carpets but also neutralizes pet odors, leaving your carpets fresh and clean.

Eco-Friendly Solution

Embrace the eco-friendly benefits of using white vinegar for carpet cleaning to enjoy a natural and effective cleaning solution. White vinegar serves as a natural disinfectant, effectively killing bacteria and germs on carpets without the need for harmful chemicals. Its acidic properties break down stains and odors, making it a cost-effective and environmentally friendly option for deep cleaning various carpet types.

By using a solution of vinegar and water, you can securely clean most carpets while also aiding in maintaining indoor air quality by eliminating allergens. This eco-friendly approach not only benefits the environment but also guarantees a thorough and safe carpet cleaning process for your home.

Say goodbye to harsh chemicals and embrace the power of vinegar for a greener and more sustainable way to keep your carpets clean and fresh.

Utilizing Baking Soda and Salt

natural cleaning with ingredients

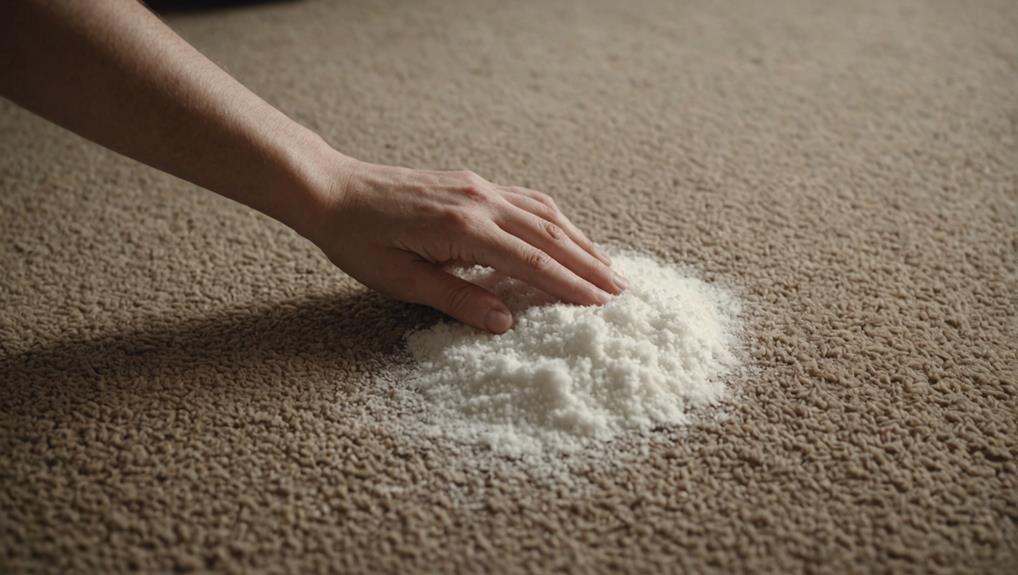
You can achieve effective carpet cleaning by combining equal parts of baking soda and salt. This DIY carpet cleaning solution is a natural method that helps absorb moisture, deodorize carpets, and tackle tough stains. Here's how to utilize baking soda and salt for a fresher-looking carpet:

  • Mix equal parts of baking soda and salt.
  • Sprinkle the mixture on the carpet.
  • Dampen the area with water.
  • Scrub the solution into the carpet to remove dirt and odors effectively.

After scrubbing, wipe away the dirt with towels and allow the carpet to air-dry completely. Once dry, vacuum up any remaining baking soda.

Using baking soda and salt is a cost-effective and eco-friendly way to deep clean your carpets without harsh chemicals. This method not only cleans but also leaves your carpets smelling fresh and looking revitalized.

Step-by-Step Guide to Steam Cleaning

steam cleaning instructions provided

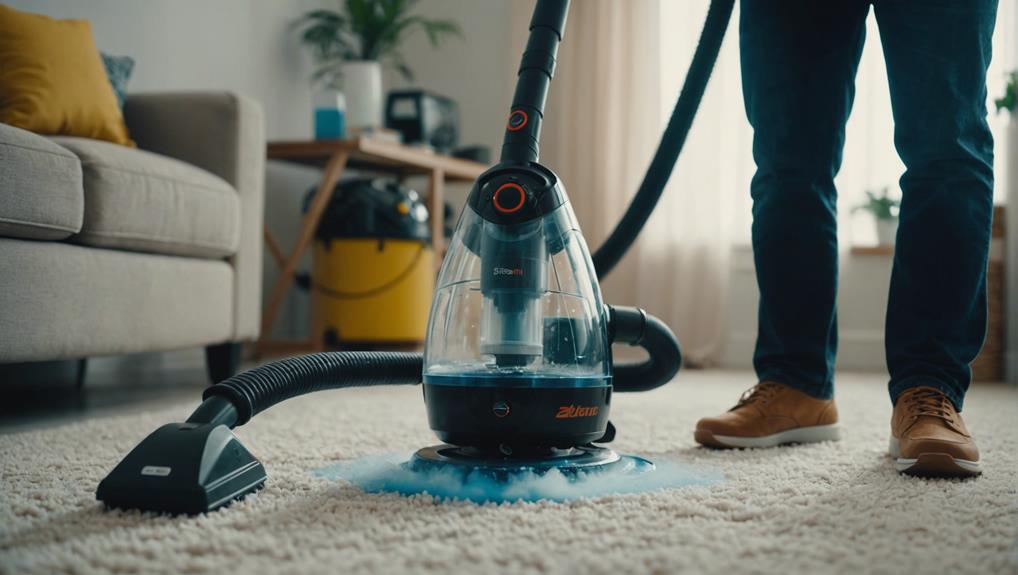
To effectively steam clean your carpet, begin by preparing the necessary equipment and space for the cleaning process. Steam cleaning, also known as hot water extraction, is a method that provides a deep clean by reaching into the carpet fibers. This process helps extract embedded dirt and grime, improving indoor air quality by removing allergens and bacteria. Professional services often use specialized equipment to guarantee a thorough clean that can extend the lifespan of your carpet.

When steam cleaning your carpet, make sure to follow the manufacturer's instructions for the cleaning solution and machine. Begin by vacuuming the carpet to remove any surface debris. Then, fill the steam cleaner with the recommended amount of water and detergent.

Slowly pass the machine over the carpet, making sure to cover the entire surface area. Allow the carpet to dry completely before walking on it again.

Advertisement

Regular steam cleaning, at least once a year, can help maintain your carpet's appearance and contribute to a healthier indoor environment.

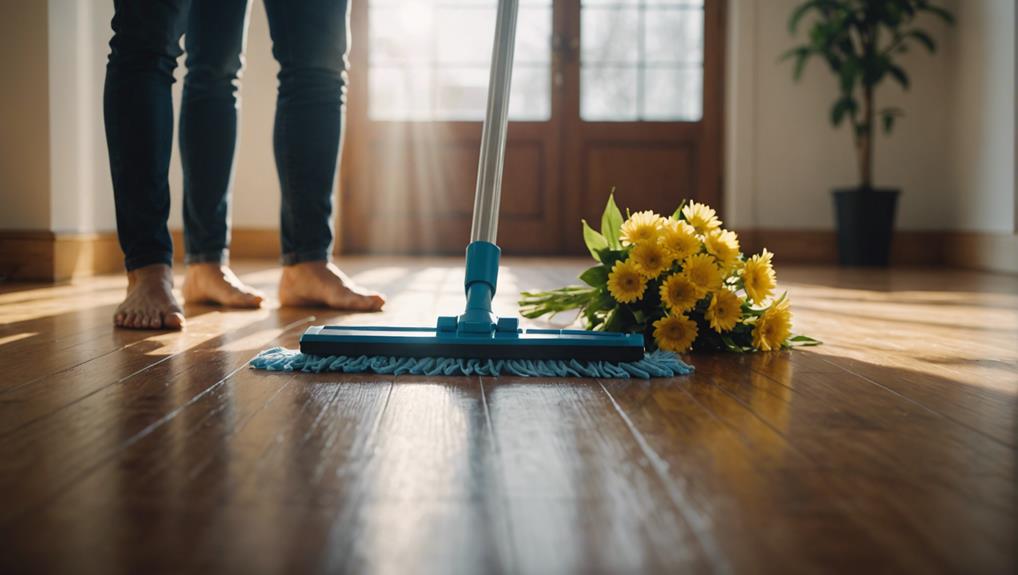
Maintaining Clean Carpets Longer

caring for your carpets

Implementing preventive measures is crucial to extending the cleanliness and lifespan of your carpets. To Keep Carpet Clean longer, consider the following tips:

  • Use walk-off mats: Place these at entrances to reduce dirt tracked onto carpets by up to 80%.
  • Vacuum high-traffic areas: Aim to do this twice a week to prevent dirt buildup and extend the life of your carpet.
  • Rotate furniture: Periodically moving furniture around can prevent wear patterns and evenly distribute foot traffic.
  • Promptly treat spills: Engage in spot cleaning as soon as spills occur to prevent them from setting and becoming harder to remove.

Keeping your carpets clean involves a combination of deep cleaning methods like steam cleaning and daily maintenance. By incorporating these preventive measures, you can make sure that your carpets stay looking their best for longer periods, reducing the need for frequent deep cleaning sessions.

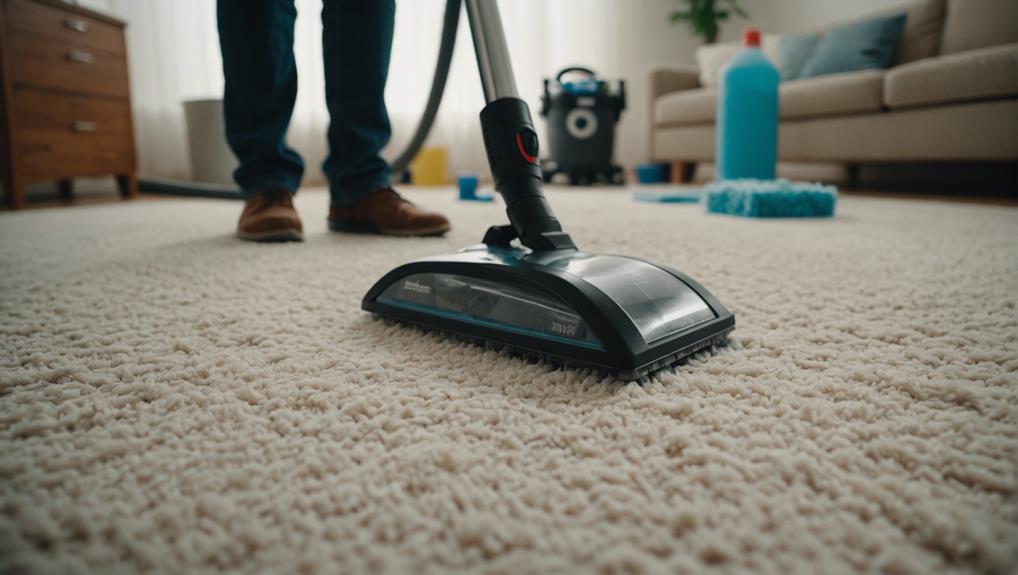
Proper Vacuuming Techniques

effective vacuuming strategies explained

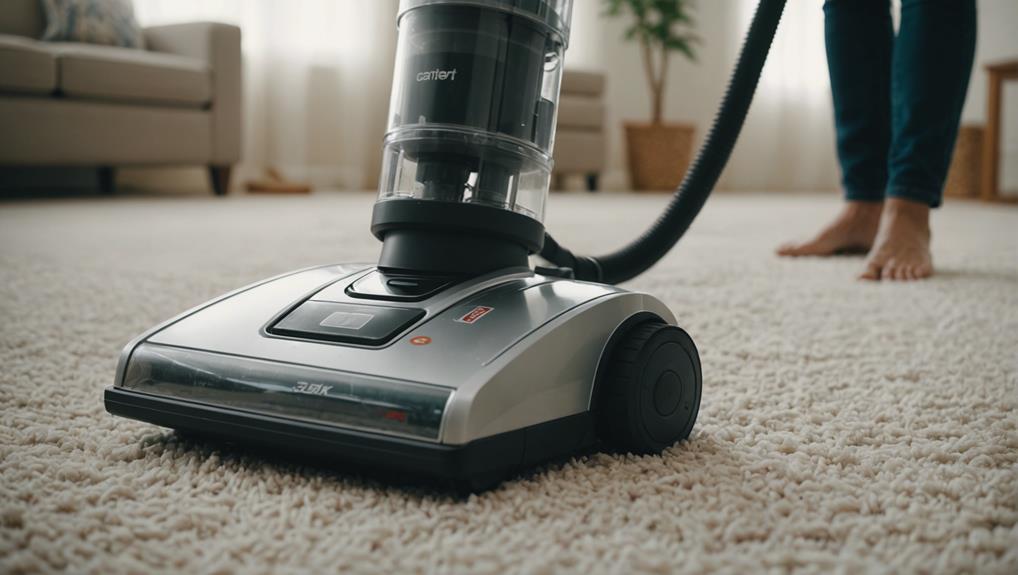
For effective carpet maintenance, mastering proper vacuuming techniques is essential. When vacuuming, make sure to cover the carpet in overlapping rows to prevent dirt buildup, especially in high-traffic areas.

Adjust the vacuum height setting according to the carpet pile height for best suction and effective debris removal. Utilize attachments like crevice tools and upholstery brushes to clean edges, corners, and furniture thoroughly.

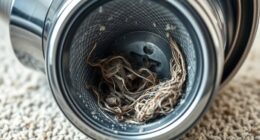
Remember to empty or replace vacuum bags regularly to maintain strong suction power and prevent dust and allergen buildup. Consider investing in a vacuum cleaner with HEPA filters to trap small particles and improve indoor air quality during carpet cleaning.

Professional Carpet Cleaning Tips

cleaning carpets like pros

Consider scheduling professional carpet cleaning every 12 to 18 months to maintain your carpet's appearance and durability.

When hiring a professional carpet cleaner, keep in mind the following tips:

  • Deep Clean: Professional cleaners utilize high-powered equipment to remove deep-seated dirt effectively.
  • Stain Remover: They've access to specialized stain removers to tackle tough stains that regular cleaning may not fully eliminate.
  • Steam Cleaner: Using steam cleaners, professionals can provide a thorough and sanitizing clean for your carpets.
  • Carpet Cleaning Method: Professionals follow industry standards set by the Carpet and Rug Institute, ensuring proper carpet maintenance and cleaning techniques are used.

Essential Tools and Materials for Cleaning

cleaning supplies and equipment

To effectively clean your carpet, make sure you have essential tools and materials readily available. Having a good vacuum cleaner, DIY steam-cleaning machine, sponges, and spot treating cleaners is important. Additionally, using indoor and outdoor floor mats can help prevent dirt from reaching your carpets, keeping them cleaner for longer. When accidents happen, having paper towels on hand for blotting spills and stains is essential. Don't forget about maintaining your vacuum's efficiency by regularly changing vacuum filters. Finally, invest in quality carpet-cleaning soap for deep cleaning and preserving your carpets' quality. Below is a table summarizing the essential tools and materials for effective carpet cleaning:

Tools and MaterialsDescriptionImportance
Vacuum CleanerEssential for regular carpet maintenanceHigh
DIY Steam-Cleaning MachineIdeal for deep cleaningMedium
SpongesGreat for spot cleaning and scrubbingMedium
Spot Treating CleanersEffective for treating specific stainsHigh

Frequently Asked Questions

What Is the Most Effective Way to Clean Carpets?

To clean your carpets effectively, vacuum regularly to remove surface dirt. Deep clean every 12-18 months for maintenance. Promptly spot clean stains with proper solutions. Hire pros annually for thorough cleaning. Consistent care and techniques maintain cleanliness and freshness.

Advertisement

What Is the Proper Way to Use a Carpet Cleaner?

To use a carpet cleaner properly, dilute the solution as directed, test on a small spot, move slowly, empty the tank often, and let the carpet dry fully. This will help avoid damage, lift dirt effectively, and prevent mold growth.

What Is the Most Important Step in Keeping a Carpet Clean?

To keep your carpet clean, the most crucial step is vacuuming regularly. By removing dirt and debris weekly, you prevent damage and maintain its appearance. Don't overlook proper techniques and settings for effective cleaning.

What Is the Best First Step When Spot Cleaning a Carpet?

The best first step when spot cleaning a carpet is to immediately blot liquid spills with paper towels to prevent staining. Use a carpet stain remover for liquids and lift solids like mud with a credit card before cleaning.

What Are the Best Techniques for Cleaning Carpets?

When it comes to keeping your carpets clean, expert carpet cleaning methods are crucial. Regular vacuuming, spot treating spills, and using professional steam cleaning services are some of the best techniques for maintaining the cleanliness of your carpets. Additionally, rotating furniture and using protective pads can help prevent wear and tear.

Conclusion

To sum up, regularly cleaning your carpet using the right techniques can greatly extend its lifespan and keep your home looking fresh and clean.

Advertisement

By utilizing effective stain removal methods, natural cleaning agents like vinegar and baking soda, and proper steam cleaning practices, you can maintain your carpets in top condition for years to come.

So, why wait? Start implementing these tips today for a cleaner and healthier living environment.

Continue Reading
Advertisement

Floor and Carpet Cleaning Guides

Effective Ways to Remove Stubborn Limestone Stains!

Get rid of stubborn limestone stains with these expert tips for a refreshed and clean look, leaving your surfaces gleaming like new!

Published

on

removing limestone stains effectively

To remove stubborn limestone stains effectively, start by selecting the right cleaning tools like a soft brush or an oscillating tool with sandpaper, depending on the surface. Apply a limestone-safe cleaner, letting it sit before gentle scrubbing and rinsing. For deep stains, use a poultice, allowing it to dry and repeating if needed. Buff and polish the surface with a specialized solution to restore shine. Seal the limestone with a penetrating sealer for long-lasting protection. Each step plays an essential role in eliminating tough stains from limestone surfaces, ensuring a clean and refreshed look.

Key Takeaways

  • Utilize a limestone-safe cleaner and let it sit before scrubbing.
  • Consider using a poultice for deep stains and allow time to dry.
  • Buff and polish the surface to restore shine and smooth imperfections.
  • Seal the limestone with a penetrating sealer every 2-3 years for protection.
  • Avoid abrasive tools on polished limestone and air dry rough surfaces after cleaning.

Selecting the Right Cleaning Tools

When tackling stubborn limestone stains, choosing the right cleaning tools is essential for effective removal. For cleaning rough limestone surfaces, opt for a soft bristle brush or toothbrush. These gentler tools help prevent scratching and maintain the integrity of the limestone.

Avoid using abrasive tools on polished limestone, as they can cause damage and unsightly scratches on the surface. If you're dealing with tough stains on limestone, consider using an oscillating tool with sandpaper for more targeted cleaning power.

After cleaning, allow rough limestone to air dry naturally. This process helps preserve the limestone and prevents any potential damage that could occur from artificial drying methods. For polished limestone surfaces, it's best to hand-dry them to avoid watermarks and maintain their shiny appearance.

Applying a Limestone-Safe Cleaner

cleaning limestone with care

To effectively remove stubborn limestone stains, start by applying a pH-neutral, organic cleaner specifically formulated for limestone surfaces. Here are three steps to effectively apply a limestone-safe cleaner:

  1. Apply the Cleaner:

Generously apply the limestone-safe cleaning product to the stained area. Make sure the cleaner covers the entire stain and let it sit for 5-10 minutes to effectively break down the stubborn marks.

  1. Scrub Gently:

After the cleaner has had time to work on the stain, delicately scrub the area with a soft brush or sponge. Avoid using harsh abrasives that could scratch the limestone surface while still working to lift the stain out of the stone.

  1. Rinse and Dry:

Thoroughly rinse the area with warm water to remove any remaining cleaner and residue. Once clean, dry the limestone surface completely to prevent water marks or streaks from forming.

Using a Poultice for Deep Stains

removing deep stains effectively

For persistent deep stains on limestone surfaces, utilizing a commercial poultice can effectively draw out the embedded discoloration and restore the stone's appearance. These poultices are specifically designed to remove stains from porous materials like limestone.

To begin, apply the poultice over the stain, making sure it covers the affected area completely. Allow the poultice to dry for 24-48 hours, enabling it to absorb the deep-set stain from the limestone.

Once dry, gently scrape off the poultice from the surface. The poultice works by pulling the stain out of the limestone, helping to eliminate the discoloration.

Advertisement

In cases of stubborn stains, multiple applications of the poultice might be necessary to ensure thorough removal without causing damage to the limestone.

Buffing and Polishing the Surface

refining car s exterior finish

Consider buffing and polishing the surface of your limestone to restore its shine and smooth out imperfections.

Here are some steps to help you achieve this:

  1. Gentle Cleaning: Start by cleaning the limestone floors with a mild soap and water solution. Use a bristle brush to scrub away any dirt or debris gently. Avoid harsh chemicals that can damage the stone.
  2. Polishing Technique: Once the surface is clean and dry, apply a specialized limestone polishing solution. Use a soft cloth or polishing pad to buff the surface in circular motions. This process helps to enhance the natural beauty of the stone.
  3. Professional Assistance: For more extensive restoration or if you're unsure about polishing your limestone floors yourself, consider hiring professional cleaning services. They've the expertise and equipment to effectively polish and maintain your limestone surfaces.

Sealing the Limestone for Protection

sealing limestone for preservation

Start by applying a penetrating sealer to your limestone surfaces to create a protective barrier against stains, moisture, and wear. Sealing limestone is vital to prevent liquids from seeping in and causing lasting damage.

The penetrating sealer acts as a shield, enhancing the durability of your limestone surfaces. Regular resealing, typically recommended every 2-3 years, is essential to maintain this protective layer. Ensuring your limestone is adequately sealed not only safeguards it from potential stains but also increases its longevity.

By investing the time and effort into properly sealing your limestone, you're actively contributing to the preservation of its beauty and structural integrity. Remember, the protective barrier created by the penetrating sealer is a cost-effective way to shield your limestone surfaces from the elements and daily wear and tear.

Prioritize sealing your limestone for long-lasting protection and enhanced aesthetic appeal.

Advertisement

Frequently Asked Questions

How Do You Remove Stubborn Stains From Limestone?

To remove stubborn stains from limestone, you can use a commercial poultice or baking soda. Apply it thickly over the stain and let it dry for 24-48 hours. Scrape it off gently with a plastic spatula to avoid damage.

How to Make Limestone White Again?

To make limestone white again, first, avoid acidic cleaners. Use a poultice or baking soda on stains, apply, let dry, scrape off, and rinse. Seal with a penetrating sealer for protection. Following these steps will restore your limestone's brightness.

What Cleans Limestone Best?

To clean limestone effectively, use pH-neutral, organic cleaners to avoid surface damage. For oil-based stains, opt for professional cleaners with high pH levels. Pressure washers work well for outdoor surfaces. Sealing post-cleaning prevents future stains.

Will Hydrogen Peroxide Clean Limestone?

Hydrogen peroxide can effectively clean limestone. Mix it with flour to make a paste, apply on stains, let sit for hours, then scrub gently. Test on a small area first to avoid discoloration.

Are Limestone Stains and Algae Removal Techniques Similar?

When it comes to removing algae from pool surfaces, the techniques are somewhat similar to removing limestone stains. Both involve using cleaning solutions, scrubbing, and perhaps even pressure washing to effectively remove algae from the pool and eliminate limestone stains. Proper and regular maintenance is key to preventing both issues.

Advertisement

Conclusion

To sum up, removing stubborn limestone stains is possible with the right tools and techniques. By selecting the appropriate cleaning tools, applying a limestone-safe cleaner, using a poultice for deep stains, buffing and polishing the surface, and sealing the limestone for protection, you can effectively restore the beauty of your stone surfaces.

So, why wait? Give these methods a try and say goodbye to those pesky stains for good!

Continue Reading

Floor and Carpet Cleaning Guides

Say Goodbye to Dog Urine Stains on Limestone Floor Tiles!

Lift the veil on removing dog urine stains from limestone floors with effective strategies and tools, ensuring a clean and pristine surface!

Published

on

remove dog urine stains

Tired of dog urine stains on your limestone floor tiles? Start by understanding the material's porous nature and the effects of urine. Gather tools like flour, hydrogen peroxide, plastic wrap, and painter's tape. Remove debris with brooms and dry mops before applying a pH-neutral cleaner. Let it sit to dissolve urine crystals. Use Diatomaceous Earth poultice for stubborn stains. Consider enzymatic cleaners for odor removal. Prevent future stains by sealing floors and training pets. Ready to bid farewell to those pesky stains? These steps provide a solid foundation for spotless limestone floors.

Key Takeaways

  • Understand limestone properties for effective stain removal.
  • Create poultice with flour or Diatomaceous Earth for stains.
  • Remove debris and clean surface before stain treatment.
  • Apply pH-neutral cleaner, scrub, and rinse stained areas.
  • Use enzymatic cleaners for odor neutralization and prevention.

Understanding Limestone Floor Properties

To effectively manage dog urine stains on limestone floor tiles, understanding the inherent properties of limestone is vital. Limestone flooring is known for being porous, which makes it prone to staining, especially from substances like dog urine.

The pH imbalance in limestone can react with the acidic components in urine, leading to discoloration and etching on the surface. If left untreated, dog urine stains on limestone floors can result in foul odors, weaken the stone structure, and promote the growth of bacteria and mold.

To tackle these issues, it's essential to comprehend the characteristics of limestone floors for effective stain removal. Prompt cleaning and sealing of the floors can help prevent and mitigate the effects of dog urine stains.

Preparing Tools and Materials

gathering supplies for construction

Make sure you have all the necessary tools and materials ready before beginning the process of removing dog urine stains from your limestone floor tiles. Gather supplies such as white flour or Diatomaceous Earth, Hydrogen Peroxide, plastic wrap, and low contact painter's tape.

Additionally, make certain you have a mild detergent, water, enzymatic cleaner, and paper towels on hand for the cleaning process. To create an effective stain removal poultice, prepare a mixture using the white flour or Diatomaceous Earth combined with Hydrogen Peroxide.

Have plastic wrap and low contact painter's tape ready to cover and secure the poultice on the stained area for best results. Remember to keep enzymatic cleaner and plastic wrap available for neutralizing urine odors that may linger on your limestone floors.

Advertisement

Removing Debris Before Cleaning

clearing clutter for cleanliness

Prior to starting the cleaning process on your limestone floor tiles, make sure to use brooms or dry mops to eliminate any debris present on the surface. Clearing away loose dirt, dust, or pet hair is essential for effective stain removal.

Debris such as dirt and grime can mix with urine stains, underscoring the importance of thorough cleaning before tackling stains. By removing debris beforehand, the cleaning solution can penetrate the stain more effectively, leading to better results.

Prioritizing debris removal creates a clean surface for the subsequent cleaning process, enhancing the overall stain removal outcome. Be sure that the brooms or dry mops are used gently to avoid scratching the limestone surface.

Taking the time to remove debris sets the stage for successful cleaning and eradication of stubborn urine stains, leaving your limestone floor tiles looking fresh and spotless.

Applying Ph-Neutral Cleaner

cleaning with ph neutral solution

Begin by selecting a pH-neutral cleaner to effectively treat dog urine stains on your limestone floor tiles. Here are four essential steps to help you successfully remove stains using a pH-neutral cleaner:

  1. Dilute the Cleaner: Follow the manufacturer's instructions to dilute the pH-neutral cleaner with water as directed. This guarantees the solution isn't too harsh on your limestone tiles.
  2. Apply the Cleaner: Use a mop or a sponge to apply the pH-neutral cleaner onto the affected areas where the dog urine stains are present. Make sure there's complete coverage over the stains.
  3. Scrub Gently: With a soft-bristled brush or a cloth, gently scrub the stained areas to help the cleaner penetrate and lift the urine stains from the limestone floor tiles.
  4. Rinse Thoroughly: After allowing the cleaner to sit for the recommended time, rinse the area thoroughly with clean water to remove any residue and traces of the cleaner. Repeat if necessary until the stains are completely gone.

Allowing Cleaner to Sit

providing designated seating space

Allow the pH-neutral cleaner to sit on the dog urine stain for the recommended time to effectively break down and lift the stain from your limestone floor tiles. Giving the cleaner time to penetrate the stain enhances its effectiveness in lifting the urine residue. The sitting time allows the cleaner to work on dissolving the urine crystals embedded in the limestone. Patience is key as the cleaner sitting on the stain guarantees thorough removal without damaging the limestone. Properly following the recommended sitting time for the cleaner maximizes its stain-lifting potential on the limestone floor tiles.

Benefits of Allowing Cleaner to Sit on Limestone Floor Tiles
Enhances stain-lifting effectivenessAllows cleaner to penetrate the stainDissolves urine crystals in the limestone
Guarantees thorough removal without damageMaximizes stain-lifting potential

Gently Scrubbing Stained Area

effectively removing stubborn stains

To effectively remove dog urine stains from your limestone floor tiles, gently scrub the stained area using a soft cloth or brush to avoid damaging the surface.

Here are some tips to help you get rid of those stubborn stains:

  1. Choose the Right Tools: Opt for a soft cloth or brush to gently scrub the stained area, ensuring you don't harm the limestone tiles.
  2. Use the Correct Cleaner: Make a solution of pH-neutral stone cleaner and water to effectively tackle the urine stain without causing any damage.
  3. Avoid Harsh Chemicals: Stay away from abrasive tools or strong chemicals when scrubbing to prevent any scratching or etching on the delicate limestone surface.
  4. Apply Gentle Pressure: Work in small sections, applying gentle pressure while scrubbing to lift the urine stains effectively without causing any harm to the tiles.

Rinsing With Warm Water

gentle cleansing technique used

Start by rinsing your limestone floor tiles with warm water to effectively remove residual cleaning solution and dirt. Warm water is a vital ally in the battle against stains on limestone surfaces. Its gentle yet effective nature can help lift lingering grime and urine stains from the tile's surface.

Thoroughly rinsing the floor is essential to prevent any residue buildup that could attract more dirt over time. By using warm water, you not only guarantee a spotless finish but also help maintain the cleanliness and beauty of your limestone tiles. This simple step can make a significant difference in the appearance of your floor, leaving it looking fresh and renewed.

Advertisement

Thoroughly Drying the Floor

excellent choice capturing the essence of the text

After rinsing your limestone floor tiles with warm water, the next essential step is to thoroughly dry the floor to prevent water spots and potential damage. Follow these steps to make certain your limestone floor stays clean and free of stains:

  1. Use a dry, clean cloth or towel to remove excess water from the surface of the floor.
  2. Thoroughly dry the entire floor area, making sure to reach all corners and edges.
  3. Guarantee all moisture is removed to prevent stains from reappearing and to maintain the natural beauty of the limestone.
  4. Regularly check the floor for any remaining dampness, as even small amounts of water can lead to water spots or discoloration over time.

Adequate drying time is vital in the maintenance of your limestone floor, so take your time and ensure the floor is completely dry before moving on to the next step in the cleaning process.

Considerations for Persistent Stains

cleaning stubborn set in stains

Addressing persistent dog urine stains on limestone floors requires taking proactive steps to utilize stain removal methods such as poultices to draw out deep-set contaminants effectively.

Additionally, implementing preventive measures like enzymatic cleaners can help neutralize lingering odors by targeting bacteria feeding on the urine.

It's crucial to be proactive in preventing etch damage, as professional honing and polishing may be necessary to restore the pristine look of polished limestone surfaces.

Stain Removal Methods

Consider utilizing a poultice containing ingredients like flour or Diatomaceous Earth to effectively remove persistent dog urine stains from limestone floor tiles. This method helps draw out the stains from the porous limestone surface, aiding in their removal.

Make sure to secure the poultice with plastic and low contact painters tape, allowing it to dry for 24 to 48 hours for best stain removal results.

Additionally, enzymatic carpet cleaners can be beneficial in neutralizing urine odors on limestone floors by targeting the bacteria responsible for the unpleasant smell. To maximize the effectiveness of the enzymatic cleaner, cover the affected area with plastic after application to allow for deep penetration and thorough odor elimination.

Advertisement

Preventive Measures

Implementing regular sealing of your limestone floors is an essential step in preventing the deep penetration of dog urine stains and maintaining the integrity of the surface.

Sealing creates a protective barrier that can help prevent future stains from seeping into the porous limestone.

Additionally, consider training your pets to avoid urinating on the floors and promptly cleaning up any accidents to prevent the spread of the stain.

Using pet-friendly cleaning products and techniques can effectively remove existing stains and discourage re-marking.

Seeking advice from stone restoration experts can provide valuable insights on preventive measures and treatment options for persistent dog urine stains on limestone floors.

Advertisement

Frequently Asked Questions

How to Get Dog Urine Out of Limestone?

To get dog urine out of limestone, act fast by blotting excess liquid, clean with water and mild detergent, apply poultice for deep stains, rinse with water, and consider sealing the surface. Prevent future stains by sealing after cleaning.

How Do You Get Stains Out of Limestone Tiles?

You scrub, you buff, you banish those stains. With water and detergent, you work your magic. Poultice in hand, you draw out the deep-seated marks. Rinse, seal, and voilà! Stains vanish, leaving pristine limestone tiles gleaming.

How Do You Remove Old Dog Urine Stains From Floor Tiles?

To remove old dog urine stains from floor tiles, create a poultice with white flour or Diatomaceous Earth and Hydrogen Peroxide. Apply it to the stained area, let it dry for 24-48 hours to draw out stains. Use enzymatic cleaners to eliminate odors.

How to Remove Urine Stains From Stone Tiles?

To remove urine stains from stone tiles, act promptly to blot up fresh stains. Create a poultice with white flour or Diatomaceous Earth and Hydrogen Peroxide to draw out stubborn stains. Cover with plastic and let dry for 24-48 hours for effective removal. Use enzymatic cleaners for odors.

Can the Methods for Removing Limestone Stains also Work for Dog Urine Stains?

When dealing with dog urine stains, traditional cleaning methods may not be the most effective. However, some ways to remove limestone stains can also work on dog urine stains. Using a mixture of water and vinegar or a commercial pet stain remover can help lift and neutralize the odor and stain.

Advertisement

Conclusion

Say goodbye to dog urine stains on limestone floor tiles by following these simple steps.

Did you know that limestone is a porous stone, making it more susceptible to staining from liquids like dog urine?

By using a pH-neutral cleaner and gently scrubbing the stained area, you can effectively remove the unsightly marks and restore the beauty of your limestone floors.

So, don't let those stains linger any longer – take action today and enjoy clean, pristine floors once again!

Advertisement
Continue Reading

Floor and Carpet Cleaning Guides

Melted Plastic on Carpet? Learn the Quick Fix!

Intrigued by melted plastic on your carpet? Discover a quick fix involving gentle heating and careful scraping for a successful solution.

Published

on

quick fix for melted plastic

Managing melted plastic on your carpet? First, guarantee proper ventilation by opening windows and using fans. Next, gently heat the plastic with a warm iron, covered with cloth. Scrape off softened plastic residue using a plastic scraper. For stubborn bits, apply Goo Gone and repeat. Remember to be patient! Pro tip: adjust iron settings gradually. Consider using protective barriers like silicone mats. Prevent future mishaps by educating household members. Thoroughly clean the area post-removal, and monitor for damage. Stay cautious with hot items near carpets. Discover more effective tips by exploring further.

Key Takeaways

  • Use warm iron to soften plastic for easier removal.
  • Scrape off residue gently with a plastic tool.
  • Clean residue with a solvent like Goo Gone.
  • Prevent future incidents with protective barriers.
  • Thoroughly clean the area post-removal for a clean finish.

Precautions Before Removing Melted Plastic

Before you start removing melted plastic from your carpet, make sure to take necessary precautions to guarantee a safe and effective cleaning process. Ventilation is important in this process to make sure that any fumes released during the cleaning don't linger in the air. Open windows and doors to allow fresh air to circulate through the room. If possible, use fans to help push the fumes outside. This step is vital for your safety and to prevent any odors from lingering in your home.

Proper ventilation not only protects your health but also aids in the removal of the melted plastic. The airflow created by good ventilation can help disperse any lingering fumes and prevent them from settling back onto the carpet. By taking this simple precaution, you're ensuring a more efficient and thorough cleaning process.

Use of Warm Iron to Heat Plastic

heating plastic with iron

To effectively remove melted plastic from your carpet runner, follow these steps:

Start by using a warm iron to heat the affected area.

Gently scrape off the softened plastic residue with a dull knife or scraper.

Heat Plastic With Iron

How can you effectively utilize a warm iron to heat and remove melted plastic from a carpet?

Advertisement

When faced with melted plastic on your carpet, employing a warm iron can be a practical solution. Here's how you can use this method successfully:

  1. Set the iron to a low temperature: Make sure the iron is on a low setting to gently heat the melted plastic without causing damage to the carpet fibers.
  2. Cover the plastic with a cloth or paper towel: Place a protective barrier over the melted plastic to prevent direct contact with the iron, reducing the risk of further damage to the carpet.
  3. Apply the warm iron over the covered plastic: Gently move the iron over the paper towel-covered plastic to soften it. This process will make it easier to lift and remove the melted plastic from the carpet. Remember not to use high heat settings to avoid harming the carpet further.

Scrape off Melted Plastic

Scraping off melted plastic from your carpet using a warm iron can effectively remove as much residue as possible before employing further cleaning methods. Begin by gently scraping the melted plastic with a plastic scraper or a dull knife to lift off as many pieces as you can.

Then, set a warm household iron to a low heat setting and place a protective barrier like paper towels over the plastic residue. Press the iron onto the paper towels covering the plastic for short intervals, allowing the heat to soften the plastic without overheating the carpet fibers.

Be cautious as you work, gradually increasing the heat setting of the iron if needed, to avoid scorching or damaging the carpet beneath. The softened plastic should start to adhere to the paper towels, making it easier to scrape off with the plastic scraper.

Repeat the heating and scraping process until the melted plastic is entirely removed, leaving your carpet clean and plastic-free.

Clean Residue With Solvent

You can effectively clean residue from melted plastic on your carpet by utilizing the warmth of a household iron.

Advertisement

Follow these steps to remove the plastic remnants with ease:

  1. Heat the Residue: Place a piece of parchment paper over the melted plastic and run a warm iron over it. The heat will soften the plastic, making it easier to remove.
  2. Apply Goo Gone: Use a solvent like Goo Gone to break down the plastic residue further. Apply the solvent to the affected area and let it sit for a few minutes to work its magic.
  3. Scrape off the Residue: Gently scrape off the softened plastic with a dull knife or a plastic scraper. Be careful not to damage the carpet fibers while removing the residue.

Gentle Scraping With Plastic Tool

gentle facial exfoliation method

To start removing melted plastic from your carpet, grab a plastic scraper or credit card for gentle scraping. Remember to avoid sharp tools that could harm the carpet fibers and begin scraping from the outer edges towards the center.

Apply light pressure and take your time to carefully lift off the melted plastic without causing more damage.

Plastic Scraper Method

Consider utilizing a plastic spatula for gently removing melted plastic from the carpet runner. Remember to avoid using sharp tools that could potentially damage the carpet fibers during the scraping process.

Slowly and carefully scrape off the melted plastic to prevent further spreading or embedding in the carpet. It's crucial to work in small sections and gradually lift the melted plastic from the carpet to guarantee thorough removal.

Be patient and continue scraping until all visible plastic has been successfully removed, taking care not to pull or tug on the carpet fibers to prevent any unnecessary damage. By following these steps and using a plastic scraper method, you can effectively tackle the issue of melted plastic on your carpet without causing additional harm.

Advertisement

Careful Removal Technique

For a gentle and effective approach to removing melted plastic from your carpet, utilize a plastic tool such as a credit card or plastic scraper. When scraping off melted plastic, it's important to opt for plastic tools to prevent further damage to the carpet fibers.

Sharp or metal tools should be avoided as they can cause more harm. Plastic scrapers like credit cards work well in softly lifting the melted plastic without causing additional damage. Remember to work slowly and carefully when scraping to prevent spreading the melted plastic further into the carpet fibers.

Before starting the removal process, test the plastic tool on a small hidden area of the carpet to make sure it doesn't cause any harm. By following these careful scraping techniques with a plastic tool, you can effectively remove melted plastic from your carpet without causing more damage.

Cleaning With Carpet Cleaner

freshening up carpets easily

Using a carpet cleaner specifically formulated for removing melted plastic stains is the recommended method for cleaning the affected area.

Follow these steps for effective removal:

  1. Choose the Right Product: Select a carpet cleaner designed to tackle melted plastic stains. Make sure it's suitable for your carpet type.
  2. Read and Follow Instructions: Before application, carefully read the instructions provided on the carpet cleaner packaging. Following the guidelines will yield the best results.
  3. Test Before Application: Prior to applying the cleaner to the entire affected area, test it on a small, inconspicuous part of the carpet. This step helps confirm that the cleaner is compatible and won't cause damage.

Using Dish Soap and Warm Water

effective cleaning method choice

Mix dish soap with warm water to create a soapy solution for cleaning melted plastic off a carpet runner quickly and effectively. Gently scrub the affected area with the soapy mixture to help loosen the melted plastic residue. Be sure to use a clean cloth to blot and lift the melted plastic from the carpet runner. Repeat the process as necessary until all traces of the melted plastic have been removed from the carpet.

After cleaning, rinse the area with clean water to remove any soap residue, then allow it to dry completely.

Advertisement

Using dish soap and warm water is an efficient method for tackling melted plastic on your carpet runner. The combination of dish soap's cleaning power and warm water's ability to break down the plastic can effectively remove the stubborn mess. Remember to be patient and thorough in your cleaning process to guarantee the best results.

Restoring Carpet Runner Fibers

reviving carpet runner fibers

To restore carpet runner fibers after removing melted plastic, consider utilizing a household iron along with paper towels. Here are three important steps to help you effectively restore the affected area:

  1. Adjust Iron Settings: Set the household iron to a wool setting without steam to prevent damaging the carpet fibers. Gradually increase the heat to soften the melted plastic for easier removal without causing further harm.
  2. Careful Removal: Use a dull knife for better control when scraping off the melted plastic. This will help prevent any accidental tearing or damage to the carpet fibers during the removal process.
  3. Thorough Cleaning: After successfully removing the melted plastic, make sure you clean the treated area thoroughly. This step is essential to guarantee that no residue remains, maintaining the carpet's cleanliness and appearance.

Tips for Preventing Future Incidents

prevent future incidents effectively

Consider utilizing protective barriers like silicone mats or trivets under hot objects to prevent future incidents of melted plastic on carpet runners. Placing hot items directly on carpets increases the risk of plastic melting, so using these barriers acts as a shield for your carpet.

It's important to educate household members on handling hot items carefully around carpeted areas to prevent accidents. Regularly inspecting and maintaining appliances and tools that could cause melted plastic incidents is vital.

Implementing a designated area for hot items can further reduce the risk of plastic melting on your carpet. By taking these preventive measures, you can greatly lower the chances of encountering melted plastic on your carpet runners.

Final Steps for Clean Carpet Finish

carpet cleaning completion checklist

For a clean carpet finish post-melted plastic removal, thorough cleaning and monitoring are vital steps to guarantee no residue or damage remains.

Here are three essential final steps to achieve a pristine carpet:

  1. Thorough Cleaning: After removing the melted plastic, clean the carpet meticulously to make sure no remaining plastic bits or residue are left behind. Use a carpet cleaner or a mixture of mild detergent and water to scrub the affected area gently. Rinse with clean water and blot dry with a clean cloth to remove any cleaning solution residue.
  2. Monitor for Damage: Regularly inspect the cleaned area for any signs of damage or discoloration. If you notice any issues such as melted fibers or changes in color, consider seeking professional help to address the damage promptly.
  3. Preventive Measures: To avoid future incidents of melted plastic on the carpet, be cautious with hot items near carpets and consider using protective mats in high-risk areas to prevent accidents. Regular maintenance and quick action can help keep your carpet looking its best.

Frequently Asked Questions

How Do You Get Melted Plastic Out of Carpet?

To get melted plastic out of carpet, use a household iron with paper towels as a barrier. Remember to set it to a wool setting without steam and start with low heat. Use a dull knife for control, then clean the carpet thoroughly after.

What Dissolves Melted Plastic?

To dissolve melted plastic on carpet, you can use acetone, WD-40, baking soda paste, or Goo Gone. These solvents effectively break down the plastic without causing further damage to your carpet fibers. Choose wisely!

Advertisement

Will Goo Gone Remove Melted Plastic?

You might find that applying Goo Gone to the melted plastic effectively removes it from carpets. Let it sit, then scrape away the residue. Guarantee a thorough cleaning afterward to eliminate any remnants.

How to Get Melted Rubber off of Carpet?

To remove melted rubber from carpet, gently scrape with a dull knife. Apply WD-40 or acetone to dissolve the residue. Blot with a cloth to absorb. Avoid heat or force. If stubborn, seek professional help.

What is the Quick Fix for Melted Plastic on Carpet and Wax?

To remove melted plastic from carpet, place a bag of ice over the affected area to harden the plastic. Once hardened, carefully scrape off the plastic with a butter knife. Use a hairdryer to melt any remaining plastic and blot with a paper towel. Apply carpet cleaner to remove any residue.

Conclusion

To sum up, removing melted plastic from carpet can be a simple process with the right tools and techniques. By using a warm iron, gentle scraping, and cleaning with carpet cleaner, you can restore your carpet to its original state.

Remember to take precautions and follow the steps carefully to prevent any damage to your carpet. With a little patience and effort, you can have a clean and plastic-free carpet once again.

Advertisement
Continue Reading
Advertisement

Affiliate disclaimer

As an affiliate, we may earn a commission from qualifying purchases. We get commissions for purchases made through links on this website from Amazon and other third parties.

Advertisement
Advertisement

Trending