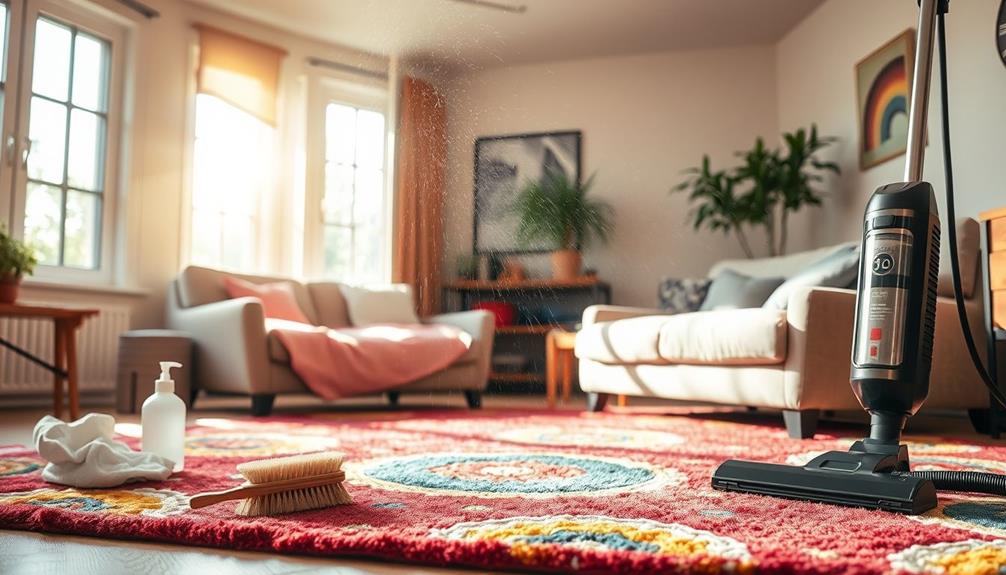
Connect with us

Floor and Carpet Cleaning Guides

The Ultimate Guide to Cleaning Area Rugs and Delicate Carpets

The ultimate guide to cleaning area rugs and delicate carpets reveals essential techniques, but are you prepared for the secrets to maintaining their beauty?

Published

on

area rugs cleaning guide

To clean your area rugs and delicate carpets effectively, start by identifying their materials—wool, silk, synthetic fibers, or natural options—all requiring different care methods. Vacuum the rugs to remove dust, then use a gentle cleaning solution, like mild detergent mixed with warm water for synthetic fibers or a vinegar-water mix for stains. Always test any cleaner on a hidden spot first. After applying the solution, allow it to sit, rinse thoroughly, and air dry flat. For deeper or more stubborn cleans, consider professional help. There's much more to guarantee your rugs stay gorgeous and long-lasting.

Key Takeaways

  • Regularly vacuum both sides of area rugs to remove dust and debris, preventing dirt from embedding deeper into the fibers.
  • Use mild detergents mixed with appropriate water temperatures for cleaning different rug materials to avoid damage.
  • For spot cleaning, act immediately by blotting spills with a clean cloth and applying a vinegar-water solution for effective stain removal.
  • Always test cleaning solutions on a small, inconspicuous area to ensure no discoloration or damage occurs before full application.
  • Consider professional cleaning every 2-5 years, especially for delicate rugs, to maintain their beauty and extend their lifespan.
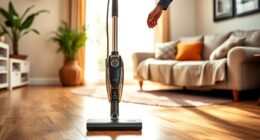
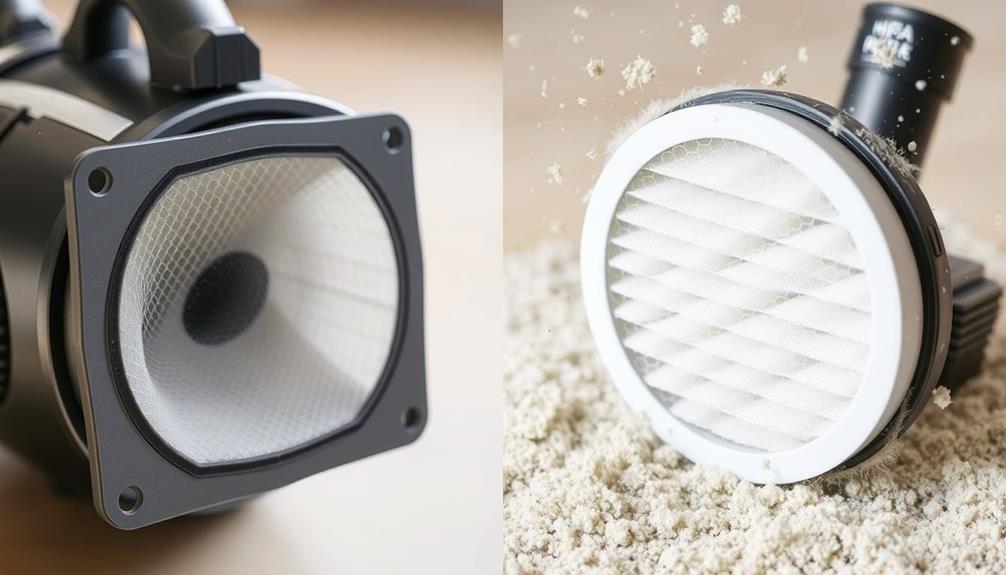
Understanding Area Rug Materials

When it comes to choosing the right area rug, what materials should you consider? You have various options, including wool rugs, synthetic fibers, and natural fiber rugs.

Wool rugs are known for their durability and resilience, making them excellent for high-traffic areas. However, they require gentle cleaning methods to avoid damage and shrinking. Incorporating a blend of modern and rustic furniture styles can complement the aesthetic of your wool rug beautifully.

If you're looking for something more luxurious, silk rugs offer beauty but demand extreme care due to their delicate nature; professional cleaning is often necessary to prevent moisture damage.

On the other hand, synthetic fibers like polypropylene and nylon are generally more stain-resistant and easier to clean. They're ideal for busy households or even outdoor use.

If you're interested in eco-friendly choices, natural fiber rugs such as jute and sisal are great options. Keep in mind, though, that they can be sensitive to moisture and require careful cleaning to avoid mold and mildew issues.

Advertisement

Each material has its pros and cons, so understanding these options will help you select the perfect area rug for your space while ensuring it stays in great shape.

Step-by-Step Cleaning Process

detailed cleaning instructions guide

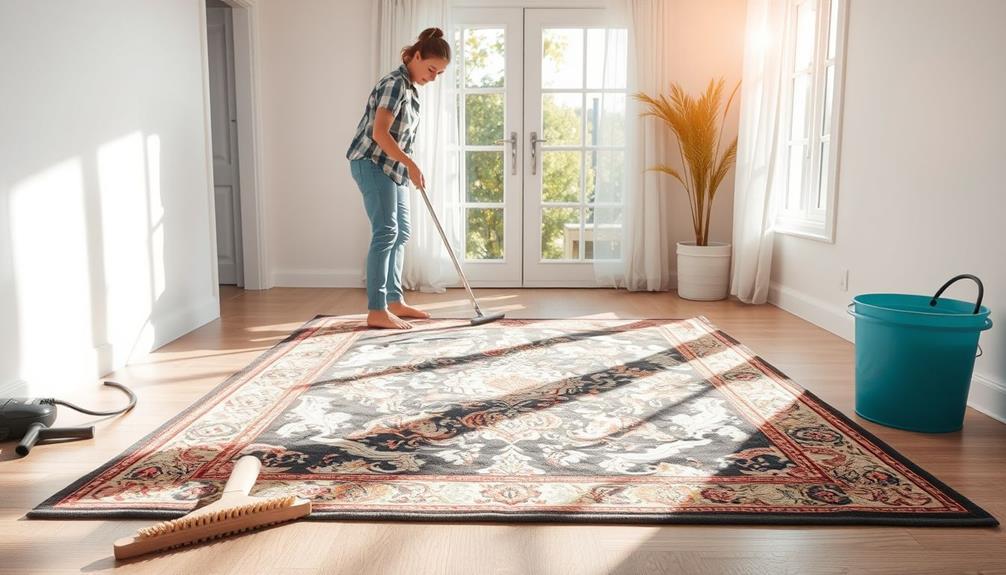
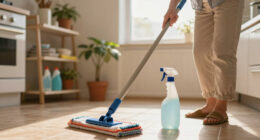
To keep your area rugs and delicate carpets looking their best, a systematic cleaning process is vital. Start by thoroughly vacuuming both sides of the rug to eliminate any dust and debris, as this initial step is essential for proper cleaning. This step prepares the surface for cleaning and guarantees that you avoid embedding dirt deeper into the fibers.

Next, prepare a cleaning solution by mixing mild detergent with warm water for synthetic rugs or cold water for natural fiber rugs. Confirm you use the appropriate temperature for the material type, which is important for effective cleaning.

Using a soft-bristle brush or sponge, apply the cleaning solution gently. Allow it to sit for about five minutes to effectively lift dirt and stains. After that, rinse the rug thoroughly with clean water, making sure all soap is removed; any residue can lead to buildup and discoloration over time.

For best results, consider what to look for in a home cleaning service, especially if you're unsure about handling delicate materials.

Once rinsed, it's time to air dry the rug flat. Flip it to dry both sides completely. Finally, once the rug is dry, vacuum or brush the fibers to restore their original texture.

Advertisement

Effective Spot-Cleaning Techniques

efficient stain removal methods

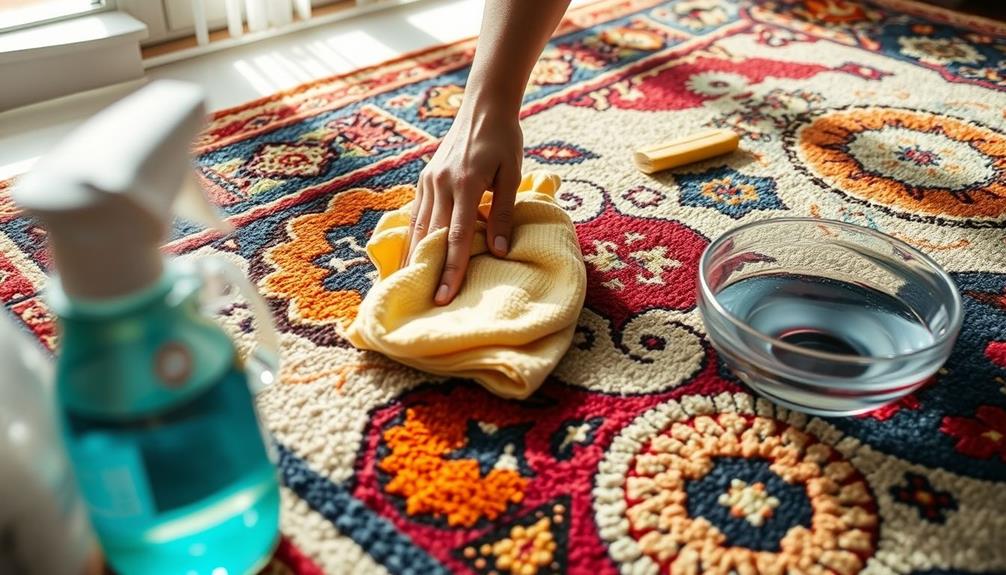
Effective spot-cleaning techniques can save your area rugs and delicate carpets from permanent stains. When a spill occurs, immediately grab a clean, absorbent cloth to blot the stain. Use a gentle dabbing motion instead of rubbing to avoid further embedding the stain.

For effective spot-cleaning, create a cleaning solution using equal parts white vinegar and water. This natural stain remover not only lifts stains but also deodorizes without damaging fibers. Additionally, consider using a vacuum designed for pet hair, such as the Bissell Pet Hair Eraser Vacuum, which enhances suction power for effective hair removal.

Before applying any cleaning solution, always test it on a small, inconspicuous area to verify there's no discoloration or damage. When treating the stain, apply the cleaning solution sparingly with a soft-bristle brush or sponge, letting it sit for about five minutes to help lift the stain. Afterward, blot the area again to absorb any excess solution.

Once you've treated the stain, it's important to rinse the area with clean water and blot again to remove any soap residue. Make sure the rug dries completely to prevent mold and mildew growth.

Tools and Supplies Needed

essential equipment and materials

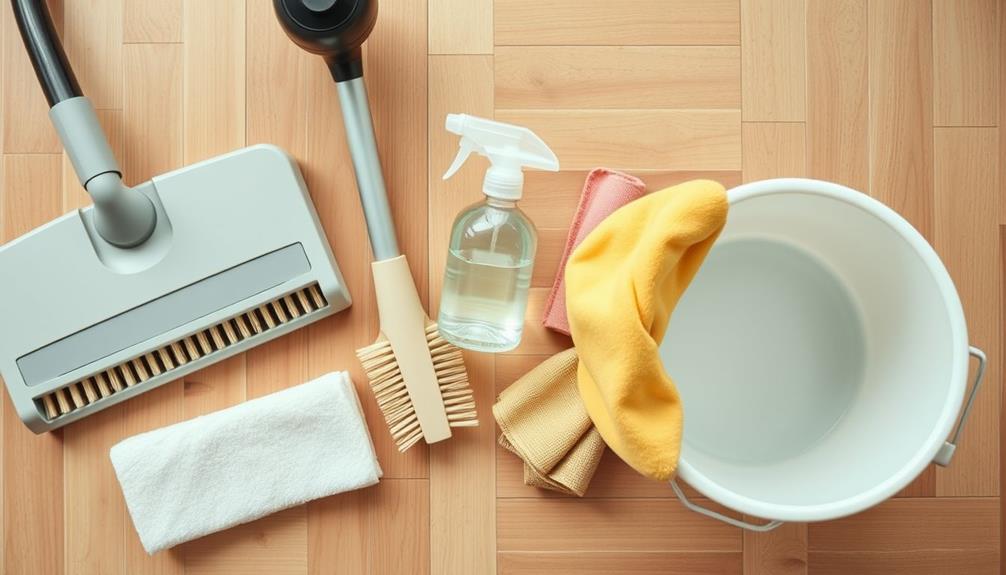
Having the right tools and supplies can make all the difference in maintaining your area rugs and delicate carpets. To effectively clean your rugs while protecting their fibers, you'll need a few essential items.

For instance, using a soft-bristle brush guarantees that you can scrub gently without damaging the delicate textures of your rugs.

Here's a quick list of must-haves:

Advertisement
  1. Soft-bristle brush or sponge: This is crucial for gently scrubbing your rugs without causing damage during the cleaning process.
  2. Mild detergent or specialized rug shampoo: Opt for cleaning solutions that effectively remove dirt while being safe for most rug materials.
  3. Wet-dry vacuum: This tool is invaluable for extracting excess water after cleaning, helping to prevent mold and mildew growth in your rugs.

Don't forget to wear rubber gloves to protect your hands while handling cleaning solutions.

Avoid using harsh carpet cleaners, as they can damage delicate carpet fibers and alter their appearance.

With these tools, you'll be well-equipped to tackle the cleaning process and keep your area rugs looking their best.

Happy cleaning!

Professional Cleaning Considerations

effective cleaning service insights

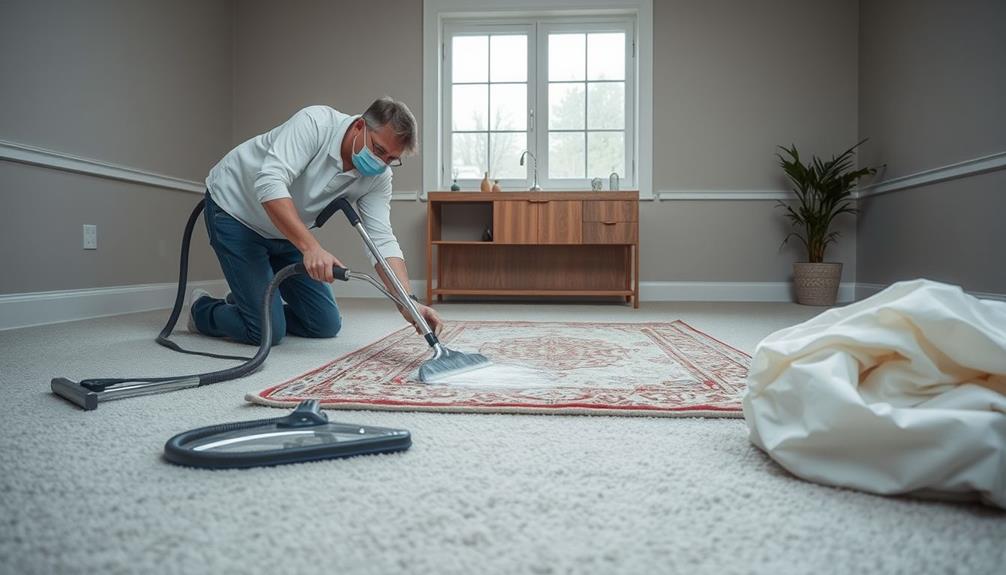
When it comes to maintaining the beauty and longevity of your area rugs, professional cleaning can be a game changer. For delicate materials like silk or antique fibers, experts recommend having your rugs cleaned every 2-5 years. Trained professionals use specialized equipment and industrial-grade cleaning solutions to remove dirt buildup and allergens effectively, ensuring your rugs remain pristine without damaging their fibers.

Here's a quick comparison of professional cleaning considerations:

Aspect Benefits
Cleaning Solutions Industrial-grade options for deep cleaning
Cleaning Methods Tailored approaches for different rug types
Frequency Recommended every 2-5 years
Stubborn Stains Advanced techniques for tough issues
Lifespan Extension Prevents deterioration of high-value rugs

Consulting with professionals for stubborn stains or complex cleaning issues is advisable, as they employ effective cleaning methods that are often unattainable through standard home cleaning. Regular professional cleaning not only preserves the integrity of your rugs but also enhances their appearance and lifespan, making it a worthwhile investment.

Advertisement

Frequently Asked Questions

How to Deep Clean an Area Rug at Home?

To deep clean your area rug at home, start by checking the manufacturer's care label for guidance.

Vacuum both sides thoroughly to eliminate loose dirt.

Mix mild dish detergent with warm water for synthetic fibers or cold water for natural ones.

Test a small area for colorfastness first.

Gently scrub the rug with a soft-bristle brush, let the solution sit, then rinse thoroughly.

Advertisement

Use a wet-dry vacuum to remove excess moisture and air dry it flat.

Should I Wash Rugs on Delicate?

Washing delicate rugs is like traversing a tightrope; one misstep can lead to disaster. You shouldn't wash them unless you're sure it's safe. Always check the care label first.

If it suggests machine washing, use a gentle cycle with cold water and mild detergent. However, spot cleaning with a mild detergent is often the best bet.

Regular vacuuming and immediate stain treatment will keep your rug looking beautiful without risking damage.

How Do You Clean an Area Rug That Says Spot Clean Only?

To clean an area rug that says "spot clean only," mix a mild detergent with water.

Advertisement

Apply this solution directly to the stain using a soft cloth or sponge, being careful not to soak the rug. Gently blot the stain instead of rubbing it, as rubbing can damage the fibers.

After treating, use a clean, damp cloth to remove any soap residue, and let the area dry completely to prevent mold.

Regular vacuuming helps too!

Can You Clean Large Area Rug With Carpet Cleaner?

Cleaning a large area rug with a carpet cleaner can be a gamble, like playing with fire. You might think it's an easy fix, but those machines can be too harsh for delicate fibers, risking damage or color bleeding.

Instead, check the care label. Spot cleaning with mild detergent and cold water is often safer.

Advertisement

If deep cleaning's necessary, consider hiring a professional who knows how to treat your rug with the care it deserves.

Conclusion

Now that you know how to care for your area rugs and delicate carpets, you can keep them looking great for years to come. Did you know that regular cleaning can extend the life of your rugs by up to 50%? By implementing these cleaning techniques and using the right tools, you'll not only enhance your home's aesthetic but also protect your investment. So, roll up your sleeves and give your carpets the attention they deserve!

Continue Reading
Advertisement

Floor and Carpet Cleaning Guides

Understanding Vacuum Cleaner Attachments: Which to Use When

In understanding vacuum cleaner attachments, discover how each tool can transform your cleaning routine and uncover secrets to achieving spotless surfaces.

Published

on

choosing vacuum cleaner attachments

To understand vacuum cleaner attachments, you need to match them with the right surfaces for maximum cleaning efficiency. Use the crevice tool for tight spots, the upholstery tool for fabric surfaces, and the floor brush on hardwood or tile. For pet owners, the pet hair tool and turbo brush are essential for tackling stubborn fur. Regular maintenance of these attachments guarantees they perform at their best. By knowing which tools to use, you'll streamline your cleaning process. There's even more to explore about specialized tools and best practices that can greatly enhance your overall cleaning strategy.

Key Takeaways

  • Use the crevice tool for tight spaces, corners, and hard-to-reach areas to ensure thorough cleaning.
  • The upholstery tool is ideal for cleaning fabric surfaces without causing damage.
  • A dust brush with soft bristles effectively removes dust from delicate surfaces like electronics and lampshades.
  • Employ the pet hair tool for stubborn pet hair on various surfaces, especially carpets and upholstery.
  • Regularly clean and inspect attachments to maintain their effectiveness and extend their lifespan.

Overview of Vacuum Attachments

When it comes to your vacuum cleaner's attachments, understanding their specific uses can greatly improve your cleaning routine. Vacuum attachments enhance your cleaning efficiency by allowing you to target areas and surfaces beyond just floors and carpets.

For instance, the crevice tool is perfect for reaching tight spaces like corners and between cushions, while the upholstery tool works wonders on fabric surfaces, ensuring a deeper clean. Additionally, using the right tools can be particularly beneficial for tackling specific challenges, such as best vacuums for pet hair, which often require specialized attachments to effectively manage fur and dander.

The dust brush is designed for delicate dusting tasks, making it ideal for electronics or light fixtures. Specialized tools, such as the pet hair tool, cater to specific cleaning needs, helping you effectively remove pet hair from various surfaces and reducing allergens in your home.

Proper use and maintenance of these vacuum attachments are essential for peak performance. Regularly clean and replace worn parts to maintain suction efficiency and prolong the life of your vacuum.

Essential Vacuum Attachment Types

vacuum attachment types explained

To really maximize your vacuum cleaning efficiency, you need to know the essential types of attachments available. Each vacuum attachment serves a specific purpose, helping you tackle various cleaning tasks effectively.

Here are the key attachments you should consider:

Advertisement
  1. Crevice Tool: This long, narrow attachment is perfect for reaching hard-to-reach spots, like under appliances and along baseboards. It guarantees no dust bunnies are left behind and can aid in maintaining a clean environment, similar to what you'd expect from a professional home cleaning service.
  2. Upholstery Tool: Resembling a miniature vacuum head, this tool is designed for cleaning fabric surfaces such as couches and mattresses. It provides powerful suction without lifting the vacuum, allowing for thorough cleaning.
  3. Dust Brush: Featuring soft bristles, this attachment is ideal for gentle cleaning on delicate surfaces like lampshades, blinds, and furniture. It helps prevent scratches while effectively removing dust.

Other notable attachments include the Floor Brush, which is great for hardwood and tile surfaces, and the Pet Hair Tool, designed with rubber bristles to remove stubborn pet hair.

Specialized Tools for Unique Tasks

custom instruments for specific functions

When it comes to tackling specific cleaning challenges, specialized tools can make all the difference.

For instance, if you've got pets, a pet groomer attachment helps you efficiently collect fur while grooming, keeping your home tidy. Additionally, using a vacuum like the Bissell Pet Hair Eraser Vacuum can enhance your pet hair removal efforts due to its self-cleaning brush roll technology.

Similarly, a radiator brush lets you clean between fins with ease, ensuring your heating system works effectively.

Effective Pet Hair Removal

Removing pet hair can feel like an endless battle, but specialized vacuum cleaner attachments can help you tackle this challenge with ease. By using the right tools, you can guarantee effective cleaning of both your home and car interiors.

Additionally, regular maintenance of your vacuum cleaner can improve its efficiency and lifespan, making it even more effective in capturing pet hair and dander energy consumption of appliances.

Here are three essential attachments to take into account:

Advertisement
  1. Pet Hair Tool: This tool comes with rubber bristles that effectively lift and suction pet hair from various surfaces without causing damage. It's perfect for upholstery and other delicate areas.
  2. Turbo Brush Attachment: Featuring rotating bristles, this attachment provides deep cleaning power on carpets and upholstery. It's ideal for homes with pets, targeting stubborn fur that ordinary vacuuming might miss.
  3. Car-Cleaning Nozzle: With its wedge shape and targeted suction, this nozzle is designed to make pet hair removal efficient in tight spaces and upholstery in your car.

Regularly using these specialized attachments not only enhances your cleaning efforts but also helps reduce allergens in your home by capturing dander along with the fur.

Deep Cleaning Radiators Efficiently

Cleaning radiators efficiently requires the right tools to tackle dust and debris that accumulate between the fins. A radiator brush is essential for this task—it's a stiff-bristle tool that fits over a crevice tool, designed specifically to reach those tight spaces.

By using it, you can remove built-up dust that restricts airflow, which is vital for maintaining your heating system's efficiency and preventing overheating. Additionally, using an air purifier can further enhance indoor air quality by reducing allergens and dust particles that may escape during cleaning.

For thorough maintenance, don't forget to use your radiator brush on refrigerator coils and vent slats as well. This guarantees all your appliances operate efficiently and last longer.

Regular cleaning not only improves indoor air quality by reducing allergens but also helps lower energy costs since your heating system can work effectively without obstruction.

To get the best results, aim to clean your radiators at least once a year. This simple step can greatly enhance your home's comfort while promoting efficient cleaning practices.

Advertisement

Remember these cleaning tips, and you'll keep your radiators—and other appliances—running smoothly.

Maintenance Tips for Attachments

attachment maintenance best practices

Maintaining your vacuum cleaner attachments is essential for peak performance and longevity. Regular maintenance guarantees your vacuum runs efficiently and helps prevent costly repairs.

Just as with window treatments, using the right tools and care techniques can enhance functionality and aesthetics. Here are three key tips to keep your attachments in top shape:

  1. Clean Regularly: Remove hair, dust, and debris from your attachments, especially the brush heads. This helps maintain maximum performance and prevents clogs that can hinder suction efficiency.
  2. Inspect and Replace: Periodically inspect your attachments for signs of wear and tear. If you notice any damage, such as frayed bristles or clogged filters, replace them promptly. This will extend the lifespan of your vacuum and guarantee effective cleaning.
  3. Proper Storage: Store your attachments in an organized manner to avoid damage and clutter. Keeping them accessible allows for quick use when needed and prevents any unnecessary wear from improper handling.

Effective Cleaning Strategies

optimal cleaning techniques guide

To clean effectively, start by targeting specific surfaces with the right attachments.

For instance, using a crevice tool can help reach tight spaces and corners, while a motorized brush is ideal for carpets.

Make sure to maximize each tool's efficiency by using them in the appropriate areas, and don't forget to maintain a routine for keeping your vacuum and attachments in top shape.

This strategic approach will help you tackle dirt and allergens with ease, similar to how garage door openers enhance home security by integrating smart technology.

Advertisement

Targeted Surface Cleaning

Utilizing specialized vacuum cleaner attachments can transform your cleaning routine, making it more efficient and effective. When you focus on targeted surface cleaning, you can tackle dust buildup in those tricky spaces that often get overlooked.

For peak performance, it's crucial to understand the right tools for the job, similar to how selecting the best laundry detergents can enhance your cleaning results. Here are three important attachments to take into account:

  1. Crevice Tool: Perfect for tight spaces and corners, this tool helps you clean between cushions and along baseboards, enhancing overall cleanliness in hard-to-reach areas.
  2. Upholstery Tool: Designed for fabric surfaces like couches and mattresses, it provides powerful suction while being gentle on delicate materials, guaranteeing you don't cause any damage.
  3. Dust Brush Attachment: With soft bristles, this attachment is ideal for delicate surfaces such as lampshades, blinds, and furniture, allowing for effective cleaning without scratching.

Additionally, don't forget about the radiator brush for cleaning radiator fins, which can greatly improve cleaning efficiency.

For hard surfaces like hardwood floors, a solid-surface attachment guarantees thorough cleaning without scratches. By using these specialized attachments, you can effectively clean targeted areas and maintain a dust-free environment in your home.

Maximizing Attachment Efficiency

Maximizing the efficiency of your vacuum cleaner attachments can greatly enhance your cleaning routine. Start by using the extension wand to clean high areas first, preventing debris from falling onto surfaces you've already cleaned. This technique not only keeps your surfaces cleaner but also aligns with effective cleaning practices that promote a healthier living environment by reducing allergens.

Next, grab the crevice tool to tackle room perimeters and tight spaces where dust and dirt tend to accumulate. This approach captures debris lodged in corners before you vacuum larger areas.

Advertisement

Consider experimenting with different attachments to find out which ones work best for your needs. The upholstery tool is perfect for furniture, while the dusting brush delicately cleans surfaces without damage. Keeping your attachments organized and accessible streamlines your cleaning process, allowing you to shift quickly between tasks.

Regularly assess your cleaning needs and think about investing in specialized attachments. A pet hair tool can be invaluable if you have furry friends, while a radiator brush can help reach those tricky spots. By using the right attachments, you not only enhance the effectiveness of your cleaning but also save time and effort, making your home look its best with minimal hassle.

For instance, using the right technique can also help stop the spread of aquatic nuisance species during outdoor cleaning activities.

Routine Maintenance Practices

Maintaining your vacuum cleaner attachments is essential for keeping them in top shape and guaranteeing effective cleaning.

By regularly cleaning and inspecting vacuum attachments, you can achieve ideal performance and prevent clogs caused by debris buildup. Additionally, just as with candle care and maintenance, guaranteeing your tools are well-maintained will extend their longevity.

Advertisement

Here are three key practices to follow:

  1. Regular Cleaning: Make it a habit to clean your attachments after each use. This helps remove dirt and prevents debris buildup that can reduce suction efficiency.
  2. Inspect and Replace: Regularly inspect vacuum attachments for wear and tear. Replace worn parts, like bristles on brushes or cracked hoses, to maintain effectiveness and prolong your vacuum's lifespan.
  3. Storage and Adaptation: Store attachments in an organized manner to prevent damage and guarantee they're readily accessible.

Assess your cleaning strategy based on the surfaces you maintain, adapting it to guarantee you use the right attachments for maximum effectiveness.

Understanding Surface-Specific Attachments

surface specific attachment insights

When it comes to keeping your home clean, understanding surface-specific attachments for your vacuum cleaner can make a significant difference. Each attachment is designed for effective cleaning on different surfaces.

For instance, the crevice tool is perfect for tight spaces, allowing you to reach under appliances and along baseboards. This enhances airflow by removing dust from vents.

If you need to clean furniture or mattresses, the upholstery tool will be your best friend. Its wider head and powerful suction effectively reach deep cracks without lifting the vacuum.

When it comes to delicate surfaces like lampshades and blinds, the dust brush tool, with its soft bristles, prevents scratches and maintains a dust-free environment.

For carpets, the carpet head, equipped with a spinning brush, guarantees thorough maintenance by pulling debris from various carpet types without damaging the flooring.

Advertisement

Finally, the solid-surface attachment is specifically designed for hardwood, tile, and stone floors, allowing efficient cleaning without the risks associated with chemical cleaners.

Targeting Hard-to-Reach Areas

accessing underserved communities effectively

When it comes to cleaning, reaching those tricky spots can be a challenge.

The crevice tool is your go-to for squeezing into tight spaces, while the multi-angle brush helps you tackle corners with ease.

Plus, using an extension wand allows you to safely clean high surfaces without the risk of injury.

Crevice Tool Benefits

The crevice tool is an essential vacuum cleaner attachment that excels at tackling those tricky, hard-to-reach areas in your home. Its long, narrow design allows you to clean places that standard vacuum heads simply can't reach, making it a must-have for maintaining a spotless environment.

Here are three key benefits of using the crevice tool:

Advertisement
  1. Efficient Cleaning: The crevice tool lets you pick up dust and debris from tight spaces, enhancing your cleaning efficiency. You can easily access under appliances, along baseboards, and in corners.
  2. Improved Air Flow: Regularly using the crevice tool on vents helps remove hidden dust, which can improve air flow and system performance in your heating and cooling systems.
  3. Allergen Reduction: This tool is particularly effective for spot cleaning pet hair and allergens. By targeting those hidden areas, you contribute to a healthier indoor environment.

Multi-Angle Brush Usage

Achieving a thorough clean in your home often hinges on your ability to tackle those hard-to-reach areas, and the multi-angle brush makes this task effortless. With its flexible design, this attachment allows you to effortlessly clean high spots like light fixtures, ceiling fans, and crown molding.

The pivoting head enhances maneuverability, making it perfect for cleaning tight spots where traditional vacuum attachments just can't fit. Equipped with soft bristles, the multi-angle brush gently dusts delicate surfaces without scratching, ensuring you can safely clean a variety of materials.

Regular use of this tool can greatly reduce dust buildup in those high and awkward spaces, which ultimately helps improve the air quality in your home. For routine cleaning, the multi-angle brush is invaluable, easily targeting areas that tend to accumulate dust and cobwebs.

Extension Wand Advantages

While the multi-angle brush helps you clean high surfaces, an extension wand takes your reach to the next level. By adding approximately 18 inches to your vacuuming toolkit, this attachment makes it much easier to tackle those hard-to-reach spots.

You'll find it particularly beneficial for cleaning high areas like ceiling fans and light fixtures without straining your back.

Here are some key advantages of using an extension wand:

Advertisement
  1. Improved Suction: The extension wand enhances suction in elevated areas, ensuring dust and debris are captured effectively.
  2. Access to Small Items: Get creative! You can use it to retrieve small items, like coins, from tight spaces by attaching panty hose over the end.
  3. Enhanced Cleaning Efficiency: It helps you cover more ground quickly, making your cleaning routine more efficient.

At around $39.99, an extension wand is an affordable addition to your vacuuming toolkit.

With its better reach, you'll find cleaning those tricky spots easier than ever. So, grab that extension wand and take your vacuuming game to new heights!

Enhancing Pet Hair Removal

improving pet fur extraction

For pet owners, effectively tackling stubborn pet hair can feel like a never-ending battle. Fortunately, using the right vacuum attachments can make all the difference.

Begin with the pet hair tool, designed specifically with rubber bristles that lift and remove stubborn pet hair from various surfaces. Regularly using the upholstery tool on your furniture and carpets will greatly reduce pet hair accumulation, thanks to its powerful suction and wider cleaning path.

For those tricky carpeted stairs, the power brush attachment shines. Its mini motorized design provides deep cleaning capabilities, reaching into tight spaces where pet hair tends to hide.

When you need a quick clean-up, the hard floor sweeper attachment is your best friend. Its soft bristles collect pet hair from hardwood and tile floors without scratching.

Additionally, consider incorporating a grooming tool that connects to your vacuum. This handy accessory allows you to groom your pet while collecting loose fur, reducing the amount of hair left around your home.

Advertisement

Cleaning Frequency Recommendations

recommended cleaning intervals schedule

Regular vacuuming is essential to maintaining a clean and healthy home environment. Establishing a consistent cleaning frequency can help you effectively manage dust and allergens throughout your space.

Here's a quick guideline for your vacuuming routine:

  1. Carpets: Vacuum high-traffic areas at least once a week and less frequented spots every two weeks. This helps keep carpets fresh and free of dirt.
  2. Hard Floors: Aim for weekly vacuuming, complemented by sweeping in between sessions to eliminate debris and dust.
  3. Upholstered Surfaces: Use an upholstery tool to vacuum mattresses and furniture every 1-3 months, or more often if you have pets.

Don't forget about your stairs! Utilize a portable vacuum with a crevice tool for edges and the upholstery tool for treads, and clean them ideally once a week.

Additionally, remember to dust vents and baseboards with a brush attachment at least monthly to reduce dust buildup and improve air quality.

User Insights and Best Practices

user insights and strategies

Understanding how to effectively use vacuum cleaner attachments can greatly enhance your cleaning routine. Familiarizing yourself with each specialized tool like the crevice tool and dust brush boosts your cleaning efficiency, as they're designed for specific tasks.

For instance, the crevice tool excels in tackling hard-to-reach areas, ensuring dust and debris don't accumulate in those tricky spots.

Regularly using attachments such as the upholstery tool and pet hair attachments can lead to superior results compared to standard vacuum heads. These specialized tools are crafted to address unique cleaning challenges, whether it's removing pet hair from furniture or dust from curtains.

Don't hesitate to experiment with different vacuum attachments; this helps you find what works best for your home's surfaces.

Advertisement

Keeping your attachments organized and easily accessible is another best practice. It saves you time during cleaning sessions, allowing you to quickly switch tools as needed.

Frequently Asked Questions

How Do You Use Vacuum Cleaner Attachments?

To use vacuum cleaner attachments effectively, start by selecting the right tool for the job.

For high areas, grab the extension wand to reach ceiling fans without straining. Use the crevice tool for tight spaces like corners or between cushions.

If you're tackling upholstery, the upholstery tool is perfect for removing hair and lint. For delicate surfaces, the dusting brush works wonders, while the pet hair tool is essential if you have furry friends.

How Do I Organize My Vacuum Attachments?

Imagine opening a treasure chest, only to find it filled with tangled mess. That's how disorganized vacuum attachments can feel!

Advertisement

To keep yours in check, use a clear storage bin or caddy. Label each piece, so you know exactly what's what.

Install a wall-mounted holder for larger attachments, and bundle smaller ones with elastic bands. Regularly inspect and clean them, placing everything back in its spot after use for ultimate organization.

What Is the Round Vacuum Attachment For?

The round vacuum attachment, often called a dust brush, is perfect for gently cleaning delicate surfaces.

You can use it on furniture, blinds, and even car dashboards without scratching. It's especially handy for dusting air vents and lampshades where a standard nozzle might be too bulky.

Just remember to reduce the suction power to protect fragile items while effectively removing dust and allergens, prolonging the life of your upholstery and surfaces.

Advertisement

What Are the Parts and Functions of Each Part of a Vacuum Cleaner?

A vacuum cleaner has several key parts, each with its own function.

The motor powers the suction, while the dustbin collects dirt—either reusable or disposable.

Filters trap allergens, improving air quality, and the brush roll agitates carpet fibers for effective cleaning.

Finally, the hose connects everything, allowing you to reach tight spaces.

Understanding these components helps you maximize your vacuum's performance and tackle cleaning tasks more effectively.

Advertisement

Conclusion

In the world of vacuuming, attachments are your trusty companions, each one a tool in your cleaning arsenal. Just as a painter selects brushes to create a masterpiece, you can choose the right attachment to tackle every mess. With the right tools, your home transforms into a sanctuary, free from dirt and clutter. So, embrace these attachments, like a gardener nurturing their plants, and watch your cleaning efforts bloom into a spotless haven.

Continue Reading

Floor and Carpet Cleaning Guides

Seasonal Cleaning Guide: Preparing Your Home for Each Season

Achieve a fresher home with our seasonal cleaning guide, revealing essential tips and tricks that will transform your living space for every season.

Published

on

seasonal home cleaning tips

Seasonal cleaning revitalizes your home, making it a more comfortable and inviting space. Each season brings unique tasks. In winter, check insulation and declutter. Spring calls for deep cleaning and opening windows for fresh air. During summer, clean your air conditioning units and organize for activities. Fall is perfect for inspecting fireplaces and maintaining outdoor areas. Using essential tools like HEPA vacuums and all-purpose cleaners makes your job easier. Embrace eco-friendly products to improve air quality while being green. You'll find that a checklist simplifies the process, so stick around to discover strategies for each season's cleaning tasks.

Key Takeaways

  • Create a seasonal cleaning checklist tailored to each season's specific tasks for effective organization and thoroughness.
  • Deep clean your home in spring, focusing on thorough dusting, washing surfaces, and preparing for outdoor activities.
  • In winter, ensure insulation and heating systems are checked, while decluttering indoor spaces for comfort.
  • Prepare for summer by cleaning air conditioning units and organizing areas for seasonal activities and relaxation.
  • Conduct fall maintenance tasks like inspecting fireplaces and cleaning outdoor spaces to prepare for colder weather.

Importance of Seasonal Cleaning

Seasonal cleaning transforms your living space, making it more inviting and comfortable. By following seasonal cleaning tips, you can enhance your home's aesthetic appeal while prioritizing a healthier living environment.

A well-structured cleaning routine, including decluttering and organizing, helps you tackle deep cleaning tasks that often get overlooked. Additionally, considering the importance of hiring a professional service can streamline your cleaning efforts and guarantee thoroughness.

Regular seasonal cleaning not only improves indoor air quality by reducing allergens and dust but also prevents long-term damage to surfaces and furnishings, preserving their functionality. This renewal and rejuvenation of your space support both mental well-being and physical health, allowing you to feel relaxed and productive in a tidy environment.

To effectively maintain a clean home, create a cleaning checklist that outlines tasks for each season. This way, you'll guarantee that every corner of your home receives attention and care.

Embracing the importance of seasonal cleaning empowers you to enjoy greater comfort within the home, making it a more enjoyable place to live. So, take the initiative today, and start your seasonal cleaning journey for a healthier and more inviting space!

Advertisement

Essential Cleaning Tools and Supplies

cleaning essentials and supplies

To achieve a thorough and efficient seasonal cleaning, having the right tools and supplies at your disposal makes all the difference. Investing in essential cleaning tools not only simplifies your cleaning process but also guarantees that your home's hygiene is maintained.

Incorporating an air purifier for cleaner air can greatly enhance your indoor environment by reducing allergens and dust. Here's what you need to have on hand:

  • Vacuum Cleaner: A vacuum cleaner with HEPA filters is vital for effectively removing dust, dirt, and allergens, especially in high-traffic areas.
  • Microfiber Cloths: These are perfect for dusting and cleaning surfaces without leaving streaks, making them a must-have in your toolkit.
  • All-Purpose Cleaner: An all-purpose cleaner can be used on various surfaces like countertops and appliances, reducing the need for multiple products.
  • Disinfectants: Keep disinfectants handy for maintaining hygiene in high-touch areas such as doorknobs and light switches to help minimize the spread of germs.

Additionally, don't forget mops and buckets—they're necessary for cleaning hard floors and tackling tough stains.

With these essential cleaning tools, your seasonal cleaning and overall home maintenance will become a breeze.

Seasonal Preparation Strategies

preparing for seasonal changes

Preparing your home for each season is essential for maintaining comfort and efficiency throughout the year. Implementing effective seasonal preparation strategies guarantees your living space remains clean and organized while addressing the specific needs of each season. Here's a quick guide to help you stay on track:

Season Indoor Preparation Outdoor Preparation
Winter Check insulation and heating systems Declutter indoor spaces
Spring Deep cleaning and open windows Prepare areas for planting
Summer Clean air conditioning units Organize spaces for summer activities
Fall Inspect and clean fireplaces Conduct outdoor maintenance tasks

Regular maintenance and thorough cleaning are key to a comfortable home. Each season presents unique challenges, so tailor your cleaning approach accordingly. For instance, winter preparation involves confirming your home likely needs warmth and coziness, while spring focuses on rejuvenation. Remember, deep cleaning and maintenance should be a year-round commitment to keep your home efficient and inviting. By following these strategies, you'll create a welcoming environment for every season!

Cleaning Techniques and Strategies

effective cleaning methods explained

Maintaining a clean and organized home involves employing effective cleaning techniques and strategies tailored to your space. To guarantee no task is overlooked, adopt a room-by-room approach by creating specific checklists for each area. This method allows for thorough cleaning, addressing the unique challenges that different rooms present.

Additionally, consider how your cleaning environment may affect your pets; for instance, using pet-safe products can help protect your cats from harmful substances. Focus on high-traffic areas during your maintenance cleaning to prevent excessive dust and dirt buildup. These spots often require more frequent attention due to daily use.

For deep cleaning, utilize techniques like washing walls and shampooing carpets to tackle accumulated dirt effectively. When selecting cleaning products, adapt to the specific needs of the materials you're cleaning. Use gentle solutions on delicate surfaces to avoid damage.

Advertisement

Additionally, schedule seasonal cleaning tasks to align with the unique needs of each season, such as gutter cleaning in the fall or air vent dusting in the spring. Be mindful of cat preferences and sensitivities when choosing scents and products to create a comfortable environment for your feline friends.

  • Create checklists for each room
  • Prioritize high-traffic areas
  • Utilize deep cleaning techniques
  • Schedule seasonal cleaning tasks

Eco-Friendly Cleaning Approaches

sustainable green cleaning methods

Embracing eco-friendly cleaning approaches not only benefits your home but also protects the environment. By using biodegradable and non-toxic cleaning products, you reduce harmful chemicals in your space, improving indoor air quality for your family and pets. Plus, homemade cleaning solutions made from vinegar, baking soda, and essential oils can handle most cleaning tasks effectively while minimizing your environmental impact.

Here are some simple eco-friendly cleaning swaps you can make:

Eco-Friendly Swap Traditional Alternative
Reusable cloths Paper towels
Homemade cleaning solutions Store-bought cleaners
Biodegradable sponges Conventional sponges
Non-toxic detergents Chemical-laden detergents
Cruelty-free products Standard cleaning products

Adopting sustainable cleaning habits, like those listed above, can greatly reduce waste and promote ethical consumerism. By choosing cruelty-free cleaning products, you support humane practices in production. Making these changes not only helps your home stay clean but also contributes to a healthier planet. So go ahead, embrace these eco-friendly practices and enjoy a cleaner, greener lifestyle!

Frequently Asked Questions

What Is a Good House Cleaning Schedule?

A good house cleaning schedule includes daily, weekly, monthly, and annual tasks.

Each day, make your bed and wipe down counters to keep things tidy.

Advertisement

Weekly, focus on high-traffic areas like vacuuming carpets and dusting surfaces.

Monthly, wash windows and check upholstery for stains.

Annually, tackle bigger tasks like decluttering your garage and deep cleaning kitchen cabinets.

This routine helps maintain organization and efficiency, making your home a pleasant place to live.

How Often Should You Clean Everything in Your House Chart?

Imagine your home as a canvas, where cleanliness paints a masterpiece of comfort.

Advertisement

You should aim for daily cleaning of high-touch surfaces and making your bed, while weekly tasks include vacuuming and bathroom upkeep.

Monthly, tackle neglected areas and inspect furniture.

For seasonal deep cleans, focus on appliances and air vents.

Finally, an annual clean should declutter and refresh spaces like your garage.

Staying on top of this keeps your home vibrant and inviting!

Advertisement

What Is a Cleaning Schedule?

A cleaning schedule is a structured plan that outlines specific tasks you need to tackle daily, weekly, monthly, and yearly.

It helps you break down larger cleaning projects into smaller, manageable tasks, ensuring you don't overlook any areas. By following a schedule, you build a routine, making cleaning less intimidating.

Plus, using a checklist can keep you accountable and organized, allowing you to prioritize what needs attention and track your progress effectively.

How to Set up a Cleaning Routine?

To set up a cleaning routine, start by identifying daily and weekly tasks.

You can make a checklist to tackle high-traffic areas and keep dirt at bay. Break larger projects into manageable steps, and schedule dedicated time for them.

Advertisement

Incorporate daily habits like making your bed and wiping surfaces to maintain cleanliness effortlessly.

Conclusion

So, now that you're armed with the ultimate seasonal cleaning guide, it's time to embrace your inner housekeeper. Sure, you could ignore those dusty corners and let the dust bunnies host their annual convention. But why not swap the couch cushions and channel your inner Marie Kondo instead? After all, nothing says "I've got my life together" like a sparkling home—until you spill your morning coffee, of course. Happy cleaning, and may the odds be ever in your favor!

Continue Reading

Floor and Carpet Cleaning Guides

How to Properly Clean and Maintain Your Robot Vacuum

Maintain your robot vacuum effectively to enhance its performance and longevity, but are you aware of the crucial steps to take?

Published

on

robot vacuum cleaning maintenance

To properly clean and maintain your robot vacuum, start with daily tasks like emptying the dustbin after each use and checking the docking station. Weekly, inspect brushes for tangles, wash them, and check wheels for debris. Clean the air filters often and wipe sensors for accurate performance. Additionally, maintain the charging ports to avoid battery issues. It's also essential to replace worn parts, like brushes, every 6-12 months. Regular maintenance not only enhances efficiency but can also extend your vacuum's lifespan. You'll find even more tips on how to keep your vacuum running smoothly.

Key Takeaways

  • Empty the dustbin after each cleaning session to maintain suction and prevent clogs.
  • Inspect and clean brushes weekly, cutting away hair and strings for optimal performance.
  • Regularly check and clean wheels to avoid debris entanglement and ensure smooth operation.
  • Clean air filters weekly and replace them when necessary to maintain effective filtration.
  • Wipe sensors and charging ports regularly to ensure accurate detection and reliable charging.

Importance of Regular Maintenance

Regular maintenance is vital for keeping your robot vacuum running at its finest. By committing to regular maintenance, you enhance the efficiency and longevity of your device, potentially extending its lifespan beyond the typical 8-10 years. Neglecting this upkeep can lead to reduced suction power and functionality, ultimately compromising your cleaning performance.

For instance, using vacuums designed for pet owners, like the Bissell Pet Hair Eraser Vacuum, can greatly improve hair removal efficiency and reduce the maintenance needed.

Spending just a few minutes each week on tasks like emptying the dustbin and cleaning filters can make a notable difference, especially if you have pets or children. Proper care prevents the buildup of dirt and debris, resulting in more effective cleaning results.

When you prioritize robot vacuum maintenance, you also reduce the risk of mechanical failures that could lead to costly repairs or replacements.

Establishing a consistent maintenance routine, including both weekly and monthly tasks, is essential for peak operation. By staying on top of these responsibilities, you guarantee your robot vacuum can tackle dirt and mess effectively, keeping your home clean and comfortable.

Advertisement

Cleaning Procedures and Frequency

regular cleaning protocols implemented

To keep your robot vacuum running smoothly, you should empty the dustbin daily. This simple task prevents clogs and maintains ideal suction.

Additionally, make it a habit to clean the brush rolls weekly to avoid hair and dirt buildup that can affect performance.

Regular maintenance not only enhances efficiency but also extends the lifespan of your device, which is similar to how you'd assess service offerings when hiring a cleaning company.

Daily Dustbin Maintenance

Maintaining your robot vacuum's dustbin is essential for ensuring peak performance. To keep your vacuum running smoothly, make it a habit to empty the dustbin after each cleaning session. This helps maintain ideal suction power and prevents clogs. If the dustbin is heavily soiled, rinse it with water but remember to remove all filters before washing. Additionally, clean any anti-tangle combs or other features on the dustbin to enhance overall efficiency.

For self-emptying models, don't forget to check and empty the docking station when it becomes full. Regular dustbin maintenance not only enhances performance but also avoids mechanical failures, helping to prolong your vacuum's lifespan.

Here's a quick reference for daily dustbin maintenance:

Advertisement
Task Frequency
Empty the dustbin After each session
Rinse the dustbin As needed
Check docking station Daily

Weekly Brush Cleaning Routine

A thorough weekly brush cleaning routine is crucial for keeping your robot vacuum performing at its best. Start by inspecting the main brush after each use for tangled hair or debris. Cutting-edge technology in modern vacuums enhances cleaning efficiency, similar to how robotic pool cleaners automate pool maintenance tasks. Cut away any obstructions to maintain peak cleaning performance.

For your weekly maintenance, remove the brush rolls and wash them with mild soap, guaranteeing they're thoroughly dried before reinserting them into the vacuum.

Don't forget about the side brushes. Check for bristle warping or tangling and restore their shape using a hair dryer, holding the bristles in place until they cool. This will help them function effectively during cleaning sessions.

Additionally, inspect the robot vacuum wheels for hair and debris entanglement. Use scissors or a utility knife to carefully remove any buildup, then wipe the wheels with a damp cloth to guarantee smooth operation.

Consistent brush cleaning and maintenance can greatly improve your robot vacuum's efficiency and prolong its lifespan, especially in homes with pets or heavy foot traffic. By taking the time to clean the brushes and wheels weekly, you'll keep your vacuum running smoothly and effectively for years to come.

Advertisement

Care for Brushes and Wheels

maintain your tools properly

To keep your robot vacuum running smoothly, you need to pay attention to the brushes and wheels. Regular maintenance, like checking for tangled hair on the main brush and cleaning the wheels, can make a big difference in performance.

Additionally, ensuring that the air quality in your home is ideal can enhance the vacuum's effectiveness, especially in reducing allergens and dust particles, as noted by the importance of air purifiers.

Let's go over some specific tips to help you care for these essential parts.

Main Brush Maintenance Tips

Keeping your robot vacuum's main brush in top shape is vital for ideal performance. Regular maintenance will guarantee your vacuum operates efficiently, especially if you have pets or a busy household.

Investing in a vacuum designed for pet hair management can also enhance your cleaning experience. Here are some key maintenance tips to keep in mind:

  • Inspect the main brush after each use for tangled debris. Use a cleaning tool to cut away hair and strings without damaging the bristles.
  • Wash the main brush with mild soap once a month. Make sure to thoroughly rinse and dry it before reinserting to prevent buildup.
  • If you notice signs of wear, consider replacing the main brush every 6-12 months. A fresh brush is vital for effective cleaning.

After cleaning, guarantee the brush is securely reinstalled to avoid any operational issues during your next cleaning session.

Side Brush Care Techniques

Maintaining the side brushes of your robot vacuum is just as important as caring for the main brush. Regularly inspect your side brushes for tangling and warping; if you notice any issues, try heating the plastic bristles with a hair dryer to restore their shape.

Advertisement

To keep them clean, wipe down the bristles to remove dirt and debris, ensuring ideal performance for effective debris collection. Proper appliance maintenance not only enhances the efficiency of your robot vacuum but also prolongs its lifespan.

When it comes to thorough cleaning, don't hesitate to remove the side brushes as needed. You might need a screwdriver for this, but it's worth the effort to maintain functionality. After cleaning, reinstall them securely to keep everything in good working order.

Remember, side brushes should be replaced every 6-12 months, or sooner if the bristles become damaged or worn. This is essential for continued cleaning efficiency.

For best results, clean the area around the side brushes frequently to prevent hair and debris buildup, which can hinder performance.

Wheel Cleaning Procedures

The wheels of your robot vacuum play a crucial role in its cleaning efficiency, so regular attention is important.

Advertisement

Just as cats show emotional attachment and can experience stress if their environment isn't maintained, making sure your vacuum's wheels are clean and well-maintained will help your vacuum navigate smoothly and extend its lifespan.

Here are some quick maintenance tips to keep in mind:

  • Check weekly: Look for hair and debris entanglement. Use scissors or a utility knife to cut away any stuck materials that could impede movement.
  • Wipe down: Use a damp cloth to clean the wheels, removing sticky residue to improve traction. This helps enhance the robot's overall cleaning efficiency.
  • Inspect axles: Regularly check the wheel axles for buildup. Keeping them clean guarantees smooth operation and prevents navigation issues.

Dustbin and Air Filter Maintenance

waste management and filtration

To guarantee your robot vacuum runs efficiently, regular attention to the dustbin and air filters is essential. Start by emptying the dustbin after each cleaning session, even if it doesn't seem full. This helps maintain maximum suction power and prevents clogs.

Additionally, maintaining a clean environment can support overall health, much like the importance of hydration in weight loss during treks.

Next, focus on the air filters. Clean them weekly or after each use by tapping them over a garbage bin to dislodge dust. For a thorough clean, use a soft brush to remove any remaining debris.

If your vacuum has washable filters, rinse them under cold water and let them air dry completely before reinstalling them. This step guarantees effective filtration.

Advertisement

If you own a self-emptying model, remember to check and empty the docking station when it's full to keep the self-cleaning feature working efficiently.

Additionally, if you notice any paper-based filters getting wet, replace them immediately. Always follow the manufacturer's guidelines for filter replacement schedules to guarantee your robot vacuum operates at peak performance.

Regular maintenance of the dustbin and air filters will help extend your vacuum's lifespan and enhance its cleaning capabilities.

Sensor and Charging Port Care

maintain sensor charge port

Keeping your robot vacuum's sensors and charging port clean is essential for ideal performance. Regular maintenance not only enhances navigation but also guarantees efficient charging.

Start by using a microfiber cloth to wipe the sensors located on the sides and bottom of your vacuum. This helps assure accurate obstacle detection and is akin to how modern ceiling fans enhance airflow for improved indoor air quality, as efficient air circulation is key in both scenarios. For stubborn dirt, dampen the cloth slightly, but steer clear of abrasive cleaners to prevent damage.

Additionally, inspect the charging port frequently for dust and debris that can interfere with the connection. Wipe it down with your microfiber cloth to keep it free from buildup.

Advertisement

Don't forget to check the charging contacts as well; grime here can lead to inefficient charging and battery issues over time.

Here are some quick tips to remember:

  • Clean sensors regularly to avoid navigation problems.
  • Use a damp microfiber cloth for tougher spots, but avoid harsh cleaners.
  • Inspect for hair or dirt around the sensors and charging port.

Tips for Optimal Performance

maximize your performance potential

For ideal performance, regularly cleaning and maintaining your robot vacuum is essential. Start by confirming that you clean your robot vacuum's brushes and filters frequently. This prevents dirt and hair buildup, which can reduce suction power and performance. Empty the dustbin after each use to avoid clogs and maintain maximum efficiency.

Consider scheduling automatic cleaning sessions and utilize smart features for better cleaning paths, which enhances overall efficiency. Also, adjust the vacuum's settings based on your floor type—this can greatly improve performance on both carpets and hard floors.

Here's a quick reference table for your maintenance routine:

Maintenance Task Frequency Purpose
Clean Brushes Weekly Effective dirt and hair collection
Empty Dustbin After Each Use Prevent clogs and confirm suction
Clean Filters Monthly Maintain suction power
Check for Blockages Monthly Confirm smooth operation
Follow Manufacturer Guide As Needed Consistent care for longevity

Frequently Asked Questions

How to Maintain Your Robot Vacuum?

To maintain your robot vacuum, start by emptying the dustbin after each use and cleaning the air filters weekly to keep suction power strong.

Advertisement

Inspect the brushes regularly, cutting away tangled hair and debris. Perform a deep clean of the brushes and wheels monthly to avoid buildup.

Don't forget to check the sensors with a microfiber cloth for accurate navigation. Following these steps will help extend your vacuum's lifespan and guarantee efficient cleaning.

How Often Should You Clean Your Robot Vacuum?

You should clean your robot vacuum regularly to keep it running smoothly.

After each cleaning session, empty the dustbin and check for debris in the wheels.

Once a week, clean the brush rolls and wheels to prevent hair buildup.

Advertisement

Monthly, do a deep clean of the brushes and inspect the sensors.

If you stay consistent with this schedule, you'll enhance your vacuum's performance and extend its lifespan greatly.

What Is the Best Cleaning Mode for a Robot Vacuum?

The best cleaning mode for your robot vacuum really depends on your flooring.

For carpets, you'll want to use a deep cleaning mode that boosts suction power.

If you have hard floors, a standard mode will do just fine, efficiently picking up dust and debris.

Advertisement

Don't forget to take into account smart mapping features; they can adapt cleaning modes based on your home's layout and dirt levels, ensuring peak performance during each session.

Do I Need to Service My Robot Vacuum?

Imagine your robot vacuum as a loyal steed, tirelessly trotting through your home. Yes, you do need to service it!

Regular maintenance keeps it galloping efficiently. Empty the dustbin daily and check for debris in the wheels to prevent clogs. Clean the brushes weekly and inspect them monthly for wear.

Neglecting these simple tasks can lead to a sluggish performance, costing you time and money in the long run. Keep your trusty companion in top shape!

Conclusion

By regularly maintaining your robot vacuum, you not only extend its lifespan but also guarantee it operates at peak efficiency. Did you know that a well-maintained vacuum can boost your home's air quality by reducing dust and allergens by up to 50%? That's a significant improvement for your health and comfort. So, take a few minutes each month to clean and care for your vacuum. Your home—and your lungs—will thank you!

Advertisement
Continue Reading
Advertisement

Affiliate disclaimer

As an affiliate, we may earn a commission from qualifying purchases. We get commissions for purchases made through links on this website from Amazon and other third parties.

Vetted

top spa vacuums 2024 top spa vacuums 2024
Vetted2 weeks ago

15 Best Spa Vacuums of 2024 – Keep Your Pool Sparkling Clean

Browse the top 15 spa vacuums of 2024 that promise to keep your pool sparkling clean and uncover essential tips...

top handheld vacuums 2024 top handheld vacuums 2024
Vetted2 weeks ago

15 Best Handheld Vacuums for Effortless Cleaning in 2024

Discover the top 15 handheld vacuums of 2024 that promise effortless cleaning and powerful performance—find the perfect one for your...

top vacuums 2024 recommendations top vacuums 2024 recommendations
Vetted2 weeks ago

The 4 Best Vacuums of 2024, According to Wirecutter Experts

The 4 best vacuums of 2024, according to Wirecutter experts, reveal top choices that elevate your cleaning game—discover which ones...

unmissable 2024 black friday vacuums unmissable 2024 black friday vacuums
Vetted2 weeks ago

13 Best Black Friday Vacuum Deals You Can’t Afford to Miss in 2024

Discover unbeatable Black Friday vacuum deals in 2024 that promise powerful performance and convenience—find out which models you can't miss!

top car vacuums 2024 top car vacuums 2024
Vetted2 weeks ago

15 Best Car Vacuums of 2024 – Top Picks for a Spotless Ride

Browse the 15 best car vacuums of 2024 for a spotless ride and discover powerful features that could transform your...

top wall mounted garage vacuums top wall mounted garage vacuums
Vetted2 weeks ago

15 Best Wall Mounted Garage Vacuums for Efficient Cleaning in 2024

Clean your garage effortlessly with our top 15 wall-mounted vacuums for 2024, but which one will suit your needs best?...

top rated vacuums 2024 top rated vacuums 2024
Vetted2 weeks ago

The 14 Best Rated Vacuums of 2024: Reviews and Expert Picks

Maximize your cleaning efficiency with the 14 best-rated vacuums of 2024—discover which model will revolutionize your home cleaning routine!

top 2024 vacuum recommendations top 2024 vacuum recommendations
Vetted2 weeks ago

15 Best Vacuums of 2024 – Expert Reviews and Top Picks

Just when you thought vacuuming couldn't get any easier, discover the 15 best vacuums of 2024 that redefine cleaning efficiency...

affordable pet vacuums under 100 affordable pet vacuums under 100
Vetted2 weeks ago

15 Best Pet Vacuums Under $100: Affordable Solutions for Fur-Free Homes

Get ready to discover the 15 best pet vacuums under $100 that promise to keep your home fur-free—affordability has never...

top vacuums for shedding top vacuums for shedding
Vetted2 weeks ago

15 Best Vacuums for Human Hair in 2024 – Say Goodbye to Shedding

Kick your shedding woes to the curb with the 15 best vacuums for human hair in 2024—discover the ultimate cleaning...

effortless fur free cleaning solutions effortless fur free cleaning solutions
Vetted2 weeks ago

15 Best Robot Vacuums for Pet Hair: Keep Your Home Fur-Free Effortlessly

I've discovered 15 incredible robot vacuums that tackle pet hair effortlessly, but which one will be the best fit for...

top 2024 vacuum cleaners top 2024 vacuum cleaners
Vetted2 weeks ago

15 Best Vacuums of 2024: Powerful Cleaners for Every Home

Outstanding vacuums for every home await you in 2024, featuring cutting-edge technology and convenience that will leave you eager to...

Advertisement
Advertisement

Trending