To test your DIY cleaner safely, pick an inconspicuous spot and apply a small amount. Wait at least 24 hours, then check for surface discoloration or damage, and observe for skin or allergic reactions. Ventilate the area to prevent fumes from building up. Make sure the ingredients are safe for your surfaces and skin, and store the cleaner out of reach after testing. For more tips on ensuring your cleaner’s safety and effectiveness, keep exploring further.
Key Takeaways
- Test on a small, hidden area and wait 24 hours for reactions before full application.
- Use minimal cleaner initially, observing for surface damage or discoloration.
- Ensure proper ventilation during testing to prevent fume buildup and monitor air quality.
- Check for skin irritation or allergic reactions through patch testing before widespread use.
- Clearly label and safely store homemade cleaners, keeping them out of reach of children and pets.
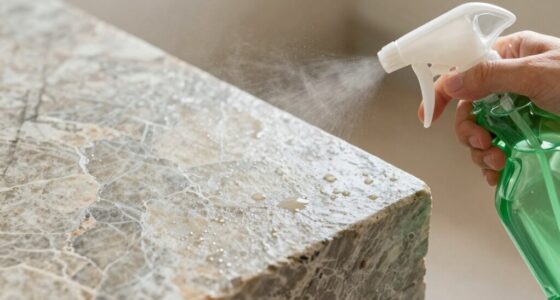
Before you start spraying your homemade cleaner all over your home, it’s smart to test it first. It’s not just about making sure it works — it’s about ensuring your safety and peace of mind. When handling DIY cleaning solutions, you need to evaluate chemical safety carefully. Many homemade cleaners contain ingredients like vinegar, baking soda, lemon juice, or essential oils, which can cause unintended reactions or irritation if not tested properly. Skipping this step can lead to skin irritation, damage to surfaces, or even allergic reactions, especially if someone in your household has sensitivities.
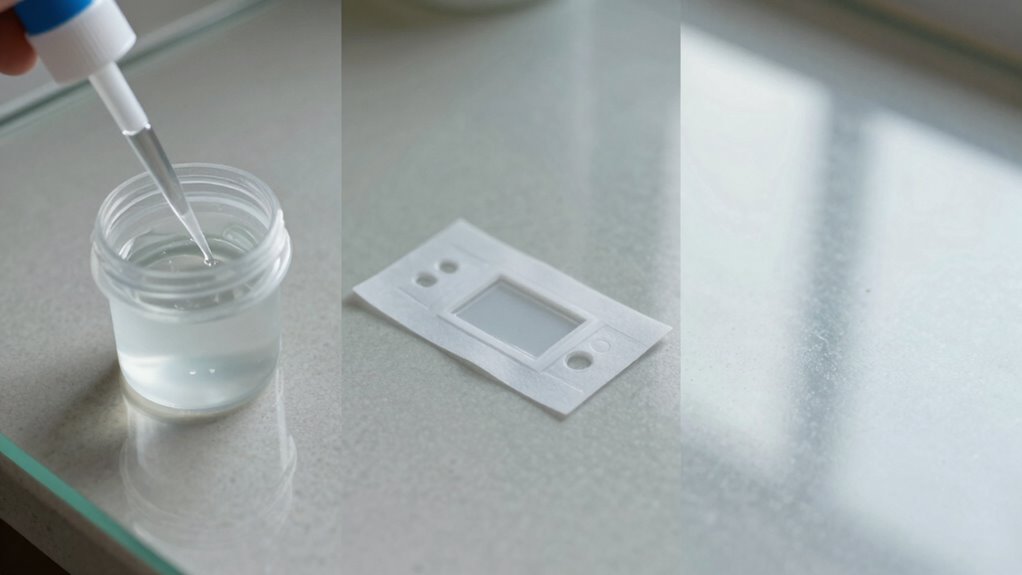
Start by choosing a small, inconspicuous area to test your cleaner. Apply a tiny amount and wait at least 24 hours before examining the results. During this time, pay close attention to how your skin reacts if you accidentally touch the solution or if any irritation develops on the surface. This process is part of allergy testing, which can help you identify any potential allergic reactions or sensitivities to specific ingredients. If you notice redness, itching, or swelling on your skin, or if the surface shows signs of damage, it’s best to reconsider the ingredients or dilute the solution further. Additionally, Understanding chemical reactions is crucial when working with DIY solutions, as some ingredients can produce harmful fumes or reactions when combined improperly. Conducting a patch test can help you identify surface sensitivities and prevent damage.
Test your cleaner on a small area first; wait 24 hours to check for reactions or damage.
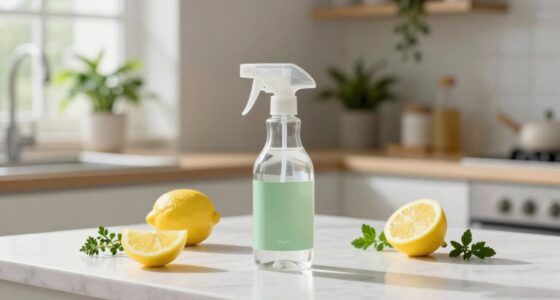
Chemical safety is especially important because homemade cleaners often lack the stabilizers and safety measures found in commercial products. Some ingredients, like citrus oils or vinegar, are generally safe but can cause reactions in sensitive individuals or certain materials. Testing helps you avoid damaging delicate surfaces or exposing yourself and your family to harsh chemicals. Researching each ingredient thoroughly and understanding their potential hazards can help you create safer cleaning solutions. Also, proper ventilation during testing can help prevent the buildup of fumes and ensure a safer environment. Be cautious when mixing multiple ingredients, as some combinations can produce harmful fumes or reactions. Additionally, always keep in mind that labeling and storage are vital steps to prevent accidental misuse or ingestion.
During allergy testing, observe not just the surface or your skin but also the air quality in your home. If you notice strong fumes or a bad odor, ventilate the area and consider adjusting your recipe. Remember, a safe cleaner doesn’t just clean; it protects your family’s health. Once you’ve confirmed that your homemade solution is safe and effective in a small test spot, you can confidently use it more broadly. Always remember to label your homemade cleaners clearly and store them out of reach of children and pets. Taking these simple precautionary steps makes your cleaning routine safer, smarter, and more effective.

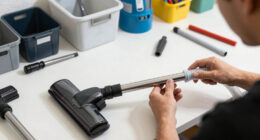
THIKPO Universal Fuel Injector Tester and Cleaner Tool Kit, DIY Cleaning Tool Kit, 8 Pulse Modes, 4 Wire Dual Channel for 2 Fuel Injectors, 8 Size Cleaning Adapters, 12V/5V Output Power
Upgraded Universal Fuel Injector Tester and Cleaner Tool Kit—Operates injectors individually to diagnose fuel delivery problems on petrol…
As an affiliate, we earn on qualifying purchases.
As an affiliate, we earn on qualifying purchases.
Frequently Asked Questions
How Long Should I Wait to See Results After Testing?
You should wait at least 24 hours after testing your DIY cleaner to observe the chemical reaction and see if it effectively tackles the stain or dirt. During this test duration, check for any discoloration, residue, or damage to the surface. Patience is key—if you notice positive results within this period, you’re likely safe to proceed with full application. If not, consider adjusting your cleaner or testing again.
Can I Test the Cleaner on All Types of Surfaces?
You can’t just test your cleaner on all surfaces blindly; doing so might cause disastrous chemical reactions or damage. Start by checking surface compatibility on a small, inconspicuous area first—your whole house’s safety depends on it! Different materials react differently, and even a seemingly safe surface might have unexpected reactions. Be cautious, and always follow manufacturer guidelines. When in doubt, test a small area and wait to see how it reacts before full application.
What Safety Precautions Should I Take During Testing?
You should wear gloves and goggles to protect yourself from chemical reactions and potential allergy risks during testing. Test the cleaner in a small, hidden area first to check for any adverse reactions. Make sure good ventilation to avoid inhaling fumes. Keep a water source nearby in case of skin irritation. Always read the ingredient labels and follow safety instructions to minimize risks and guarantee safe, effective testing.
How Do I Modify the DIY Cleaner if It Reacts Poorly?
When your DIY cleaner reacts poorly, think of it like a storm brewing—calm it down with pH adjustment. Carefully add small amounts of vinegar to lower alkalinity or baking soda to increase it, stirring gently and testing after each change. Chemical reactions can be unpredictable, so proceed slowly. Adjust gradually until the cleaner’s pH stabilizes, ensuring it’s safe and effective for use without causing damage or irritation.
Is It Necessary to Test in a Hidden Area First?
Yes, it’s necessary to test in a hidden spot first. You should apply a small amount of the cleaner to an inconspicuous area to watch for any color change or damage. This prevents surprises on visible surfaces and helps you assess if the cleaner reacts poorly. If the color change or damage occurs, you can adjust the formula or choose a different cleaning method, saving time and avoiding costly mistakes.

CleanPatch-V Variety Kit – Medical Surface Repair Patches for Vinyl Equipment (2 of 1.75" × 4", 1 of 5.75" × 8") – REF 24001
Includes (2) patches measuring 1.75" × 4" (4.4 cm × 10.2 cm)
As an affiliate, we earn on qualifying purchases.
As an affiliate, we earn on qualifying purchases.
Conclusion
Now that you’ve mastered the methodical way to test your DIY cleaner, you’re equipped to approach every surface with confidence. By taking small steps first, you prevent potential problems and protect your space. Remember, patience paves the path to perfect cleanliness, so proceed prudently and persistent testing. With this smart, strategic approach, you’ll soon see spotless surfaces shining, showcasing your savvy and safe cleaning skills. Success is just a careful test away—so test wisely, and enjoy a pristine, problem-free space.

16 in 1 Air Quality Monitor Indoor 7" Large Display 9 AQI+7 Alerts, CO2 Monitor Air Quality Tester for CO2, TVOC, PM2.5 PM1.0 PM10, HCHO Temperature Humidity AQI & Time Air Quality Meter for Home
【16-in-1 Air Quality Monitor Indoor】Experience the ultimate indoor air quality monitoring with our 16-in-1 Air Quality Monitor, offering…
As an affiliate, we earn on qualifying purchases.
As an affiliate, we earn on qualifying purchases.

Pet-Ag Nursing Kit – 4 oz – Promotes The Natural Feeding of Liquids to Baby Animals – Each Kit Includes 4 oz. Bottle with Cap, 3 Nipples & Cleaning Brush
NURSING KIT – This kit was designed to feed Esbilac, KMR, Goat’s Milk KMR, Goat’s Milk Esbilac, PetLac,…
As an affiliate, we earn on qualifying purchases.
As an affiliate, we earn on qualifying purchases.