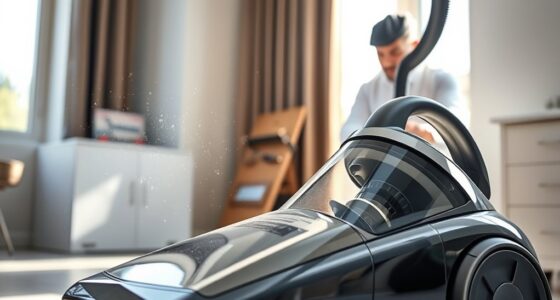
To clean your vacuum’s brushroll, start by unplugging the device for safety. Remove the cover or panel securing the brushroll, then carefully slide it out. Use tools like tweezers or a small brush to clear away hair, threads, and debris, paying attention to tangled buildup. Check for blockages or damage, then reassemble everything securely. Following these steps helps maintain peak performance—keep going to discover more tips for a thorough clean.
Key Takeaways
- Always unplug the vacuum before disassembly to ensure safety during cleaning.
- Remove the brushroll carefully using a screwdriver or pliers, then detach it from the housing.
- Use a small brush or old toothbrush to dislodge hair, threads, and debris from the brushroll.
- Clean the brushroll with mild soap, vinegar, or vacuum-specific sprays, then dry thoroughly before reinstallation.
- Regularly inspect and clean the brushroll weekly or biweekly to maintain optimal suction and prevent motor strain.
Top picks for "vacuum clean brushroll"
Open Amazon search results for this keyword.
As an affiliate, we earn on qualifying purchases.
Understanding Why a Clean Brushroll Matters

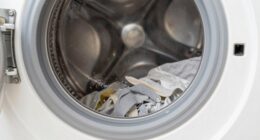
A clean brushroll is essential because it directly impacts your vacuum’s cleaning performance. When your brushroll is free of hair, debris, and tangled fibers, it spins more efficiently, maintaining peak vacuum suction. This not only improves dirt and dust pickup but also extends the brushroll’s lifespan by preventing unnecessary wear and tear. A clogged or dirty brushroll can cause strain on your vacuum’s motor, reducing its overall effectiveness and potentially leading to costly repairs. Keeping the brushroll clean ensures consistent suction power, making your cleaning routine more effective and less time-consuming. Additionally, regular maintenance of the brushroll can help prevent motor strain and ensure your vacuum operates at optimal efficiency. Ultimately, caring for your brushroll helps preserve its function, enhances your vacuum’s longevity, and guarantees a thorough clean every time you vacuum.
Tools and Supplies You’ll Need for the Job

To effectively clean your vacuum brushroll, gather the right tools and supplies beforehand. Start with essential vacuum accessories like a screwdriver, tweezers, or pliers to remove the brushroll easily. You’ll also need a small brush or old toothbrush to dislodge debris and hair. Keep cleaning solutions on hand—mild soap, vinegar, or specialized vacuum cleaning sprays—to help break down dirt and grime. A microfiber cloth or soft rag is useful for wiping down the brushroll and surrounding areas. If your vacuum manufacturer recommends it, have replacement filters or belts ready. Having these tools and supplies prepared guarantees a smooth cleaning process, saving you time and effort while keeping your vacuum performing at its best. Additionally, understanding the best vacuum accessories can further enhance your cleaning efficiency.
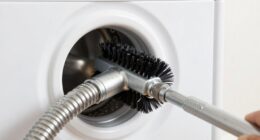
Step-by-Step Guide to Removing the Brushroll
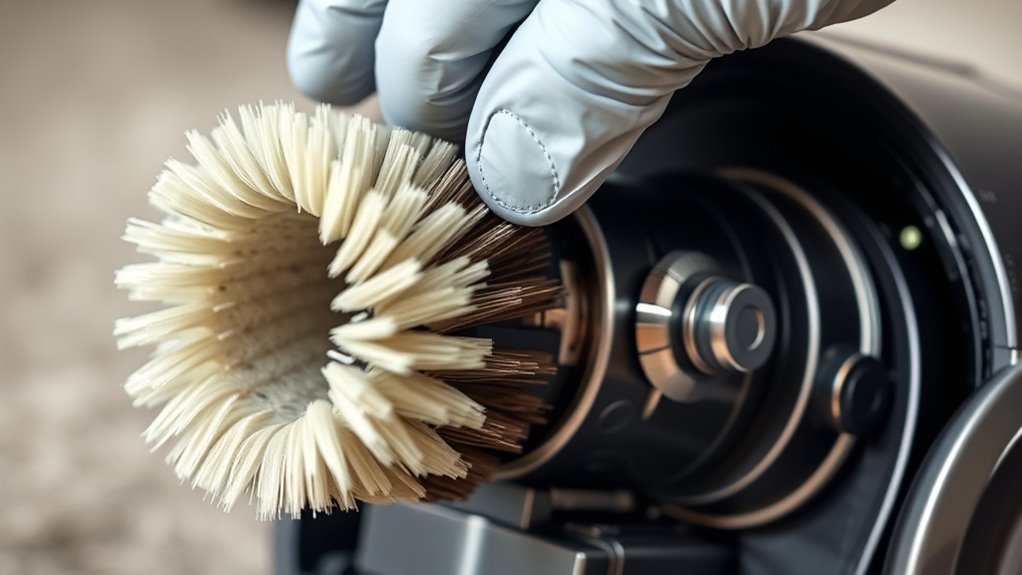
Before removing the brushroll, unplug your vacuum to guarantee safety. Locate the brushroll compartment, usually accessible by removing a cover or panel. Carefully detach the screws or clips holding the cover in place. Gently lift the cover off, being mindful of any dust buildup around the area. Once open, slide out the brushroll, taking care not to yank it abruptly, which could damage the motor or belt. Check for tangled hair, debris, or dust buildup that could hinder performance. Removing the brushroll properly helps protect the motor from dust and debris that can cause overheating or damage. Keep track of all parts and screws to ensure smooth reassembly. With the brushroll out, you’re ready for the next cleaning step.
How to Properly Clean and Detangle the Brushroll
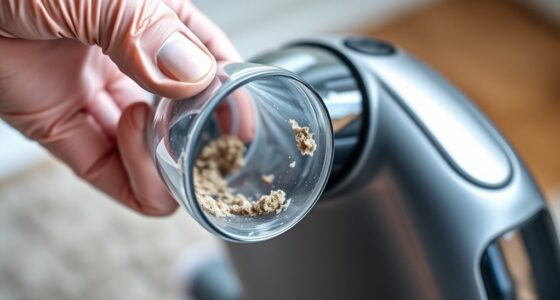
Once you’ve removed the brushroll, carefully clear away any debris to make certain of damage. Next, gently detangle hair and threads wrapped around it, making sure nothing gets snagged during use. Additionally, inspecting the engine performance can help ensure your vacuum operates efficiently after reassembly. Finally, reassemble the brushroll correctly and test your vacuum to ensure it’s working smoothly.
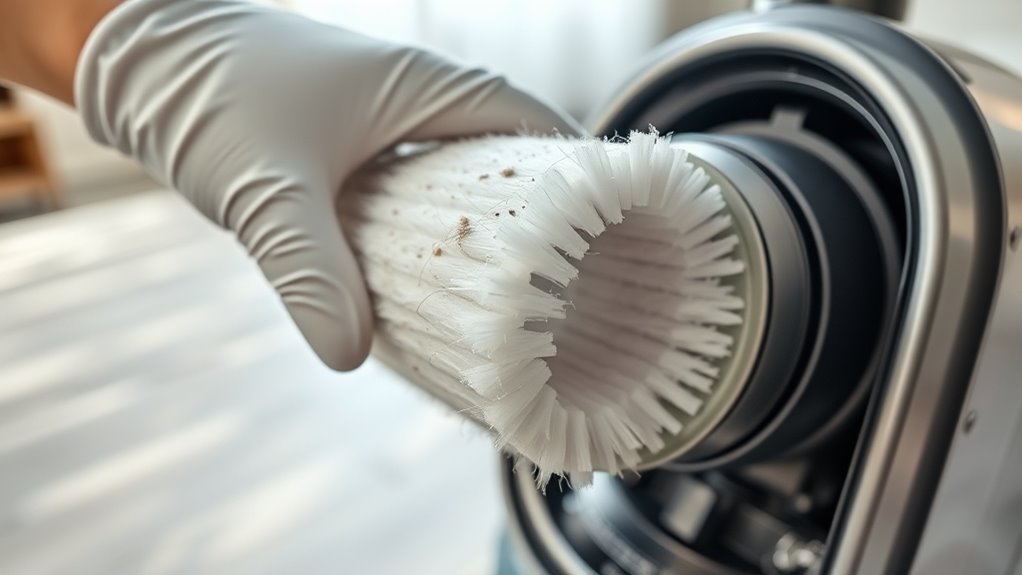
Remove Debris Carefully
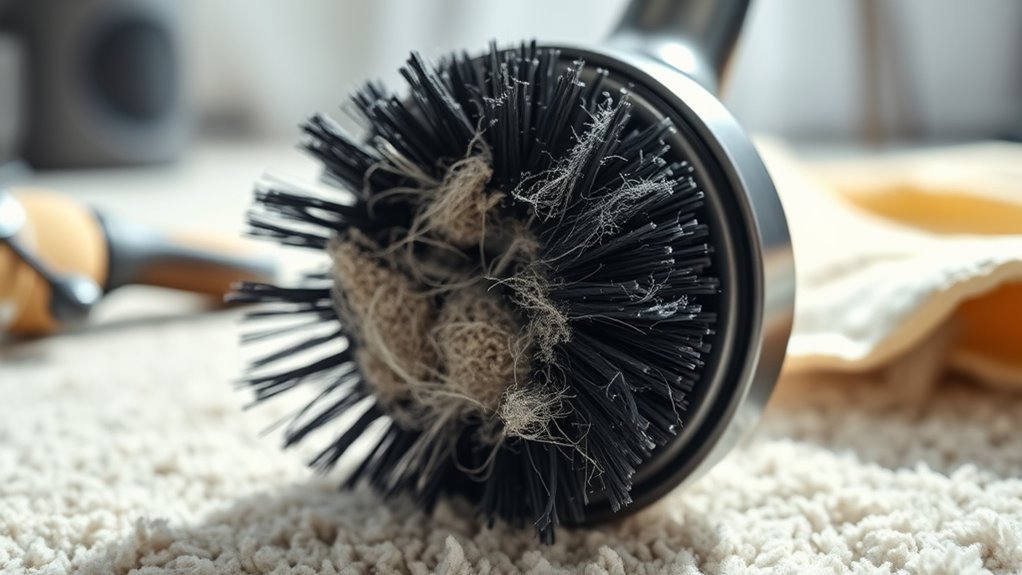
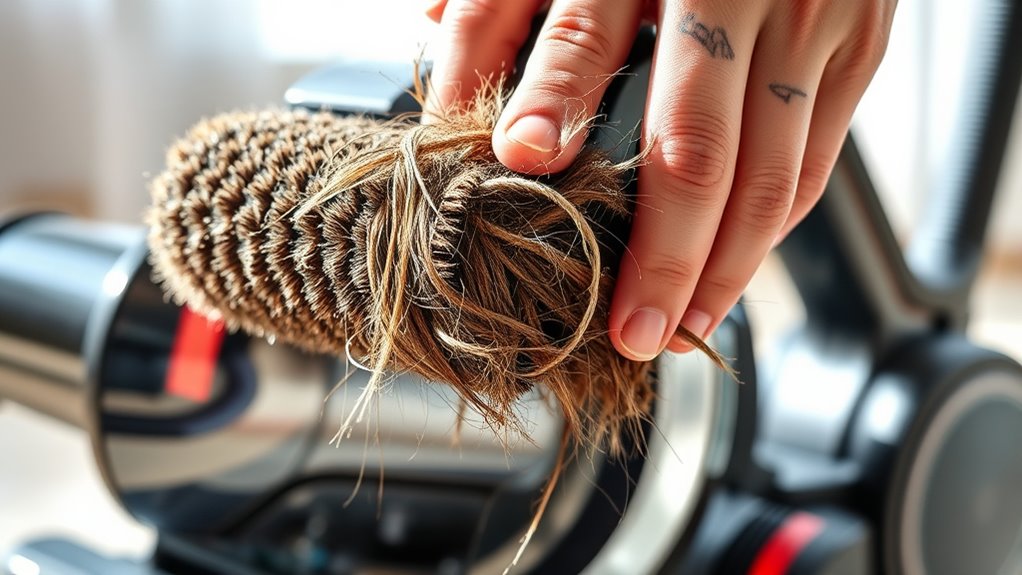
When removing debris from your vacuum brushroll, it’s important to do so carefully to avoid damaging the bristles or the mechanism. Start by gently extracting hair, threads, and larger debris with your fingers or a tool, being careful not to pull too harshly. Be mindful of airflow obstruction; tangled debris can block airflow, reducing suction and cleaning efficiency. As you clear debris, check that the brushroll’s lubrication points aren’t disrupted—keeping these areas well-lubricated ensures smooth rotation and prevents unnecessary wear. Avoid forcing debris out or using excessive force, which can damage the brushroll or motor components. Taking your time during this step helps maintain ideal airflow and keeps your vacuum running smoothly. Properly removing debris prolongs the life of your vacuum and ensures effective cleaning. Additionally, incorporating airless paint sprayer benefits into your maintenance routine can help streamline cleaning tasks, making the process more efficient and less time-consuming.
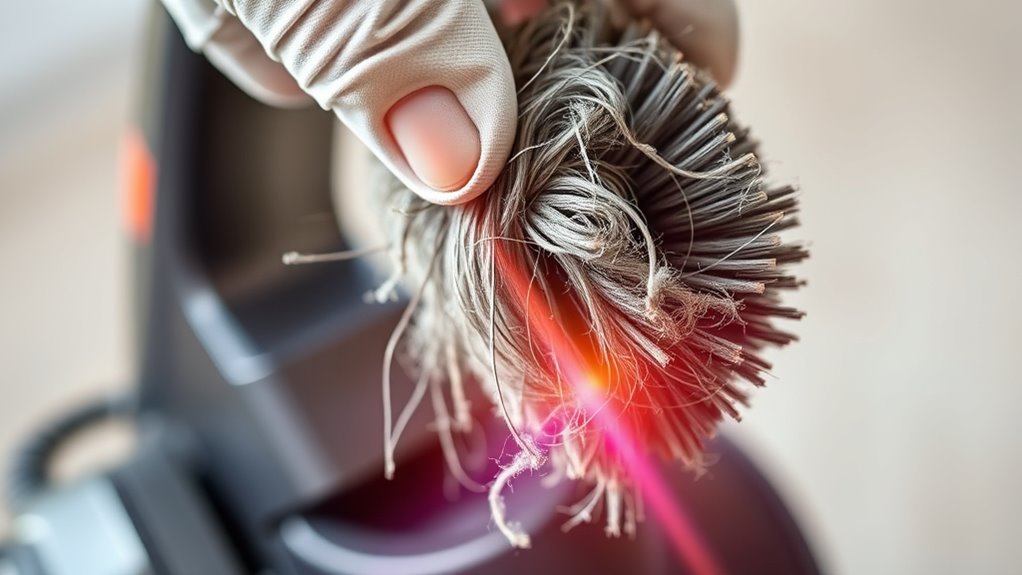
Detangle Hair and Threads
After removing loose debris, focus on detangling hair and threads wrapped around the brushroll. Hair entanglement and thread removal are common issues that hinder vacuum performance. To effectively free these obstructions, gently pull and unwind hair strands and threads using your fingers or pliers. Be careful not to damage the bristles or motor parts. Incorporating automation technologies can also help in maintaining vacuum efficiency by preventing such buildups.
Reassemble and Test Properly
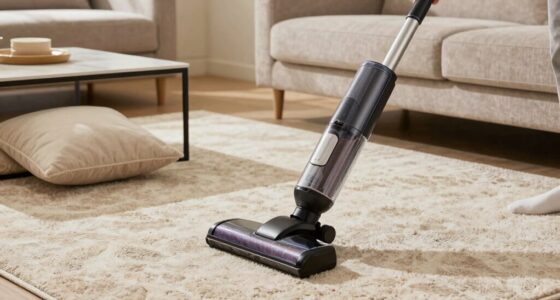
Before reassembling your vacuum, double-check that the brushroll is completely clean and free of hair, threads, and debris. Different brushroll types, such as soft, stiff, or hybrid, may require varying cleaning frequencies—some weekly, others monthly. Guarantee all parts are dry before putting everything back together to prevent damage. Carefully reattach the brushroll, making sure it’s aligned correctly with the belt and housing. Once reassembled, turn on your vacuum and test it on a small area. Listen for any unusual sounds or vibrations, which could indicate improper installation. Confirm that the brushroll spins freely and picks up debris efficiently. Regularly reassembling and testing your vacuum assures optimal performance and prolongs the life of your cleaning tool. Additionally, properly maintaining your vacuum’s components, including the brushroll, is essential for achieving the best image quality in your home cinema setup.
Tips for Preventing Future Buildup and Blockages
To prevent future buildup and blockages in your vacuum brushroll, regular maintenance is essential. Start by replacing filters according to your manufacturer’s schedule, as clogged filters can reduce airflow and cause debris to accumulate elsewhere. Proper cord storage also helps prevent tangles and damage that might lead to blockages. When storing your vacuum, wind the cord neatly to avoid pulling on internal parts or snagging debris. Additionally, inspect the brushroll periodically for hair, string, or debris that could cause accumulation. Keep the vacuum’s intake area clear to ensure ideal airflow. By committing to these simple steps, you’ll minimize the chances of future clogs, extend your vacuum’s lifespan, and maintain effective cleaning performance.
Reassembling and Testing Your Vacuum
Once you’ve cleaned and inspected the brushroll, it’s time to reassemble your vacuum. Begin by carefully reinstalling the brushroll, making certain it fits securely into its housing. While doing this, check that any brushroll lubrication points are properly greased to prevent future squeaks and maintain smooth operation. Next, reconnect any removed parts, such as covers or filters, making sure everything snaps into place. Before turning on your vacuum, perform a quick motor inspection—listen for unusual noises and ensure the motor spins freely. You can also refer to industry trends to stay informed about best practices for maintenance. Once reassembled, plug it in and test on a small section of your floor. Confirm that the brushroll spins correctly and that suction is strong. Proper reassembly and testing help your vacuum operate efficiently and extend its lifespan.
Maintenance Tips to Keep Your Vacuum Running Like New
To keep your vacuum performing its best, stick to a regular cleaning schedule and inspect the brushroll often. This helps prevent debris buildup and catches any issues early. By staying on top of these maintenance habits, your vacuum will run smoothly and last longer.
Regular Cleaning Schedule
Establishing a regular cleaning schedule for your vacuum brushroll is essential to maintain peak performance. Consistently cleaning your vacuum accessories, including the brushroll, prevents buildup that can hinder suction and damage flooring types. Depending on your home, you might need to clean the brushroll weekly or biweekly, especially if you have pets or high-traffic areas. Regular maintenance ensures debris doesn’t accumulate, which can cause the vacuum to work harder and wear out faster. Adjust your schedule based on the flooring types you have—carpets, hardwoods, or tiles—since each requires different care. By sticking to a routine, you’ll keep your vacuum running smoothly, extend its lifespan, and maintain maximum cleaning power. A proactive approach saves you time and money in the long run. Incorporating industry transformations like AI automation can also help optimize your cleaning routines and enhance your overall floor care.
Proper Brushroll Inspection
Have you ever wondered if your vacuum’s brushroll is functioning properly? Regular inspection is key. Check the brushroll for proper brushroll alignment to ensure it spins freely and evenly. Misaligned or tangled brushrolls can reduce cleaning efficiency and strain the motor, risking damage or safety hazards. Carefully remove debris and hair wrapped around the brush, and verify that the brushbar is securely attached. While inspecting, look for signs of wear or damage that could affect performance. Proper brushroll alignment not only improves suction but also helps maintain motor safety by preventing unnecessary strain. Doing this routine check keeps your vacuum running smoothly, prolongs its lifespan, and ensures safe operation during every cleaning session. Additionally, reviewing the state tax implications periodically can help you optimize your savings if your vacuum cleaning business is part of your income streams.
Frequently Asked Questions
Can I Clean the Brushroll Without Removing It From the Vacuum?
Yes, you can clean the brushroll without removing it from the vacuum through manual cleaning. Turn off and unplug your vacuum first, then use scissors or tweezers to carefully remove hair and debris wrapped around it. For DIY repair, some models allow you to access the brushroll compartment for cleaning without full removal. Regular manual cleaning helps maintain performance and extends the lifespan of your vacuum, making it a simple maintenance task.
How Often Should I Clean My Vacuum’s Brushroll?
You should clean your vacuum’s brushroll at least once a month for ideal vacuum maintenance. Regular cleaning prevents hair and debris buildup, which can reduce the brushroll’s lifespan and cleaning efficiency. If you notice reduced suction or tangled hair, clean it more often. Keeping the brushroll clean ensures your vacuum performs well longer, saving you money and effort in the long run. Consistent maintenance is key to maintaining peak performance.
What Are the Signs of a Clogged or Damaged Brushroll?
You’ll notice a clogged or damaged brushroll when it’s not spinning properly or if you see debris buildup around the bristles. During brushroll inspection, look for tangled hair, threads, or other debris that can hinder performance. Excess debris or a jammed brushroll can cause poor cleaning, strange noises, or uneven carpet agitation. Regularly inspecting and clearing debris helps maintain your vacuum’s efficiency and extends its lifespan.
Is It Safe to Use Household Cleaning Products on the Brushroll?
While it might seem tempting to use household chemicals on your brushroll, it’s best to prioritize cleaning safety. Many household cleaning products contain harsh ingredients that can damage the brushroll’s components or leave residues that affect performance. Stick to gentle, vacuum-safe solutions and avoid strong cleaners. This guarantees your brushroll stays in top shape, prolonging its lifespan while keeping your vacuum working efficiently.
How Do I Troubleshoot if My Vacuum Still Won’T Pick up After Cleaning the Brushroll?
If your vacuum still won’t pick up after cleaning the brushroll, start troubleshooting by checking for common causes like clogged filters or full dust bins. Make certain the brushroll spins freely and isn’t obstructed. Double-check the belt for damage or misalignment. Try resetting the vacuum or testing it on a different surface. These troubleshooting tips help identify issues that may be preventing peak suction and cleaning performance.
Conclusion
Now that you know how to clean your vacuum’s brushroll, you can keep it running smoothly and extend its lifespan. Regular maintenance is your best friend—think of it as giving your vacuum a much-needed tune-up. Don’t let debris pile up and cause trouble down the line. With a little effort, you’ll keep your floors spotless and your vacuum working like new—just like a well-oiled machine ready to tackle whatever comes its way.