
To troubleshoot vacuum clogs effectively, start by optimizing the vacuum pressure and airflow—adjust vents to balance suction without causing leaks or blockages. Check and clean filters and hoses regularly, replacing any that are damaged. Fine-tune brush and agitator speeds based on floor type to improve debris removal. Use diagnostic tools to spot airflow restrictions early. Keeping these settings in check helps prevent clogs and maintain peak performance—stay tuned for more tips to keep your vacuum running smoothly.
Key Takeaways
- Regularly inspect and clean filters and hoses to prevent blockages and maintain optimal airflow.
- Adjust vent openings to balance airflow and pressure, reducing clog formation.
- Use diagnostic tools like airflow meters to identify airflow restrictions early.
- Ensure clamps and seals are secure to prevent suction leaks that cause clogs.
- Perform routine preventative maintenance on motors, filters, and components for consistent performance.

Vacuum Cleaner Hose for Bissell Cleanview Swivel Pet Crosswave 2252 2489 2486 2254 22543 24899 1831 Vacuum Hose Replace Part #203-8049
1. Product compatibility: for Bissell Cleanview Swivel Pet crosswave 2252 2489 2486 2254 22543 24899 1831 Replace Part…
As an affiliate, we earn on qualifying purchases.
As an affiliate, we earn on qualifying purchases.
Understanding Vacuum Pressure and Suction Levels

Understanding vacuum pressure and suction levels is vital because they directly affect how well your vacuum performs. When you grasp these concepts, you can maximize dust collection and maintain efficient operation. Higher vacuum pressure creates stronger suction, making it easier to pick up debris and dust particles. Conversely, low pressure can lead to poor dust collection and clogged filters. Airflow dynamics play a pivotal role here, as they determine how air moves through the system, affecting suction strength and efficiency. Properly balanced vacuum pressure ensures that airflow remains steady, preventing blockages and maximizing cleaning power. Additionally, understanding Airflow dynamics helps in diagnosing and resolving common vacuum issues more effectively. By understanding these fundamentals, you can troubleshoot issues more effectively and keep your vacuum running smoothly, avoiding unnecessary clogs and maintaining peak performance.
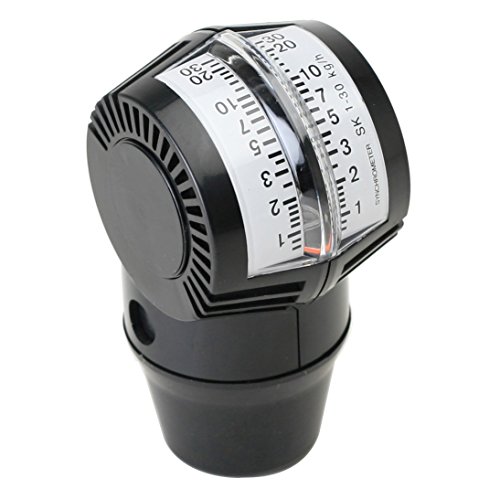
Deluxe Carburetor Airflow Meter by Latest Rage
Proper Synchronization For Peak Performance
As an affiliate, we earn on qualifying purchases.
As an affiliate, we earn on qualifying purchases.
Adjusting the Airflow and Vent Settings

You can improve vacuum performance by adjusting the airflow balance and vent position. Start by fine-tuning the vents to guarantee they’re open enough for proper airflow without causing leaks. Properly optimized vent settings help maintain consistent suction and prevent clogs. Additionally, ensuring air purifier maintenance dos and don’ts are followed can help prevent the buildup of debris that may cause clogs in your vacuum system.
Airflow Balance Adjustments
Adjusting the airflow and vent settings is a crucial step in resolving vacuum clogs caused by poor airflow. First, check your hose replacement options if airflow seems restricted. A damaged or clogged hose can considerably impact suction, so ensure it’s clear or replace it if needed. While adjusting the vents, make sure the power cord safety is intact; a loose or damaged cord can interfere with proper airflow and cause overheating. Fine-tune the vent openings to balance airflow throughout the vacuum, preventing uneven pressure that may lead to clogs. Proper airflow ensures dust and debris move smoothly through the system. Regularly inspecting these components and making precise adjustments can greatly improve performance and reduce clogging issues. Incorporating good lighting can also help you better see and identify airflow obstructions or damaged parts during maintenance.
Vent Position Optimization
Have you considered how the position of your vents impacts vacuum airflow? Adjusting vent settings can greatly influence exhaust airflow, helping you optimize performance. If airflow feels restricted, try directing vents to improve airflow paths, which can reduce clogs caused by uneven airflow distribution. Proper vent positioning also allows better control of exhaust airflow, preventing pressure buildup that hampers suction power. Additionally, matching vent settings with your power settings ensures consistent performance. When you fine-tune your vents, you maintain steady airflow and reduce strain on the vacuum’s motor, minimizing clog risks. Remember, small adjustments can make a big difference in overall efficiency, helping your vacuum clear blockages more effectively and operate smoothly. Considering regional resources and local guidelines can also provide insights into maintaining your equipment and troubleshooting effectively.

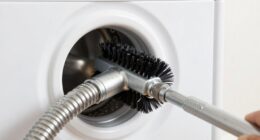
PetOde 2 Pieces Dryer Vent Cleaner Kit Compatible with Most Vacuum Cleaner, Dryer Lint Brush and Vacuum Hose Attachment with Universal Connector, Quickly Lint Remover
[Stretch Universal Connector] PetOde dryer lint vacuum cleaner attachment is designed with a premium elasticated stretch universal connector…
As an affiliate, we earn on qualifying purchases.
As an affiliate, we earn on qualifying purchases.
Monitoring and Modifying Filter and Hose Conditions

Regularly inspect your filter for blockages that can reduce suction. Check the hose for cracks or leaks to prevent airflow issues. Keep all components clean and maintained to guarantee your vacuum runs smoothly and efficiently. Additionally, ensure the air quality within your environment is optimal, as poor air quality can contribute to filter and component degradation over time.
Inspect Filter for Blockages
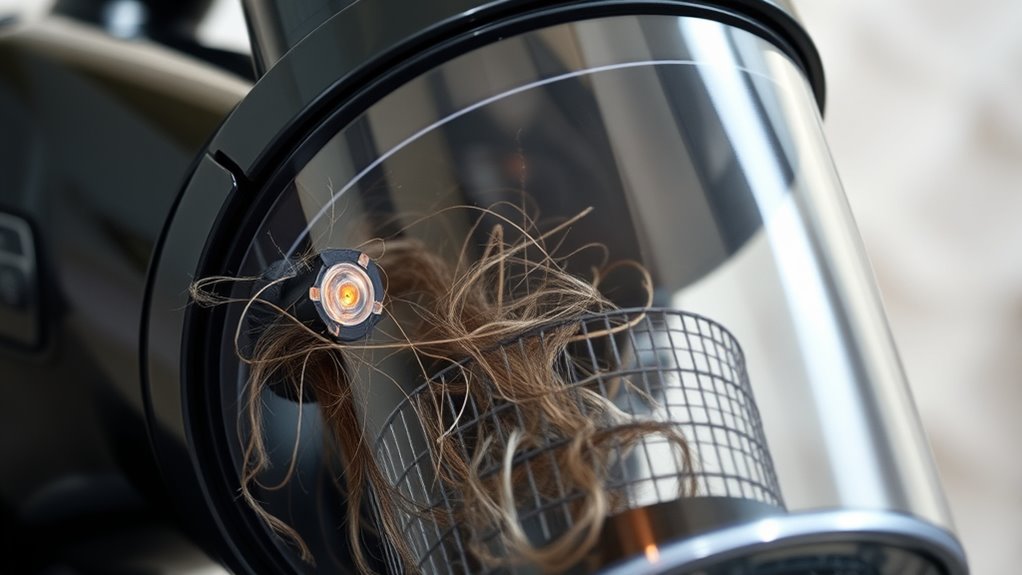
Start by examining the vacuum’s filter and hose for any obstructions that could be causing a clog. During filter inspection, look for dirt, debris, or buildup that might be blocking airflow. Check for signs of damage or tears that could impair filtration. Blockage detection is key—if the filter appears clogged or dirty, replace or clean it according to the manufacturer’s instructions. A clogged filter reduces suction, forcing the vacuum to work harder and increasing the likelihood of clogs elsewhere. Don’t forget to inspect the surrounding area for debris that may have accumulated. Regular filter inspection helps identify blockages early, ensuring ideal airflow and preventing future clogs. Maintaining a clean, unobstructed filter is essential for smooth vacuum operation and effective clog troubleshooting. Additionally, understanding how filter benefits can improve overall performance may help in selecting the best replacement or cleaning method.
Check Hose Integrity Regularly
To maintain ideal vacuum performance, you should check the hose for damage or blockages often, as these issues can cause clogs and reduce suction. Regular inspections help ensure hose durability and proper clamp tightness. Look for cracks, holes, or signs of wear that could compromise airflow. Ensure clamps are secure to prevent leaks, which can diminish vacuum efficiency. Maintaining the hose in good condition prevents unnecessary strain on the motor and prolongs equipment lifespan. Additionally, inspecting the filtration systems, including HEPA filters, can help maintain optimal airflow and suction power.
Clean Components Periodically
Monitoring and modifying your vacuum’s filter and hose conditions is essential for maintaining ideal performance. Regularly check the filter for dirt buildup and replace it when necessary to guarantee proper airflow. A clogged or dirty filter can strain the motor, so consider performing a motor inspection to spot signs of wear or overheating. Clean the hose thoroughly to prevent blockages that reduce suction power. Periodic filter replacement keeps airflow at its best, helping prevent clogs and motor stress. Additionally, inspecting the motor ensures it runs smoothly and efficiently. Keeping these components clean and in good condition minimizes the risk of clogs and prolongs your vacuum’s lifespan. Staying proactive with filter maintenance and motor checks helps maintain consistent performance and avoids costly repairs. Regular maintenance also supports effective cleaning, ensuring your vacuum functions optimally over time.

25" Long Flexible Crevice Tool Vacuum Cleaning Attachment For All 1-1/4 in or 1-3/8 inch Connector Hoses Helps Clean Dryer Lint and Spiders on Ceiling
【SUPERIORITY】This 25" crevice tool features a flexible body that bends and twists, allowing you to reach tight spaces…
As an affiliate, we earn on qualifying purchases.
As an affiliate, we earn on qualifying purchases.
Evaluating and Setting the Proper Brush and Agitator Speed

Evaluating and setting the proper brush and agitator speed is essential for effective vacuum operation and preventing clogs. If the brush moves too fast, it can pull in debris too aggressively, increasing clog risk. Conversely, too slow a speed might reduce cleaning efficiency. Adjust your agitator settings based on floor type and debris size. Use this guide:
| Floor Type | Recommended Brush Speed | Agitator Settings |
|---|---|---|
| Carpet | Medium | Moderate |
| Hard Floor | Low | Gentle |
| Thick Carpet | Fast | High |
| Area Rugs | Medium | Moderate |
| Delicate Surfaces | Slow | Low |
Properly balancing these settings ensures effective cleaning without clogging, extending your vacuum’s lifespan. Additionally, understanding AI-driven solutions in cleaning technology can lead to more efficient maintenance routines.
Utilizing Diagnostic Tools for Clog Detection

Utilizing diagnostic tools for clog detection can substantially streamline the troubleshooting process by providing real-time insights into your vacuum’s performance. These tools help you quickly identify issues like excessive dust buildup that may block airflow, leading to decreased suction. By monitoring motor noise, you can detect abnormal sounds indicating a clog or strain on the motor. For example, a sudden increase in motor noise or fluctuations in power often point to airflow restrictions caused by dust accumulation. Handheld air flow meters or vacuum analyzers can measure airflow and pressure levels, pinpointing clog locations. Using these diagnostic tools saves you time and effort, ensuring you address the root cause efficiently. They enable you to monitor your vacuum’s health regularly, preventing minor issues from escalating into major clogs. Additionally, understanding the subconscious power during sleep can help boost your overall energy and focus, making it easier to maintain consistent troubleshooting routines.
Implementing Preventative Maintenance and Regular Checks

Regularly performing preventative maintenance and checks on your vacuum can considerably reduce the risk of clogs and airflow issues. Focus on these key areas:
- Seal maintenance: Inspect and replace worn or damaged seals to prevent leaks that compromise suction.
- Motor calibration: Ensure the motor operates at peak performance, reducing strain that can lead to airflow blockages.
- Filter cleaning: Regularly clean or replace filters to prevent debris buildup that causes clogs.
- Hose and duct checks: Look for obstructions or damage that hinder airflow, and clear or repair as needed.
- Tuning components: Regularly assess the vacuum’s performance tuning to ensure optimal airflow and engine efficiency, minimizing the risk of airflow restrictions.
Frequently Asked Questions
How Often Should Vacuum Filters Be Replaced for Optimal Performance?
You should replace your vacuum filters every 3 to 6 months for ideal performance. Regular filter maintenance ensures your vacuum runs efficiently and prevents clogs. Keep an eye on the replacement schedule, especially if you notice decreased suction or increased dust emissions. If you have pets or allergies, consider changing filters more frequently. This proactive approach helps maintain airflow, prolongs the vacuum’s lifespan, and keeps your environment cleaner.
What Signs Indicate a Vacuum Hose Is Causing a Clog?
You’ll know your vacuum hose is causing a clog when airflow suddenly drops to nearly nothing or if you notice exaggerated hose leaks that make the vacuum sound like a whisper. If your vacuum struggles to pick up debris or you see irregular airflow restrictions, it’s a clear sign. These issues happen because debris or blockages are obstructing the hose, preventing proper suction and causing an annoying, almost cartoonish loss of power.
Can Adjusting Suction Levels Damage the Vacuum Motor?
Adjusting the suction levels can potentially harm your vacuum motor if done improperly. When you increase suction too much, it puts extra strain on the motor, risking overheating or damage, so always prioritize motor safety. Use the suction adjustment feature carefully, and avoid setting it too high for extended periods. Properly maintaining and monitoring your vacuum guarantees the motor remains protected while optimizing performance.
What Is the Ideal Brush Speed for Different Flooring Types?
You’ll want to match your brush speed with your flooring types for the best clean. For hardwood or tile, use a slower brush speed to avoid scratching and guarantee gentle cleaning. On carpets, increase the brush speed to loosen dirt and debris more effectively. Coincidentally, adjusting your vacuum’s brush speed according to flooring types not only improves cleaning but also extends your vacuum’s lifespan. Keep experimenting to find what works best for your surfaces.
How Do Temperature Changes Affect Vacuum Clog Troubleshooting?
Temperature fluctuations can considerably impact vacuum clog troubleshooting by affecting clog sensitivity. When temperatures rise or fall sharply, debris may expand or contract, making clogs more or less noticeable. Lower temperatures can cause materials to become brittle, increasing clog sensitivity, while higher temperatures might soften debris, easing removal. Keep an eye on temperature changes, as they influence how your vacuum responds to blockages and help you diagnose clogs more accurately.
Conclusion
By mastering these settings, you’ll keep your vacuum running smoothly, like a well-oiled engine. Think of each adjustment as tuning a musical instrument—when everything’s in harmony, suction flows effortlessly, and clogs become distant echoes. Regular checks and maintenance are your symphony’s conductor, ensuring peak performance. Stay vigilant, and your vacuum will serve you reliably, turning the chaos of clogs into a distant memory, leaving behind only the clean melody of pristine floors.