The key habit that makes your vacuum last years longer is regularly cleaning and replacing its filters. Well-maintained filters prevent clogs, protect the motor, and guarantee strong suction. Check them often, follow the manufacturer’s guidelines on cleaning or swapping filters, and use quality replacements. Don’t forget to care for belts, brushes, and emptying the dustbin regularly. Keep up with these simple tasks, and you’ll keep your vacuum performing like new for years to come. More tips await!
Key Takeaways
- Regularly inspect and clean filters to prevent clogging and maintain optimal airflow.
- Empty dustbins or canisters frequently to avoid suction loss and motor strain.
- Check belts and brush rolls for wear, replacing them promptly to ensure efficient cleaning.
- Store the vacuum in a dry, protected space to prevent damage and facilitate easy maintenance.
- Follow manufacturer recommendations for scheduled filter replacements and system inspections.

Vacuum Filter Replacement Kit for Dyson V7, V8 Animal, V8 Absolute & SV10 Cordless Vacuum Cleaners, Replaces Part # 965661-01 & 967478-01 (4P)
PRECISE FIT – Specifically crafted for Dyson V7 Animal, V7, SV10, and V8 Absolute Vacuums. The post filter…
As an affiliate, we earn on qualifying purchases.
As an affiliate, we earn on qualifying purchases.
Why Regular Vacuum Maintenance Is Key to Longevity

Regular vacuum maintenance is vital because it directly impacts the device’s lifespan. When you take time for routine upkeep, you prevent issues that can cause early wear and tear. Proper vacuum storage is essential; store your vacuum in a dry, protected space to avoid damage. If a minor problem arises, DIY repairs can save you money and extend your vacuum’s life. For example, fixing a loose belt or unclogging a hose helps maintain suction power and prevents motor strain. Skipping regular maintenance can lead to clogged filters, worn brushes, and motor failures. Additionally, understanding the importance of device longevity helps motivate consistent upkeep. Maintaining clean filters ensures optimal airflow and performance, ultimately prolonging your vacuum’s life. Regularly inspecting and replacing parts as needed also supports sustained efficiency in your vacuum’s operation. Staying informed about AI-driven discoveries in repair techniques can also provide innovative ways to troubleshoot and extend your vacuum’s functionality. A well-maintained vacuum also benefits from proper filtration, which enhances air quality and prevents dust buildup. By staying proactive with simple upkeep, you guarantee your vacuum continues performing efficiently for years, saving you money and hassle in the long run.

ilovelife 4PCS HEPA Filter with Mesh Filter Replacement for INSE N5S N5T S6T S6P Pro S610/TMA T120 T121 T151 T150 T220 T210 T181 T180 T220 Cordless Vacuum Cleaner, White
[ INSE N5S Model ] – Compatible with INSE N5S N5T N500 N500R N500LBZ N500RZ S6 S6P S6T…
As an affiliate, we earn on qualifying purchases.
As an affiliate, we earn on qualifying purchases.
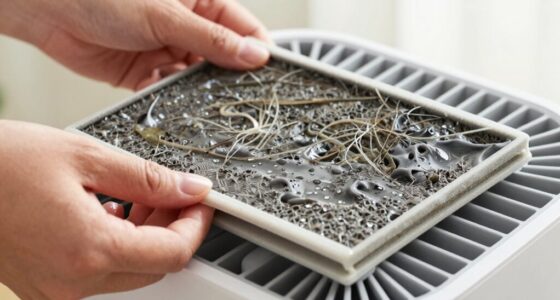
How to Clean and Replace Your Vacuum Filters
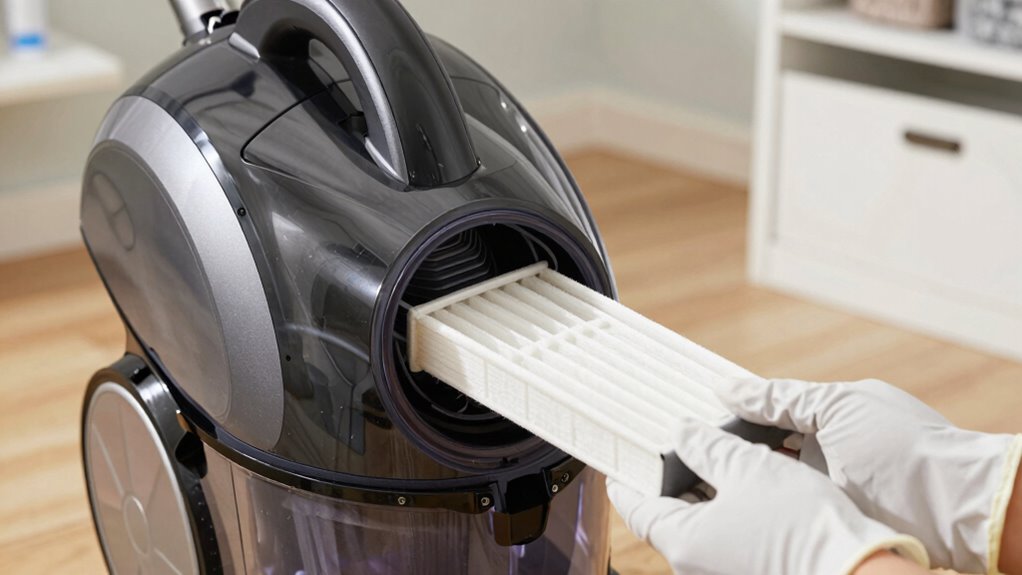
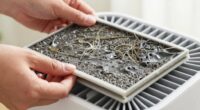
Knowing your filter type helps you clean or replace it correctly. Use the right techniques to keep filters clean without damage, and watch for signs it’s time to swap them out. Proper filter care guarantees your vacuum stays powerful and lasts longer. Regularly checking filter indicators can help you determine when it’s time for a replacement or deep cleaning. Understanding filter maintenance can also prevent costly repairs and ensure optimal suction. Additionally, being aware of airflow preservation techniques can further extend the lifespan of your vacuum components, especially in relation to component durability and overall system performance. Incorporating routine system inspections can help identify potential issues early, maintaining your vacuum’s effectiveness over time.
Recognize Filter Types
Understanding the different types of vacuum filters is essential for maintaining peak performance. Knowing whether your vacuum has HEPA filters or foam filters helps you determine proper cleaning and replacement needs. HEPA filters trap tiny particles, making them ideal for allergy sufferers, but they often require gentle handling to avoid damage. Foam filters are usually washable and durable, providing effective airflow and filtration over time. Additionally, selecting reputable sources for reconditioned filters can ensure better quality and longevity. Recognizing filter maintenance practices can further extend your vacuum’s lifespan and improve its efficiency. Regularly inspecting and replacing filters based on manufacturer recommendations can also prevent loss of suction and maintain optimal operation.
Proper Cleaning Techniques
To keep your vacuum functioning at its best, it’s important to clean and replace filters properly. Regular cleaning enhances cordless advantages, giving you longer runtime and more powerful suction. To do this, remove the filter according to your vacuum’s instructions, then tap out loose debris or rinse it with water if it’s washable. Make sure it’s completely dry before reinstalling. For ideal carpet cleaning, a clean filter prevents dust buildup that can reduce suction and dirt removal. Avoid using harsh chemicals or brushes that might damage the filter. Remember, clean filters maintain airflow and prevent motor strain, extending your vacuum’s lifespan. Consistently maintaining your filters supports optimal airflow and overall performance, helping your vacuum last longer. Regularly inspecting and replacing filters when necessary also prevents clogging, which can compromise suction and motor health. Proper cleaning techniques are a crucial part of vacuum maintenance, ensuring your device operates efficiently over time. By staying consistent with proper cleaning techniques and understanding filter care, you’ll maximize the efficiency of your vacuum and keep it performing like new for years. Additionally, understanding the filter lifespan can help you anticipate when replacements are needed to maintain peak performance.
When to Replace Filters
Regularly cleaning your filters helps maintain ideal vacuum performance, but over time, filters will wear out and need replacing. Knowing when to replace filters depends on their filter lifespan and material. Typically, HEPA filters last 6 to 12 months, while foam or cloth filters may last longer but still need regular attention. Signs it’s time for a replacement include reduced suction, persistent odors, or visible dirt buildup. Routine maintenance is key to extending filter life and ensuring your vacuum works efficiently. For optimal results, consider filter material that influences durability and cleaning frequency. Remember, filter material affects durability: porous filters may clog faster, requiring more frequent changes. To keep your vacuum running smoothly, follow these tips: – Check your user manual for recommended replacement intervals – Replace filters if they’re torn or damaged – Upgrade to higher-quality filters for better longevity. Incorporating proper filtration techniques can further improve vacuum efficiency and prolong filter lifespan.
vacuum belt and brush replacement
As an affiliate, we earn on qualifying purchases.
As an affiliate, we earn on qualifying purchases.
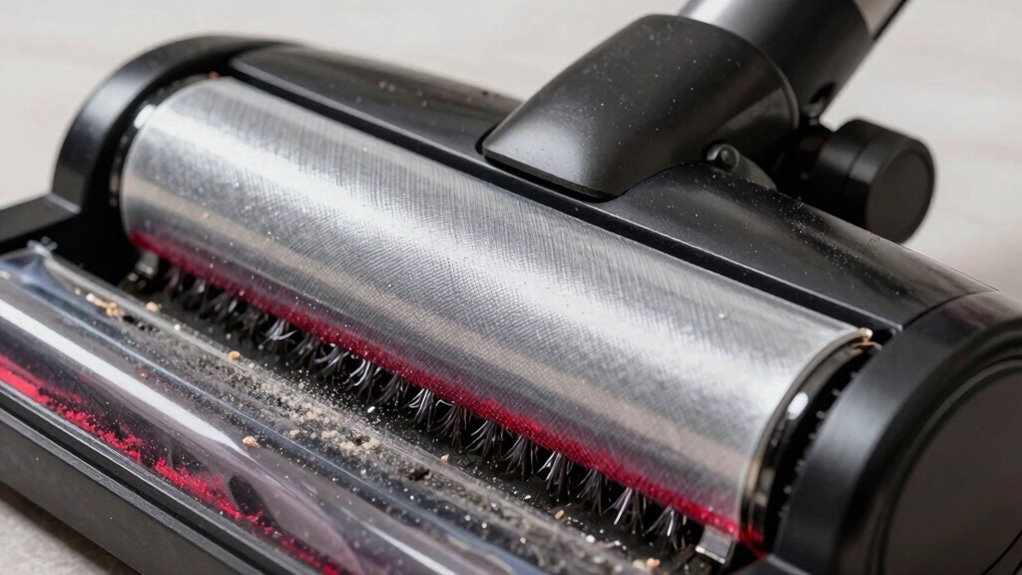
Maintaining the Belt and Brush Roll for Peak Performance
To keep your vacuum working efficiently, you need to regularly check the belt tension and make certain it’s not too loose or tight. Cleaning the brush roll often removes hair and debris that can hinder performance, while replacing worn parts prevents breakdowns. Staying on top of these tasks helps extend your vacuum’s lifespan and maintains ideal cleaning power. Regularly inspecting and understanding vacuum maintenance can further improve your device’s longevity. Additionally, understanding how belt tension affects your vacuum’s performance can help you catch issues early before they cause significant damage. Incorporating regular checks for brush roll cleanliness ensures consistent cleaning results over time, especially as smart home integration allows for more efficient monitoring and maintenance reminders.
Check Belt Tension Regularly
Ensuring your vacuum’s belt has the correct tension is essential for ideal performance. A loose belt can slip, reducing suction and damaging the vacuum, while an overly tight belt strains components, shortening the vacuum lifespan. To check belt tension:
- Inspect the belt for slack or tightness; it should have slight give but not be loose.
- Replace the belt if it shows signs of wear, cracks, or is too loose.
- Regularly test the belt after cleaning or maintenance to guarantee it stays properly tensioned.
- Monitoring belt tension over time helps prevent premature wear and maintains optimal performance.
Clean Brush Roll Frequently
Cleaning your brush roll often is essential for maintaining peak vacuum performance and preventing unnecessary strain on the belt. Regular brush roll maintenance removes hair, fibers, and debris that can cause clogs or uneven spinning. When the brush is free of obstructions, your vacuum operates more efficiently, reducing motor strain and preserving the vacuum’s lifespan. To clean it, unplug the vacuum, remove the brush roll, and clear off tangled hair or threads. Check for any damage or wear while cleaning. Keeping the brush roll in good condition ensures maximum agitation and dirt pickup. Neglecting this task can lead to decreased suction and faster wear on belts and other components. Consistent brush roll maintenance is a simple step that extends your vacuum’s durability and maintains peak cleaning performance.
Replace Worn Components Promptly
Replacing worn components promptly is crucial for keeping your vacuum operating at its best. If you notice a slipping belt or a frayed brush roll, don’t delay replacing the parts. Doing so guarantees ideal cleaning and prevents further damage. When replacing parts, always choose quality replacement parts compatible with your model to maintain performance. Check if your vacuum’s warranty coverage includes replacement parts, which can save you money. Regularly inspect the belt and brush roll for signs of wear, such as cracks or loss of bristles. Prompt replacements help you avoid costly repairs down the line. Remember, timely maintenance keeps your vacuum running smoothly and extends its lifespan. Addressing worn components early guarantees peak performance and preserves your warranty coverage.
vacuum dustbin canister
As an affiliate, we earn on qualifying purchases.
As an affiliate, we earn on qualifying purchases.
Why and How to Empty Your Vacuum’s Dustbin or Canister

Regularly emptying your vacuum’s dustbin or canister is essential for maintaining ideal suction and preventing clogs. Proper dustbin maintenance guarantees your vacuum operates efficiently, avoiding strain on the motor. Use correct dust disposal techniques by carefully removing the canister without spilling debris. Avoid overfilling the dustbin, as a full container reduces suction power and can cause overheating. Check the manufacturer’s guidelines for how often to empty it, typically after each use or when it’s about ¾ full. When emptying, tap out debris into the trash, and clean the dustbin with a damp cloth if needed. Consistent dustbin maintenance keeps your vacuum performing at its best, prolonging its lifespan and ensuring thorough cleaning every time.
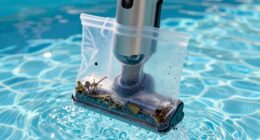
Checking and Clearing Hoses and Attachments
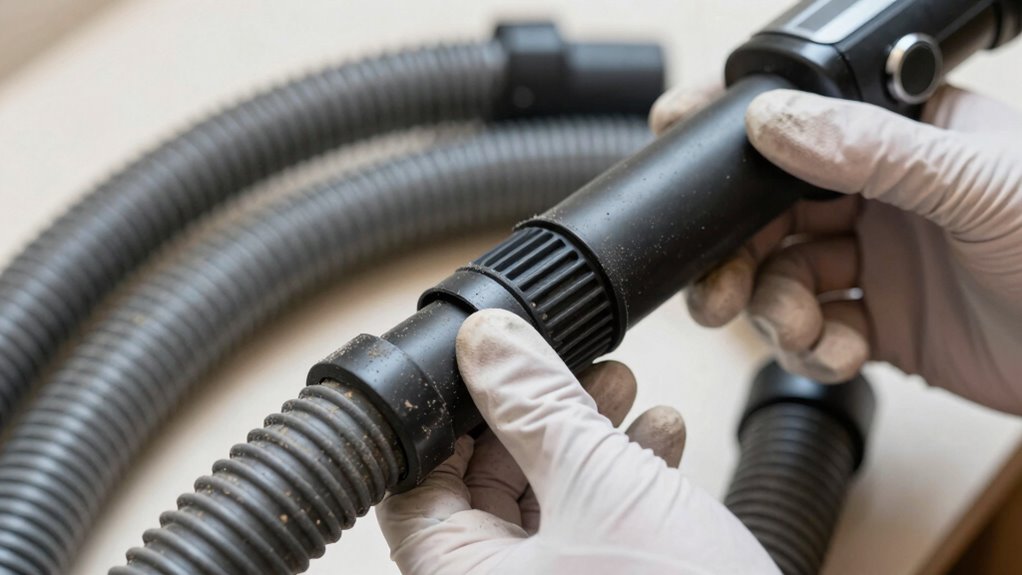
To guarantee your vacuum maintains peak performance, it’s important to regularly check and clear its hoses and attachments for obstructions. Start with a thorough hose inspection to identify blockages or debris that could reduce suction. Clear any clogs by removing the hose and flushing it with water if needed. Don’t forget attachment cleaning—removing hair, dust, or dirt buildup ensures ideal airflow. Here are key steps to follow:
- Inspect hoses for cracks, holes, or blockages
- Clear hoses by disconnecting and flushing or using a long brush
- Clean attachments with a damp cloth or brush to remove debris
Regularly performing these steps prevents suction loss and prolongs your vacuum’s lifespan, keeping it running smoothly for years.
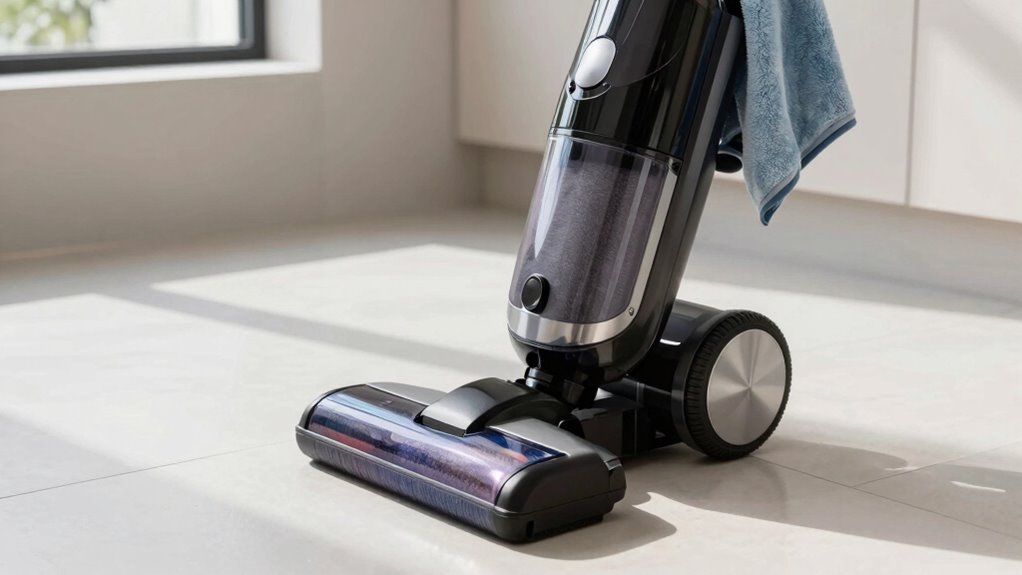
Creating a Simple Routine to Keep Your Vacuum Running Like New

Establishing a simple cleaning and maintenance routine guarantees your vacuum stays in top shape and performs efficiently over time. Start by regularly checking filters and emptying the bin or dust cup, especially if you use cordless options, which often have smaller containers. Keep brushes clear of hair and debris to maintain suction power. Incorporate storage tips like keeping your vacuum in a dry, accessible spot to encourage consistent maintenance. For cordless models, ensure the battery is charged properly and avoid overcharging to prolong lifespan. Set a weekly reminder to perform these tasks, and you’ll reduce wear and tear. A straightforward routine saves you time and money, keeping your vacuum running like new and extending its durability for years to come.
Frequently Asked Questions
How Often Should I Schedule Professional Maintenance for My Vacuum?
You should schedule professional maintenance for your vacuum every year or every 12 to 15 uses. During this service, they’ll check your vacuum filter, clean or replace it, and inspect the belt, replacing it if worn. Regularly replacing the vacuum filter and belt ensures peak performance and prolongs your vacuum’s lifespan. Staying consistent with these maintenance routines helps prevent costly repairs and keeps your vacuum running smoothly for years.
Can Using Homemade Cleaning Solutions Damage My Vacuum?
Did you know that using homemade cleaning solutions can lead to 30% more vacuum damage? If you use homemade solutions, you risk damaging your vacuum’s motor or seals because they might contain ingredients that aren’t compatible with your device. To keep your vacuum in top shape, avoid homemade cleaning solutions and stick with manufacturer-recommended products. This simple step helps prevent vacuum damage and extends its lifespan.
What Signs Indicate My Vacuum Needs Urgent Repairs?
You should get urgent repairs if your vacuum’s filter is clogged or damaged, causing loss of suction. Watch for a brush roller that isn’t spinning properly or is jammed, which affects cleaning efficiency. If your vacuum smells burnt or makes strange noises, it’s time for professional help. Regularly check the vacuum filter and perform brush roller maintenance to prevent these issues and extend your vacuum’s lifespan.
Are There Specific Vacuum Models That Require Different Maintenance Steps?
Yes, different vacuum brands often have unique maintenance checklist variations. For example, some models may require specific filter cleaning routines or belt replacements, while others have different motor care instructions. It’s essential that you review your vacuum’s user manual for brand-specific maintenance steps. By understanding these vacuum brand differences, you can tailor your upkeep routine, ensuring your vacuum stays in top shape and lasts longer.
How Do I Troubleshoot Unusual Noises During Vacuum Operation?
Did you know that 60% of vacuum repairs are caused by unusual noises? To troubleshoot vacuum sounds, first check for blockages or debris in the brush roll and hose. Listen carefully to identify if the noise comes from the motor or brush area. Tighten loose parts, and replace worn belts or filters as needed. Regular maintenance can prevent many vacuum noise causes and keep your machine running smoothly.
Conclusion
Keep up with your vacuum’s maintenance, and it’ll serve you longer than you ever expected. But the real secret lies in that one simple habit you might be overlooking—consistent, attentive care that prevents surprises down the line. When you make this routine part of your cleaning, you’re not just extending its life; you’re safeguarding your home and your peace of mind. Don’t wait until it’s too late—start today, and discover what true longevity really means.