
To keep your vacuum performing its best, regularly check your filters for dirt, clogs, or damage. Clean washable filters with mild soap and dry thoroughly, while HEPA filters should be tapped or cleaned with compressed air—never water. Replace filters every 3 to 6 months or when signs of reduced suction appear. Proper care guarantees better airflow and longer lifespan. Stay tuned to discover detailed steps for cleaning and replacing your filters effectively.
Key Takeaways
- Turn off and unplug the vacuum before removing filters to ensure safety and prevent motor damage.
- Regularly inspect filters for dirt, damage, or clogging; clean or replace as per manufacturer guidelines.
- Wash washable foam filters with mild soap and dry thoroughly; do not water-clean HEPA filters—use compressed air or gentle tapping.
- Replace filters every 3 to 6 months or sooner if performance declines, following the manufacturer’s schedule.
- Store spare filters in a dry, dust-free environment and handle filters gently to avoid damage.
Top picks for "vacuum maintenance clean"
Open Amazon search results for this keyword.
As an affiliate, we earn on qualifying purchases.
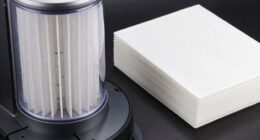
Understanding Your Vacuum Filter Types
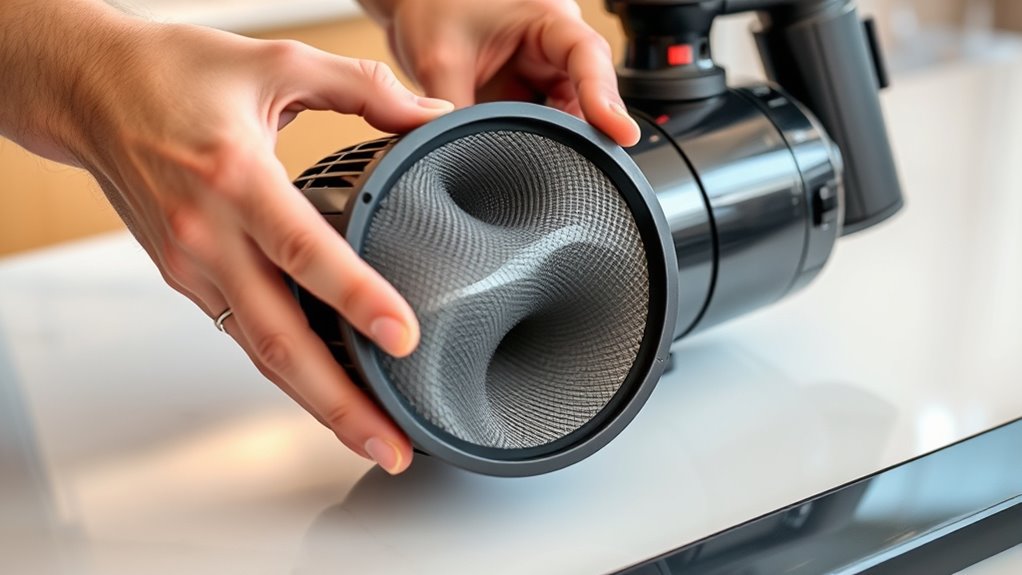
Understanding your vacuum filter types is essential for maintaining ideal performance. HEPA filters are designed to trap tiny particles like allergens, making them perfect if you suffer from allergies or asthma. They often come in cartridge form and need careful handling during cleaning or replacement. Foam filters, on the other hand, are typically made of porous material that captures larger debris and dust. They’re washable and reusable, which makes them convenient and cost-effective. Knowing which filter your vacuum uses helps you follow the correct cleaning or replacement procedures. HEPA filters require gentle handling to preserve their filtration capacity, while foam filters benefit from regular washing. Properly maintaining these filters ensures your vacuum performs efficiently and improves indoor air quality. Additionally, some vacuums incorporate multi-functionality, combining different filter types for comprehensive cleaning. Regular inspection and adherence to manufacturer guidelines can extend the lifespan of your filters and maintain optimal air purification. Being aware of a brand’s reputation can also help ensure you buy authentic filters that meet safety standards. It’s also beneficial to understand the filter lifespan to schedule timely replacements and avoid performance issues. Moreover, understanding how different filter materials impact air filtration efficiency can help you choose the best options for your needs.
Signs That Your Filter Needs Attention
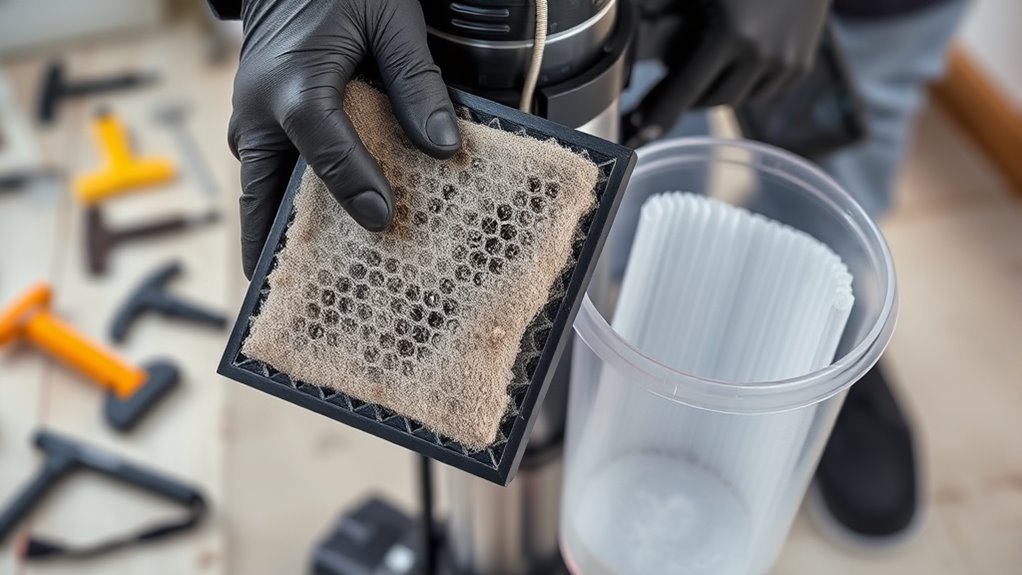
If your vacuum isn’t cleaning as effectively as it used to, it’s a strong sign that your filter may need attention. Over time, filters can become clogged with dust, dirt, and allergens, reducing airflow and suction power. A decline in performance might also indicate that your filter is nearing the end of its filter lifespan. You might notice more dust or allergens escaping back into the air, which can worsen allergy symptoms or cause discomfort. Additionally, a musty or burnt smell during use could signal a clogged filter. Regularly checking these signs helps make certain your vacuum continues to trap allergens effectively and maintains top-notch performance. When you notice these indicators, it’s time to clean or replace your filter to keep your vacuum operating efficiently. Proper filter maintenance is essential to ensure your vacuum functions optimally and prolongs its lifespan. Incorporating regular filter checks can prevent buildup and extend the effectiveness of your vacuum’s filtration system. Moreover, understanding the importance of filter replacement can help maintain indoor air quality and prevent potential malfunctions. Regular inspection of your vacuum’s filters and understanding air filtration technology can further enhance your appliance’s performance and longevity. Additionally, staying informed about vacuum filter lifespan can help you plan timely replacements and avoid performance issues.
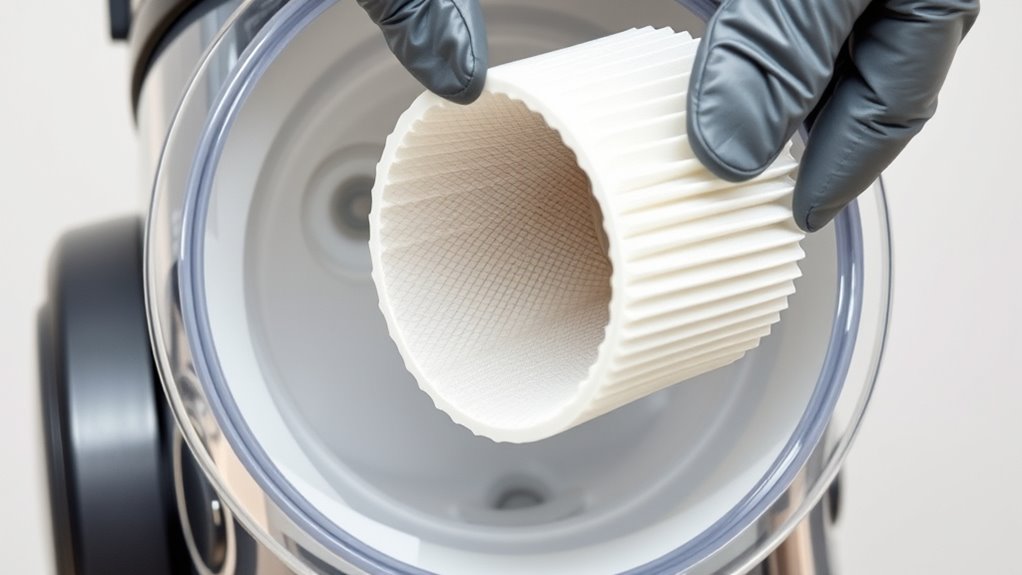
How to Remove and Inspect Your Filters
Start by turning off and unplugging your vacuum to guarantee safety. Then, access the filter compartments and carefully remove the filters. Finally, examine them closely for any signs of damage or excessive dirt. Be sure to check the filter condition regularly to maintain optimal performance. Regular inspection is especially important given how Volkswagen Tuning can assist in early detection of issues.
Turn Off and Unplug
Have you turned off and unplugged your vacuum before attempting to remove or inspect its filters? This step is vital for your safety and to prevent damage. Once unplugged, you can confidently remove the filters without risking electrical shock or motor damage. When handling filters, consider proper filter disposal—dispose of dirty filters responsibly, following local regulations. If your filters are recyclable, look for designated recycling options to reduce waste. Unplugging first ensures you can inspect the filters thoroughly, checking for dirt buildup or damage. Avoid rushing this step; safety and proper maintenance depend on it. Once you’ve turned off and unplugged the vacuum, you’re ready to carefully remove the filters for cleaning or replacement, helping your vacuum perform at its best. Additionally, understanding filter performance can help you determine when a replacement is necessary for optimal operation.
Access Filter Compartments
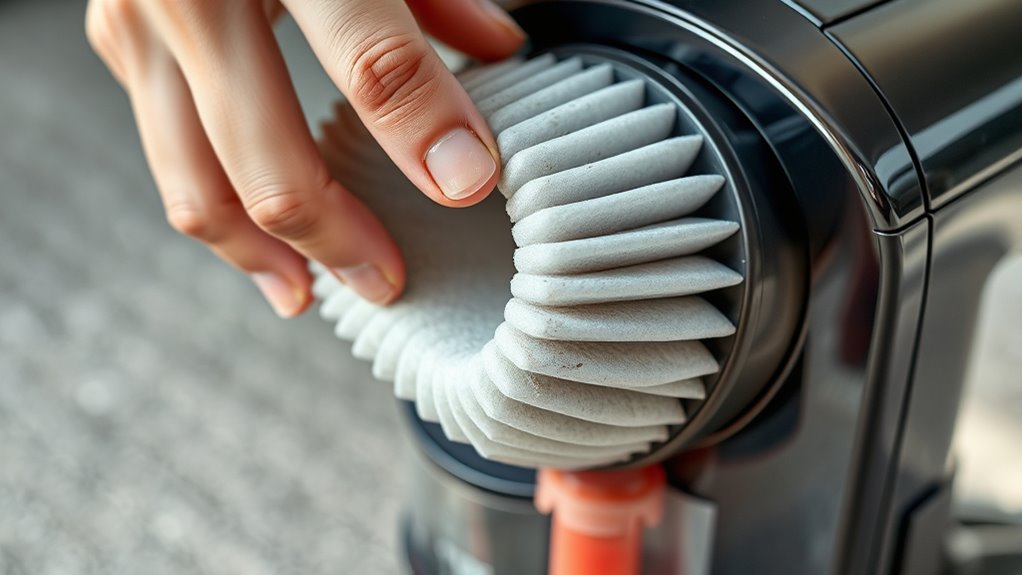
Wondering how to access your vacuum’s filter compartments? Start by locating the access panel, usually on the side or underside of the unit. Once found, carefully open it to reveal the filter compartment. To remove and inspect your filters effectively, follow these steps:
- Gently lift or slide out the filter from the filter compartment.
- Check for dust buildup, debris, or signs of damage.
- Clean or replace the filter as needed before reinserting it into the compartment.
- Regular maintenance, similar to Juice Cleanse and Detox practices, ensures optimal performance and longevity of your vacuum. Proper handling and timely replacement of filters help maintain the vacuum’s efficiency and prevent potential issues.
Be gentle when handling the filter to avoid damage. Always ensure the access panel is securely closed after inspection to maintain vacuum efficiency. Proper access to the filter compartment is essential for regular maintenance and peak performance.
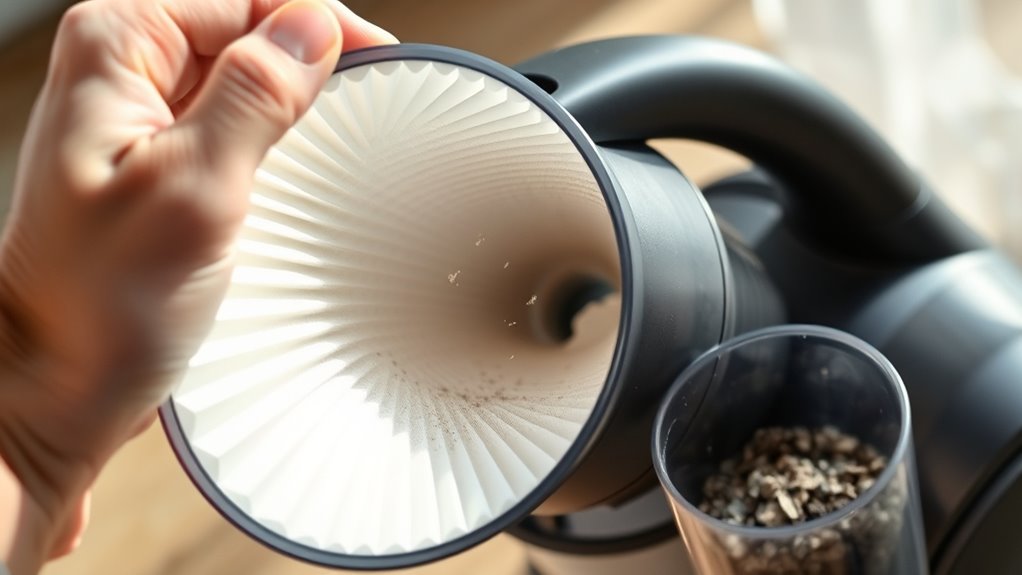
Examine for Damage
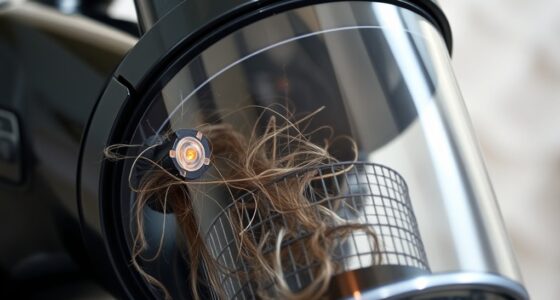
Before inspecting your filters, carefully remove them from the compartment to get a clear view. Check for any signs of filter damage, such as tears, holes, or warping, which can compromise the filter’s effectiveness. Damage increases contamination risks by allowing dust and debris to bypass the filter, potentially harming your vacuum’s motor or spreading allergens. Examine the entire surface thoroughly, paying attention to the edges and seams. If you notice any damage, it’s best to replace the filter rather than attempt repairs. Even if the filter looks intact, verify it’s free from excessive dirt or clogging. Damaged or contaminated filters reduce vacuum performance and can lead to further issues, so regular inspection is key to maintaining maximum performance and a healthy environment.
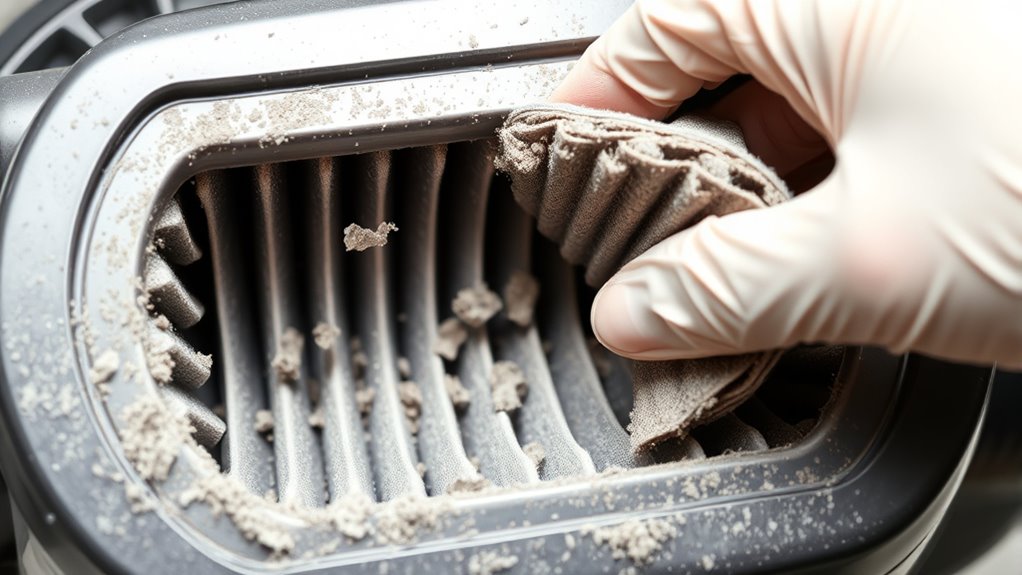
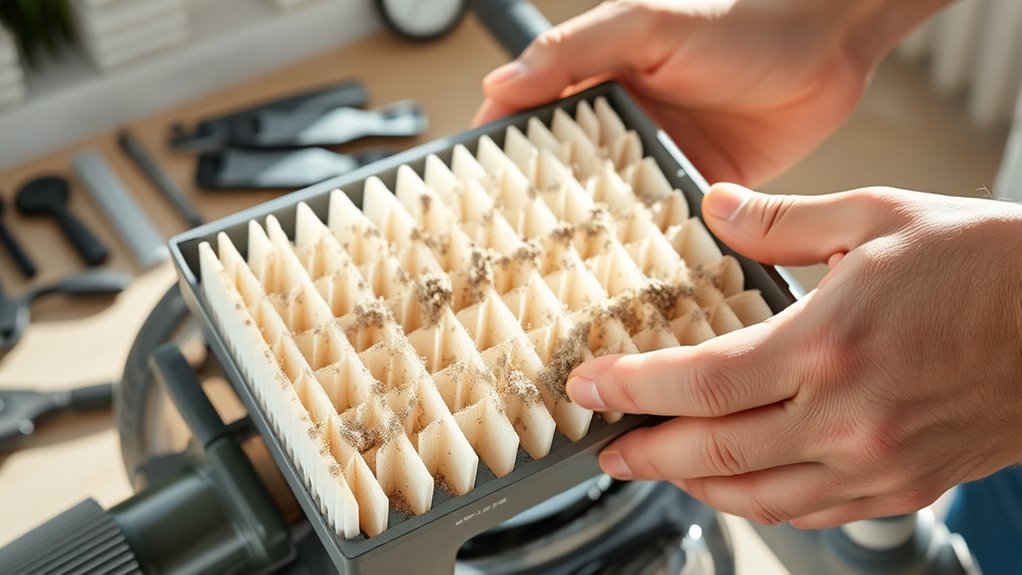
Cleaning Methods for Different Filter Materials
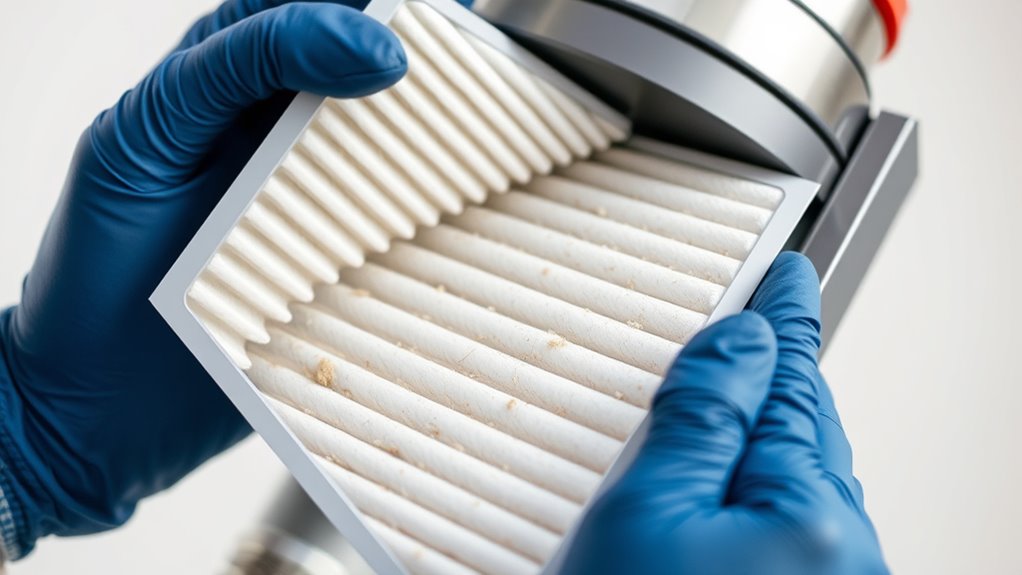
Different filter materials require specific cleaning methods to maintain their effectiveness. For fabric filters, gently vacuum or wash with mild soap and water, then let them dry completely to prevent airflow blockages. For HEPA filters, avoid water; instead, gently tap out dust or use compressed air to remove debris, ensuring airflow isn’t restricted. Charcoal filters should be replaced rather than cleaned, but if reusable, brush off surface dust carefully. Always store filters in a dry, dust-free environment, following filter storage tips, to prevent contamination. Proper cleaning not only preserves filter performance but also avoids airflow blockages that reduce suction power. Remember, cleaning techniques vary by material, so always follow manufacturer instructions to keep your vacuum operating at peak efficiency.
When and How to Replace Your Filters
You’ll want to watch for signs of filter wear, like decreased suction or musty odors. Typically, filters should be replaced every few months or as recommended by the manufacturer. Keeping track of these indicators guarantees your vacuum stays efficient and effective.
Signs of Filter Wear
How can you tell if your vacuum filter needs replacing? If your air quality has declined or your vacuum is losing suction, it’s a sign your filter may be worn out. Over time, filters degrade, reducing their effectiveness and shortening their lifespan. Here are key indicators:
- Visible dirt buildup or damage on the filter.
- Persistent odors despite cleaning.
- Noticeable decrease in suction strength.
Replacing filters at the right time guarantees maximum performance and maintains good air quality. If you notice any of these signs, it’s time to evaluate your filter’s condition. Ignoring wear can lead to reduced filtration efficiency, affecting indoor air quality and overall vacuum performance. Regularly inspecting your filter helps you stay ahead of wear and ensures your vacuum works efficiently.
Replacement Frequency Tips
To keep your vacuum performing at its best, replacing the filters at appropriate intervals is essential. Understanding your filter’s lifespan helps determine when to replace it, which typically ranges from three to six months depending on usage and filter type. Follow the replacement schedule recommended by your vacuum’s manufacturer to maintain ideal airflow and filtration. Regularly check for signs of wear or reduced performance, such as decreased suction or visible dirt buildup. Don’t wait until your filter is visibly dirty or damaged—proactively replace it to prevent strain on your motor and ensure cleaner results. Keeping to a consistent replacement schedule not only extends your vacuum’s lifespan but also guarantees it operates at peak efficiency.
Tips for Maintaining Optimal Filter Performance
Regularly inspecting and replacing your vacuum filter is essential for maintaining ideal performance. A clean filter ensures peak air quality and keeps filter efficiency high. To achieve this, follow these tips:
- Check your filter monthly for dust buildup or damage, and clean or replace as needed.
- Use compressed air or a gentle brush to remove debris without damaging the filter material.
- Store spare filters in a cool, dry place so you’re ready for quick replacements when necessary.
Common Mistakes to Avoid During Filter Care
One common mistake to avoid during filter care is neglecting to check the filter regularly, which can lead to dirt buildup and reduced performance. Make certain your filter is properly sealed; poor filter sealing allows dust to bypass the filter, decreasing efficiency. Also, avoid improper filter storage. Store filters in a clean, dry place, away from dust and moisture, to prevent damage or contamination before reuse. Additionally, never skip cleaning or replacing filters when needed, as dirt accumulation hampers suction and airflow. Be cautious of handling filters roughly, which can damage the filter media. By paying attention to filter sealing and correct storage, you’ll maintain ideal vacuum performance and extend the lifespan of your filters. Regular checks prevent costly mistakes and keep your vacuum working at its best.
Frequently Asked Questions
How Often Should I Replace My Vacuum Filters for Best Results?
You should replace your vacuum filters based on the filter lifespan and your usage. Typically, check the filters every 1 to 3 months, and replace them at least once a year for peak performance. If you notice reduced suction or increased dust, it’s time for a replacement. Following a consistent replacement schedule helps maintain your vacuum’s efficiency and prolongs its lifespan, ensuring it stays effective in cleaning your space.
Can I Use Any Cleaning Products on My Vacuum Filters?
Think of your vacuum filters as the lungs of your machine—delicate, essential, and needing gentle care. You shouldn’t use just any cleaning solutions, as they might harm filter compatibility. Stick to manufacturer-recommended cleaning products or plain water when cleaning filters. Always check instructions before applying any cleaning solutions, ensuring you’re not risking damage or reduced performance. Proper care keeps your vacuum breathing easily and working efficiently.
Are There Filters Compatible With Multiple Vacuum Brands?
You might wonder if cross-brand filters work for your vacuum. Some filters offer universal compatibility, meaning they can fit multiple brands, which is convenient and cost-effective. However, always check the filter specifications and size to guarantee proper fit. While cross-brand filters can be compatible, it’s best to confirm with your vacuum’s manufacturer or look for filters explicitly labeled as universal or for multiple brands to avoid damage or reduced performance.
What Are the Environmental Impacts of Disposing of Old Filters?
Your old vacuum filters might be the eco-equivalent of a mountain—big and hard to handle! When you dispose of filters, consider recycling programs or proper disposal methods to reduce environmental harm. Many filters can be recycled, preventing waste from piling up. Ignoring this can lead to pollution and harm wildlife. Always check local guidelines for filter disposal methods, because responsible actions today protect our planet tomorrow.
How Do I Know if My Vacuum’s Suction Power Is Affected by Filter Issues?
If your vacuum’s suction decline seems noticeable, it could be due to filter issues. Check if the filter has reached its filter lifespan or appears clogged or dirty. A clogged filter restricts airflow, reducing suction power. Regularly inspecting and replacing filters when needed helps maintain peak suction. Don’t ignore signs of suction decline, as they often indicate your filter needs cleaning or replacing to restore your vacuum’s performance.
Conclusion
Regularly cleaning or replacing your vacuum filters keeps your machine running smoothly, saving you time and effort. Did you know that a dirty filter can reduce your vacuum’s efficiency by up to 50%? By staying on top of filter maintenance, you ensure cleaner floors and better air quality. Just a few simple steps can make a huge difference—so don’t overlook your filter’s health. Your vacuum—and your lungs—will thank you for it.